Rate of reaction
Aim:
The aim of this investigation is to find out and observe how temperature affects the rate of reaction. I am going to investigate the changes caused to the solution of hydrochloric acid and sodium thiosulphate when the temperature is changed.
Prior Knowledge/Research:
The rate of reaction is the speed or velocity at which a chemical reaction precedes, expressed in terms of the amount of product formed or the amount of unit's time taken for a certain reaction to occur (usually in seconds). Thus for the reaction of two compounds (in this case X and Y) that form a product (Z) the equation would be:
X+Y=Z
The Rate of Reaction varies greatly. Some chemical reactions, such as explosions, happen very quickly while others like rusting, occur very slowly. The rate of reaction can be affected by a number of factors: temperature, concentration and pressure, adding a catalyst, surface area/particle size and light. The one that I am going to be investigating and explaining about is Temperature.
Changes in temperature change the kinetic energy of the particles and hence the numbers of successful collisions with enough energy to break existing bonds and make product parties. The minimum energy needed for a successful collision is called the activation energy.
For a reaction to take place reagent molecules must collide with each other. When they do so, they must possess enough energy to cause or initiate a reaction. The level of energy needed to start a reaction is called its energy barrier. The actual energy needed to start a reaction is the activation energy e.g. a splint is needed to start a Bunsen burner in the process of combustion.
So in order to break the energy barrier, there has to be enough activation energy so the reaction will take place. Temperature helps to do this as increasing the temperature of the system increases the range of kinetic energies, increases the average kinetic energy and increases the population of particles with more than the activation energy
Reaction mixtures contain particles that have different amounts of energy. Some particles are of very high energy whilst others are of relatively low or medium energy. A graph can be produced to show these variations in energy and it is known as an energy distribution curve:
The distribution curve shows that most of the particles have energy values close to that of the average energy value. The EA is the activation energy and the shaded area shows indicates the number of particles that have an energy amount that is equal to or greater than the activation energy. It is only these particles that can make the reaction occur taking into account that the activation is the minimum amount of energy needed for a reaction to occur. The shaded red area shows the total number of particles that have enough combined energy to react when they collide.
If the temperature is increased, the average temperature of the particles is increased so the graph shifts to the right as shown in graph 2. Now the total number of particles with energy equal to or greater than the activation energy has increased considerably.
The two theories that affect temperature and the rate of reaction are the kinetic theory and the collision theory. The kinetic theory clearly states that the positioning and movement of particles in a substance increases if the temperature increases. Therefore, increasing the temperature increases the energy between the particles and makes them move around a lot more and collide more often with each particle colliding with enough energy to get it past the energy barrier. If this is done successfully, then the collisions should have no problem passing the requirement stated in the collision theory that are: To react particles must collide with enough energy to break existing bonds and with the correct orientation to bring reactive sites close together.
Bringing the reactive sites closer together means that the likelihood of a reaction occurring is increased so in a final research conclusion, increasing the temperature increases the rate of reaction speed.
Prediction:
As I explained earlier, the rate of a chemical reaction is the speed at which it takes place. Temperature is a major factor in this as increasing or decreasing the temperature changes the movement of particles in a substance therefore changing the rate of reaction. When a reaction mixture is heated up, each particle in it acquires more energy and collides more with other particles.
Thus, from my prior knowledge and research, I can make the prediction that if you increase the temperature of a particular reaction, you increase the speed at which it takes place. This is simply because the particles carry more energy and collide more often where these collisions contain enough energy to break the energy barrier:
Temperature Raised
Particles, when moving faster, collide with greater power.
The reaction therefore becomes faster
Collisions between particles are useless unless they break the energy barrier and this is exactly what increasing the temperature will allow them to do.
Apparatus:
The equipment I need to carry out the work and to obtain my results is:
· Sodium thiosulphate solution
· Hydrochloric acid
· 250cm conical flask
· -5 C -110 C thermometer
· 10cm /50cm measuring cylinder
· Heat proof mat
· Bunsen burner
· Wire gauze
· Tripod
· Stop clock
· White tile
· Filter paper
· A pair of Tongs
Preliminary Work:
Preliminary work is the work that is done beforehand for you to know that the values of chemicals and temperatures etc are all within a usable range and are pretty much guaranteed to work. It is a way for the person carrying out the experiment to know that it has been set up correctly for when the actual experiment begins.
For my preliminary work, I did the experiment but did not repeat it four times as I only wanted to see that the values that I was to be using were accurate. This preliminary work helped me to plan my actual investigation better as I learnt from my mistakes. These were things like not starting the stop clock, quick enough, which changed the times of my results, and using a little too much hydrochloric acid (10cm when I should have used 5cm ) that again made my results inaccurate.
Therefore, in the actual experiment I am ...
This is a preview of the whole essay
For my preliminary work, I did the experiment but did not repeat it four times as I only wanted to see that the values that I was to be using were accurate. This preliminary work helped me to plan my actual investigation better as I learnt from my mistakes. These were things like not starting the stop clock, quick enough, which changed the times of my results, and using a little too much hydrochloric acid (10cm when I should have used 5cm ) that again made my results inaccurate.
Therefore, in the actual experiment I am going to be very careful when measuring the chemicals to get them accurate and starting the stop clock at the exact time the hydrochloric acid is added to again ensure fair and precise results.
Safety Precautions:
Throughout this experiment, I made sure that safety was one of my top priorities. I wore goggles at all times to protect my eyes; I wore a lab coat to prevent getting any chemicals on my clothing or me and used hazard cards. These told me the dangerous capabilities of chemicals that were to be using and what safety measures were needed when using these chemicals. I used a heatproof mat and tripod when using the Bunsen burner and took extreme caution when turning it on and off. I took the same extreme caution when I repeated the results, which I will talk about later on.
Method:
Firstly, I measured 50cm sodium thiosulphate solution using the conical flask. The appropriate temperature was checked using the thermometer. It was at this point where I carried out the various temperatures.
At the appropriate temperature, 5cm hydrochloric acid was measured using the measuring cylinders and then added to the flask containing the sodium thiosulphate. I now placed the flask over the paper, which had a black cross on it that I had drawn earlier.
The stop clock was started immediately to make results more accurate and the time in seconds for the cross to disappear was recorded in a table like the one below. I carried this out from room temperature (R.T) to 80 C. I used the Bunsen burner at each temperature with the heatproof mat on it and the wire gauze.
I repeated each temperature a total of 4 times to make my results accurate and calculated an average by which I compared each temperature with greater ease.
Observation
All rate of reaction experiment have visible results and this experiment is no exception. When I added the hydrochloric acid to the flask I observed immediately at each temperature to see the changes or reactions that were taking place between the particles.
When observing the experiment, the changes I saw take place were the tone of the sodium thiosulphate/hydrochloric acid solution. At the initial temperatures, which were quite low, the solution became very foggy and misty but only after a fairly long time. At the higher temperatures, the solution became fogy very quickly and in both cases, the solution continued to get foggy until it was no longer clear or transparent. I could not see through the solution at all. The colour of the solution went from a clear colourless liquid to a yellowish-green colour and at the higher temperatures, the colour changed almost immediately. I did not see any gas given off or any vigorousness in the actual reaction. The change in colour was smooth and there was no sound made when it happened.
Fair Test:
To make my experiment a fair one, I had to look at a lot of things. Firstly, I looked at the factors that may have affected how well the investigation would work and these were things like using different equipment or doing the actual experiment in different conditions i.e. a colder/hotter environment. To combat this, I made sure that upon repeating the experiment, I used the exact same equipment and done it in the exact same environment to make absolutely sure that the experiment was fair at each temperature.
I think that these were both very important factors because they could affect the results severely and leave me with an anomalous when I should only have correlating results. To ensure fair and accurate results, all of the factors that can affect my results need to be controlled.
Reliable Results:
To make my results reliable, I am going to be doing each temperature 4 times between the ranges of Room Temperature to 80 C. That's nine different results altogether for the temperatures and the average that I will make from the four primary results that I record.
I will also make sure that each temperature is calculated to as accurate it can be as recording a result past the required temperature can mean unreliable results which makes the entire investigation void as one result is not calculated correctly.
Results:
I have decided to record my results in a table with a graph that is on a separate piece of graph paper:
Temperature( C) Time For Cross To Disappear Average
2 3 4
R.T 32.46 30.92 33.31 32.51 32.3
30 18.71 19.64 21.03 20.85 20.058
40 15.32 17 14.31 15.62 15.563
50 6.05 8.02 5.99 6.13 6.5475
60 4.07 3.78 3.65 2.87 3.5925
70 2.19 2.25 3.03 2.12 2.3975
80 1.53 1.24 1.41 1.66 1.46
Analysis Of Results:
From my results, I notice that there is a considerable difference in the time for the cross to disappear from the lower temperatures to the higher temperatures. All of the times are pretty much the same for the four different recording indicating that the experiment was a pretty successful one. There is no anomalousness and the average temperatures seem to descend, as the temperature gets higher. There is a decrease of almost 30 seconds from the starting temperature to the finishing one.
The table clearly shows that the time for the cross to disappear decreases as the temperature increases.
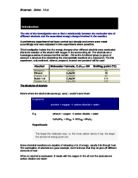
The reaction between Hydrochloric acid and Sodium Thiosulphate
When dilute hydrochloric acid is added to sodium thiosulphate solution, a fine deposit of sulphur is formed. The sulphur makes the solution cloudy. As more and more sulphur is formed, the solution becomes more and more cloudy. Soon it becomes impossible to see through the solution. The balanced equation for this reaction can be seen below.
Sodium + Hydrochloric Sodium + Water + Sulphur + Sulphur
Thiosulphate Acid Chloride Dioxide
Na2 S2 O3 (aq) + 2HCL(aq) 2NaCL(aq) + H2O(l) + SO2 (g) + S(s)
Conclusion
From my results, I have come to the conclusion that if the temperature of a solution is raised, so is the time for the reaction to occur. The cross disappeared more rapidly as the temperature rose and I think this was due to the increase of energy between the particles and an increase in energy between collisions that successfully passed the energy barrier. This released the sulphur quicker and in larger doses, which turned the solution cloudy thus making the cross invisible.
At the lower temperatures, the time for the cross to disappear was less because the particles did not have as much energy as they did at the higher temperatures. At these temperatures the particles are colliding with much more energy and thus the reaction that releases sulphur works and now releases more sulphur at a much quicker rate thus increasing the rate at which the cross disappears.
Heat From Room Temp. HEAT
Linking Prediction To Conclusion
My original prediction was that if you increase the temperature of a reaction, you decrease the time it takes to occur. And, from looking back on my results, I can see that this hypothesis was correct as the time for the cross to disappear decreased as the temperature rose. My conclusion matches my prediction very well overall, and my results clearly show this where at room temperature, the time for the cross to disappear was 32.3 seconds and at 80 C the time for the cross to disappear was 1.46- a difference of about 31 seconds. The particles were moving around with more energy; enough to break the energy barrier and for a reaction to occur as the temperature rose.
Evaluation
I think that this experiment has gone very well for me. My results were of a particularly accurate standard as I did each temperature the reaction was taking place four times and calculated an average from these times. There were no strange results (anomalies) within my results table and I think that this was because of the extreme caution and care that I put into making sure that the experiment was set up correctly with careful measuring of chemicals and substances.
I think that I could have repeated my results more however for the reason that I feel although the experiment was repeated four times, the most accurate results in experiment can only come from constant repeatability which I did not display in my experiment. That said, the time allocated did not allow me to do so and I believe as an improvement of what I could do if I did the experiment again, I would have to say that, with more time, I would repeat the results further for even more accurate and reliable results.
I believe that I could have improved the method by making it more specific. I stated clearly all the various methods I took in setting the experiment up but I could have been more specific to how all the apparatus was used and perhaps why I used the apparatus I did as well.
I believe that I did get a suitable range of results for this experiment. I recorded results from temperatures that ranged from Room Temperature to 80 C and I think that this is a very good range to see how temperature affects the rate of reaction. However, I feel that this also reduces the chance of knowing if anything changes if the temperature reaches a certain point. Perhaps doing the temperature even higher would enhance my results but this is also quite dangerous so I cannot really say that I could have improved the range of my results.
Some other areas in the experiment that I feel I could have improved on were factors like controlling the stopwatch and measuring the amount of sodium thiosulphate and hydrochloric acid. There is lots of room for human error here. However the inaccuracies due to them were negligible because I paid close attention to these during the experiment.
Overall, this investigation has been a very successful one. I feel my results and analysis have been as accurate and reliable as they could have been under the time allocated. However I feel with extra time, I could have repeated the experiment and made it even more accurate and adapted it to try other variables i.e. concentration or adding a catalyst. These are the ways that I could expand on the original question.
)
Investigation of factors that affect resistance of a wire
Before starting my coursework I have decided to chose a factor that will affect the resistance of a wire.
I shall do this by going through all of the factors that affect the resistance of a wire and how I would
measuring each factor to find out which would be the most effective and easiest factor to measure.
Below is a list of factors and reasons why they affect the resistance of a wire. From this list of factors I
shall only pick one factor to investigate. To explain the how the factors would affect the resistance of a
wire I have drawn a diagram to show how resistance occurs.
WIRE
ATOMS=
ELECTRONS=
Resistance occurs when the electrons travelling along the wire collide with the atoms of the wire.
These collisions slow down the flow of electrons causing resistance. Resistance is a measure of how
hard it is to move the electrons through the wire.
Factors
.Temperature : If the wire is heated up the atoms in the wire will start to vibrate because of their
increase in energy. This causes more collisions between the electrons and the atoms as
the atoms are moving into the path of the electrons. This increase in collisions means that
there will be an increase in resistance.
2.Material : The type of material will affect the amount of free electrons which are able to flow through
the wire. The number of electrons depends on the amount of electrons in the outer energy
shell of the atoms , so if there are more or larger atoms then there must be more electrons
available. If the material has a high number of atoms there will be high number of electrons
causing a lower resistance because of the increase in the number of electrons. Also if the
atoms in the material are closely packed then the electrons will have more frequent collisions
and the resistance will increase.
3.Wire length : If the length of the wire is increased then the resistance will also increase as the
electrons will have a longer distance to travel and so more collisions will occur. Due to this
the length increase should be proportional to the resistance increase.
4.Wire width : If the wires width is increased the resistance will decrease. This is because of the
increase in the space for the electrons to travel through. Due to this increased space between
the atoms there should be less collisions.
To chose which factor I am going to investigate I am going to consider how I would measure each
factor and which factor would be the best and easiest to record.
To measure the wire width I would use different widths of the same length and same material of wire
e.g. thin , medium and thick copper wire with thin and thick constantin wire. To record the difference
in widths I would use the same voltage and measure the resistance for each thickness. Although it
would be easy to obtain and record the data the graphs that I would be able to draw up would not be
interesting.
For the temperature of the wire I would not be able to carry out a fair test because it is extremely
difficult to produce and control the range of temperatures needed without the correct equipment.
If I chose to measure the difference in the resistance in different materials I would chose a number of
different materials and using the same voltage I would record the resistance given by each wire of the
same length and width. Although once again it would be simple to record these results the graphs that
could be drawn would not show any connection between the material and the resistance because of the
limited number of materials I could test with the equipment available.
The final factor is the length of the wire. To measure and record the findings for this factor would be
simple and the results collected could show a connection between the length of the wire and the
resistance given by the wire. This is why I have chosen to investigate this factor.
Prediction
I predict that if the length increases then the resistance will also increase in proportion to the length. I
think this because the longer the wire the more atoms and so the more likely the electrons are going to
collide with the atoms. So if the length is doubled the resistance should also double. This is because if
the length is doubled the number of atoms will also double resulting in twice the number of
collisions slowing the electrons down and increasing the resistance. My graph should show that the
length is proportional to the resistance.
The diagrams below show my prediction and should explain it more clearly:
Because the length of the wire is only half the length of the wire below there should be half the number
of collisions between the electrons and the atoms.
The wire below is twice the length of the wire above and so there should be twice the number of atoms
resulting in twice as many collisions and a predicted doubling of the resistance.
Preliminary Method
In this preliminary experiment I will select a wire that will be used in my main experiment when
investing the connecting between the length of the wire and the resistance of the wire.
To ensure a fair test whilst carrying out my preliminary experiments I am going to be very careful
when selecting my independent variables which are the width of the wire and the wire material. I am
going to use a constant voltage of 2 volts and a constant length of 50 cm.
Apparatus: Meter ruler ¡V To measure the wire being tested to ensure a fair test.
Selection of wires ¡V Different materials and widths but the same length.
Crocodile clips ¡V To connect the wire being investigated to the rest of the circuit.
Voltmeter & Ammeter ¡V To measure the resistance.
Wires ¡V To connect the above items and to complete the circuit.
To measure the resistance of the wire I am going to use the equation RESISTANCE=VOLTS
CURRENT I will obtain the voltage and current readings from the voltmeter and ammeter.
Below is a circuit diagram for my preliminary experiment.
POWER SUPPLY
2 VOLTS
AMMETER
VOLTMETER
CROCODILE CLIPS
WIRE
METER RULER
To ensure a fair test I shall keep the power supply at 2 volts and I shall keep the length of the wire at 50
cm.
Preliminary Results
Below is a table of results which I have collected from my preliminary experiment.
WIRE VOLTS (v) AMPS (A) RESISTANCE (Ohms)
THICK COPPER 0.3 5.13 0.06
MEDIUM COPPER 0.6 4.20 0.14
THIN COPPER 0.9 3.13 0.29
STEEL 0.7 1.20 0.58
MEDIUM CONSTANTIN 1.0 0.41 2.44
THIN CONSTANTIN 2.7 0.49 5.51
From these results I have chosen to use thin constantin for the wire I am going to use in my main
experiment. I have chosen this wire as it has the highest resistance and so it will be easier to notice any
difference in resistance in my main experiment
Main Method
Before I start my main experiment I have chosen to do a risk assessment which is shown below.
Risk Assessment:
"h I will handle the power supply carefully.
"h I am going to only use a voltage of 2 volts.
"h I will be careful when handling live wires.
Apparatus: Power Supply
Ammeter
Voltmeter
Thin Constantin wire
Meter Ruler
Crocodile Clips
Connecting Wires
I have chosen to use thin constantin wire because from my preliminary results I found that this wire had the highest resistance, because it has the highest resistance it will be easier to measure any change in resistance.
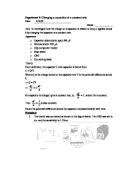
To collect the data for my graph I have chosen to take a range of 5 lengths. I have chosen a range of 5
as to plot an accurate graph I will need at least 5 points to mark on the graph . I have also chosen to
take 3 repeats at each length and then take an average. I have chosen this so that if I have any
anomalous results they will not show when I plot the averages on the graph. The lengths that I have
chosen are as follows : 20cm , 40cm , 60cm , 80cm and 100cm. I have chosen these lengths because
they are easily measured by the meter ruler and give a good range.
Below is a circuit diagram of the circuit I am going to use in my main experiment:
POWER SUPPLY
2 VOLTS
AMMETER
VOLTMETER
CROCODILE CLIPS
WIRE
METER RULER
In my main experiment instead of using an ohmmeter I have chosen to use an ammeter and voltmeter ,
I have done this so that instead of relying on the ohmmeter to give the resistance I will calculate the
resistance of the wire , I shall calculate the resistance of the wire using the equation below.
RESISTANCE = VOLTS
AMPS
I have chosen to use a meter ruler because the lengths that I will be measuring are to big for a smaller
ruler and also the meter ruler can be accurate to +1mm or ¡V1mm.
Results
Below is a results table with the results that I collected from my main experiment.
LENGTH 200 mm 400 mm 600 mm 800 mm 1000 mm
VOLTS (v) 1.6 1.5 1.6 1.7 1.7 1.7 1.8 1.8 1.8 1.9
.8 1.8 1.9 1.9
.9
AMPS (I) 0.608 0.609 0.607 0.351 0.352 0.351 0.237 0.238 0.238 0.184 0.184 0.184 0.148 0.149 0.149
RESISTANCE
(Ohms) 2.6 2.5 2.6 4.8 4.8 4.8 7.6 7.6 7.6 10.3 9.8 9.8 12.8 12.8 12.8
AVERAGE
RESISTANCE
(Ohms)
2.6
4.8
7.6
0.0
2.8
From these results I have drawn a graph of the length of the wire and the resistance of the wire.
Analysis
From the graph on the previous page I can see that the resistance of the wire is proportional to the
length of the wire. I know this because the Line of Best Fit is a straight line showing that if the length of the wire is increased then the resistance of the wire will also increase.
Conclusion
In my prediction I said that :
¡§¡K.if the length increases than the resistance will also increase in proportion to the length.¡¨
From my graph I have shown that my prediction was correct, as the Line of Best Fit is a straight line proving that the resistance of the wire is proportional to the length of the wire.
The length of the wire affects the resistance of the wire because the number of atoms in the wire increases or decreases as the length of the wire increases or decreases in proportion.
The resistance of a wire depends on the number of collisions the electrons have with the atoms of the material , so if there is a larger number of atoms there will be a larger number of collisions which will increase the resistance of the wire. If a length of a wire contains a certain number of atoms when that length is increased the number of atoms will also increase. This is shown in my diagrams below:
Electron
Atom
In this diagram the wire is half the length of the wire below and so has half the number of atoms, this means that the electrons will collide with the atoms half the amount of times.
Also if the length of the wire was trebled or quadrupled then the resistance would also treble or quadruple.
Evaluation
From my results table and graph I can see that my results that I collected are very reliable. I know this because my results table does not show any individual anomalous results this means that I did not have to leave any results out of my averages because they were anomalous. Also on the graph I can see that none of the averages plotted are anomalous because all the averages lie along the same straight line.
During my experiment I have noticed several modifications I could make to improve on the Investigation if I was to repeat it.
The first of these modifications would be the circuit that I would use. To be more accurate with my results I would use the circuit layout below:
POWER SUPPLY
2 VOLTS
AMMETER
VOLTMETER
WIRE
METRE RULER
Instead of connecting the voltmeter to the main circuit I would connect it to the wire which is being tested. I would do this so that the voltmeter is measuring the voltage of just the wire being tested and not the wires of the main circuit as well.
To also improve on my results I would use a digital voltmeter instead of an analogue meter. I would do this because a digital voltmeter is a lot more accurate than an analogue because if the needle in the analogue voltmeter is bent then the readings given off will be false whereas a digital voltmeter does not rely on a needle or any other manual movements.
The next modification I would make would be to use pointers instead of crocodile clips , I would do this because pointers would be more accurate. The pointers would be more accurate because the tips have a much smaller area than the crocodile clips giving a more accurate measurement of the length of wire.
As well as making these modifications I would also improve my Investigation by testing the same wire but different widths of that wire. I would do this to expand on my Investigation.