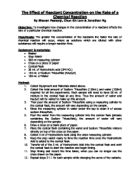
Fig.c Variation of current with time Fig.d Variation of charge with time Fig.e Variation of voltage with time
The final charges stored in the capacitor is given by Qo = Iot and the final voltage across C is Vo. By Q = CV, the capacitance is given by C = Qo / Vo = Iot / Vo----- (1)
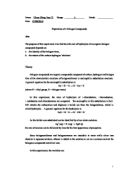
Discharging capacitor at constant rate
Fig.f shows the circuit for discharging the capacitor at constant rate. When the switch S is in position 1, the capacitor is fully charged. When it is changed to position 2, the capacitor would be discharged through R. Initially, R is set at high resistance. To keep the current constant, you will reduce the resistance so that the capacitor discharges at a constant rate.
The charge initially stored in C is calculated from the constant discharging current Io and the period of discharge t using Qo = Iot. Thus, the capacitance can also be found using the same equation 1 above.
Fig.f Discharging t constant rate
The theoretical variation of current, charge and voltage with the same time for a discharging circuit at constant rate are shown in Fig.g to i below:
Fig.g Variation of current with time Fig.h variation of charge with time Fig.i Variation of voltage with time
- Procedures
Experiment 1 Charging a capacitor at a constant rate to find the total charge stored in the capacitor
- The circuit was examined.
-
The e.m.f. (Vo) of the battery was measured by the voltmeter. (Fig. 1)
- The variable resistor was set to the highest resistance.
- The circuit was connected is as shown above. The capacitor was discharged with a flying lead. The switch was closed and the initial charging current was recorded.
- The capacitor was discharged again using the flying lead. (Fig. 2)
- The flying lead was removed to charge the capacitor and timing was started immediately. The resistance was reduced to keep the charging current at its initial value. (Fig. 3)
- The timer was stopped when the resistance of the variable resistor could not be reduced any more. The charging period was recorded.
- Steps 5 to 7 were repeated twice.
Experiment 2 Variation of voltage with time when a capacitor is charged at constant rate
- The above circuit was examined.
- The circuit was connected as shown. The variable resistor was set to the highest resistance.
-
Switch S was closed. The capacitor was discharged with a flying lead. The initial ammeter reading Io was written.
- The flying lead was removed and timing was started immediately.
-
The resistance was reduced to keep the charging current at its initial value. The voltmeter reading Vc at each 10s intervals was recorded in Table 1.
- Recording was stopped when the resistance of the variable resistor could not be reduced any more.
Experiment 3 Discharging a capacitor at a constant rate
- The above circuit was examined.
- The circuit was connected as shown. The variable resistor was set to the highest resistance.
-
Switch S was closed. The capacitor was fully charged very quickly. The ammeter reading Io was recorded.
- S was open and timing started immediately.
- The resistance was reduced to keep the charging current constant at Io
- The timer was stopped when the variable resistor could not be reduced any more. The discharging period was recorded.
- Steps 3 to 6 were repeated twice.
Experiment 4 Variation of voltage with time when a capacitor is discharged at a constant rate
- The above circuit was examined.
- The circuit was connected as shown. The variable resistor was set to the highest resistance.
-
Switch S was closed, the ammeter reading Io was recorded.
- S was opened and timing started immediately.
-
The resistance was reduced to keep the charging current at Io. The voltmeter reading Vc at each 10s intervals was recorded in Table 2.
- Recording was stopped when the resistance of the variable resistor could not be reduced any more.
Fig. 1 Measuring the e.m.f. of the battery Fig. 2 Discharging the capacitor
Fig.3 Adjusting the resistance of variable resistor to keep current constant
- Precautions
- If you are not sure which direction the knob of the variable resistor that you should turn to give the highest resistance, you may either use a multimeter to test or connect up the circuit (using an ammeter) as shown. Note that you should set the variable resistor at the middle position initially. Slightly turn the variable resistor and observe how the meter deflects. The turning direction that gives a smaller current represents increasing resistance.
- Check the correctness of the polarities of the capacitor and the ammeter. Avoid causing the ammeter to deflect in the opposite direction.
- Results, Calculations and Graphs
Experiment 1
Experimental set-up:
Step 2: e.m.f. of the battery, Vo = 2.96 ± 0.01V
Step 4: Initial charging current, Io = 68 ± 2μA
Steps 7 – 9:
Step 10: Total charge stored, Q = It
68 x 103 = 7004 μC
capacitance C, C = Q / V
= 7004 / 2.96
= 2366μF
Error:
By Q = CV and Q = It
C= It / V
ΔC = ΔI + Δt + ΔV
C I t V
ΔC / C = (2/68) + (0.01/103) + (0.01/2.96)
= 3.29%
∴C = 2366 ± 78μF
Experiment 2
Experimental set-up:
Step 3: Initial ammeter reading, Io = 68 ± 2μA
Table A
Data Analysis 2 Step 2
-
A straight line passing through the origin is obtained in the Q-Vc graph. Therefore, Q is proportional to Vc
-
∵ Q = CVc
Slope of graph = Q / Vc = C
Slope of graph = C = [(5650 – 2250) x 10-6] / (2.5 – 1)
C = 2267μF
Error:
From the graph, slope of the best fitted line = 2.28 x 10⁻³
Max. slope = [(5800 – 3500) x 10-6] Min. slope = [(3500 – 1200) x 10-6]
(2.5 – 1.55) (1.55 – 0.5)
= 2.42 x 10-3 = 2.19 x 10⁻³
Deviation: (2.42 - 2.27) x 10-3 = 0.15 x 10⁻³ (2.27 – 2.19) x 10-3 = 0.08 x 10⁻³
Maximum error in slope = larger deviation =
Percentage error in slope = (0.15 / 2.27) x 100% = 6.61%
∴C = 2267 ± 150μF
Experiment 3
Experimental set-up:
Step 3: Initial discharging current, Io = 68 ± 2μA
Step 6 & 7:
Step 8: Initial charge stored Q = It
68 x 99.3 = 6752μC
Capacitance, C = Q / V
= 6752/2.96
= 2281μF
Error:
By Q = CV and Q = It
C= It / V
ΔC = ΔI + Δt + ΔV
C I t V
ΔC / C = (2/68) + (0.01/99) + (0.01/2.96)
= 3.29%
∴C = 2281 ± 75μF
Experiment 4
Experimental set-up:
Step 3: Initial ammeter reading, Io = 68 ± 2 μA
Table 2
Data Analysis 2 Step 2:
-
A straight line passes through origin is obtained in the Q-Vc graph. Therefore, Q is proportional to Vc
-
∵ Q = CVc
Slope of graph = Q/Vc = C
Slope of graph = C = [(4550 – 1150) x 10-6] / (2 – 0.5)
C = 2267 μF
Error:
From the graph, slope of the best fitted line = 2.34 x 10⁻³
Max. slope = [(4500 – 2250) x 10-6] Min. slope = [(5500 – 1250) x 10-6]
(1.95 – 1) (2.45 – 0.5)
=2.37 x 10-3 =2.18 x 10⁻³
Deviation: (2.37 – 2.27) x 10-3 = 0.10 x 10⁻³ (2.27 – 2.18) x 10-3 = 0.09 x 10⁻³
Maximum error in slope = larger deviation =
Percentage error in slope = (0.10 / 2.27) x 100% = 4.41%
∴C = 2267 ± 100μF
- Discussion
Answer to discussion
- What are the sources of errors in the above experiments?
Ans:
Random error
- Reading error of instruments e.g. microammeter, digital voltmeter and timer.
Systematic errors
- Zero error of microameter
- Resistance of wire
- Resistance of microammeter is not small enough
- Resistance of digital voltmeter is not infinity
- Poor experimental skills
- fail to keep the current constant
- poor reaction time
- In experiment 2, the voltmeter is connected across both the capacitor and the ammeter. Would it make any difference if it is connected across the capacitor only? State the pros and cons of the original arrangement.
Ans:
When voltmeter are connected across both the capacitor and ammeter, the voltage measured does not indicate the actual voltage passing through the capacitor, but with the voltage of ammeter also as the ammeter is not ideal.
Therefore, V= VC + VA. As capacitor and ammeter is connected in series, ammeter reading is accurate.
When voltmeter is connected across the capacitor only, it is measuring the actual voltage passing through the capacitor. However, the ammeter is not measuring the actual current, but also the current passing through the voltmeter as it is not an ideal one.
The pro is the original arrangement is that the current is measured correctly, while the con is that the capacitance calculated will be smaller than the actual value.
- The experiment uses the equation Q = It to determine the charge stored in a capacitor. Can we use an electrometer to measure the chare stored in the capacitor? Explain.
Ans:
Electrometer is adapted to measure charge with its build-in capacitor of capacitance 10-8F, which can accept charges from its input terminal. It can measure charge only provided that the charged object has a low capacitance compare with the built-in capacitor C. otherwise, the charge in the capacitance cannot be fully transferred to the built-in capacitor C, therefore the actual no. of charge cannot be found out.
Assumptions
- Zero error does not exist in microammeter
- Microammter and digital voltmeter are ideal
- Wires have no resistance
Limitations of apparatus
- Zero error exists in microammeter
- Resistance of wire
- Resistance of microammeter is not small enough
- Resistance of digital voltmeter is not infinity
Precautions
- Take repeated readings and averaging to reduce systematic errors
- Do not put the capacitor near any conductors to reduce stray capacitance
- Select only one student for recording data
Suggestions for improvements
- Use data logger to collect data
- Use electronic device to keep the current constant
Comparison of result with that expected
From the experimental result, four values of capacitance C obtained are 2366 ± 78μF, 2267 ± 78μF, 2281 ± 75μF and 2267 ± 100μF respectively, while the actual value of the capacitance C is 2200μF.
The obtained values of 4 experiments are all higher than the expected value. This is because the there are errors existed during experiments, such as stray capacitance, reading errors, ammeter and voltmeter were not ideal.
- Conclusion
By collecting data from 4 experiments, the average capacitance C is:
C = [(2366 ± 78μF) + (2267 ± 78μF) + (2281 ± 75μF) + (2267 ± 100μF)] / 4
= 2295 μA
Error = (2295 – 2200) / 2200 x 100% = 4.33%
From the experiment, we can find that the current of charging and discharging can be kept constant by adjusting the resistance of the variable resistance. Also, form experiment 2 & 4, straight lines passed through origins are obtained in the graphs of Q against V. therefore, the voltage across a capacitor is proportional to the charged stored in it.
Compare with the actual value of capacitance C, the experimental result C is higher than the actual one because of the presence of errors in the experiment.