I was able to analyse the current system at the office of George Youngs Coaches to see what hardware they have, and what software they are running and compare it with my recommended I found out they had the following system;
Hardware: A Pentium 2 350MHz processor, 64Mb of RAM, 6GB Hard drive, a 17” Monitor (16 bit, 800 x 600 resolution), a 16Mb Graphics Card
Software: Microsoft Windows 98 and Microsoft Office 2000, including Access 2000.
They did meet my recommended criteria in all areas apart from one, the screen resolution. They currently run 800 x 600, but I highly recommend 1024 x 768, especially on a 17” monitor. They thought it looked too small at first and it took them a while to come around to the idea. This is shown below;
One thing they were lacking is a CD- rewriter. These are very low priced nowadays and fast ones can be picked up for as little as £49. It would be wise to add a CD-rewriter to the system, to backup the solution on a regular basis. This is the most cost effective backup system, with blank write-once CD’s retailing for as little as 20p and re-writable CD’s costing as little as £1.50.
Constraints
After speaking to the proprietor of George Youngs Coaches and reviewing their machine specifications, I was able to draw up a list of constraints, both human and physical.
To start with, there are very few Human constraints. No one has any serious problems, there are no visual impairments and no one has arthritis or anything of that nature. However the computers are new and are used very little and they have no previous knowledge of computers. The only thing the computers are used for is to calculate routes on the route calculating software. This requires very little knowledge, as everything is self explanatory and done with the mouse. This means that they are not very fast typists and, by their own admittance, are not very computer literate. Therefore the solution will have to be very minimal on typing and as simple to understand and use as possible. User documentation was requested and will be provided.
Physical constraints were, again very minimalist. A CD Re-writer was not present on George Youngs Coaches machine; one of the partners has one on his home computer how ever. This could be a problem, as the files will get to big for a standard floppy disk, and they will need a way of backing up the files and, should they need a copy elsewhere, transporting them to other computers. These drives can be picked up for under £60, this is well within in their budget, but does pose another problem in that they do not have sufficient hardware knowledge to know how to install and configure the new drive. One option would be to take it into a local computer shop and have them install it. However this will again increase the price, probably by around £30 or so. If they were willing to install it themselves, the drive should come with some sort of documentation, so it shouldn’t be too complicated. I can also assist them in doing so, as I installed one myself on my home computer without any problems.
Input, processing and Output needs
To input data into the database, a conventional keyboard will be fine. This will enable them to use the database to full effect. Anything like a graphics tablet or bar code reader would not be needed because a database program isn't designed to be used with any of them. A scanner and OCR package would be an option, if they wanted to transfer all their current documents to the computer, but they specifically said they did not want to do this, as it would be too time consuming to transfer all the old data into the new database. A mouse is the standard pointing device and this will be fine for use with the database, as nothing more than clicking in the appropriate place will be required..
To process the data, a database package will be used. Microsoft Access is the chosen package as it is very commonplace and fairly easy to get hold off if they don’t already own a copy. The data will be stored in the database and can be modified by the user or by using a series of visual basic scripts, relationships and basic formulas to process the data, into a way in which it can be output into one of the methods below.
There are many ways in which data within the database can be output. The main one will be the ability to save to a file for later use. Tables can be exported separately and can be bought back for use in the future should anything happen to the main tables in the database . A structured file system with filenames representing the content will be mandatory as this will speed up locating the file they are looking file. Another important output method is the ability to print out data, queries and reports. This should be done automatically when a button is clicked and the user should not have to worry about margins and what the print out will look like. I will design the way the printout is displayed, although George Youngs Coaches will obviously check that it is suitable and it will be displayed on their headed paper.
Another output format will be the ability to transfer the database to external hardware, be it a blank CD or a webserver for transportation or backup purposes. The latter could also be used to display the entire database, or certain reports or tables as a web page, when it has been exported from access in HTML format. Using a button it would also be possible to e-mail the file from within access, either sending individual tables, or the whole database as an attachment. This would mean that it could be sent from user to user. However this could be a problem if they are using a free e-mail provider such as Yahoo! because they limit the maximum size that an attachment can be, so if the file gets too big, it may not be able to be sent unless they have there own webspace.
Design Of Solution
The information flows through the current system in a similar way to the new solution will. This is illustrated below in 2 diagrams
Current System:
New, Electronic Solution:
The Detailed Design
For the final solution I have decided to use Microsoft Access as this provides me with a large range of options that I can use and as it is designed specifically for complex databases and that is required for the final solution. There are alternatives available. The Database section of Microsoft Works for Windows could have been used instead of Access or, straying from Microsoft products, another Office suite could have been used assuming it has a database program. These include The Lotus and Corel WordPerfect Suites.
A spreadsheet program such as Microsoft Excel could’ve been considered, as similar results may be achievable. The only way to determine which was most appropriate was to compare all the Software available, trying out different features of it and rejecting software which would not meet the quota.
Microsoft Access
This was the initial first choice of software although I thought it would be appropriate to test all the options available. Microsoft Access been built up over the years and now offers a huge range if features including Tables with relationships, complex macros, running entire websites with the database acting as a ‘central hub’. Although I will need to use some of the features, some will be useful and some will not. The standard features I need and must be available are tables that can draw information from one another automatically, the ability to input data easily into the tables and then recall it, in a printer friendly layout so that data can be taken or distributed where necessary.
Microsoft Access incorporates all of these features with a wealth of options available for each one. It covers everything in plenty of depth and can create user-friendly interfaces with images and options similar to what can be commonly found on a webpage, and so users will be more familiar with what they are doing.
Microsoft Access may seem daunting to anyone that may not have come across it before as he or she will not know where to start, so if Access is to be used then a large documentation will be required so as the user is not lost.
Microsoft Works For Windows
This is Microsoft’s Integrated works suite, as it contains a Word Processor, Spreadsheet, Database and Contacts program. Each program is not as accomplished as the respective equivalent from the Microsoft Office suite, and does not offer as many options. It is as easy to get hold of as Microsoft Office and retails at about a quarter of the price.
However it is not as suitable for the solution. It is a flat file database which means that there can be no relationships between tables and they will not be able to draw information from one another. It does offer basic querying functions, which would be enough to search through for people but it will not put them in a report format similar to that of Microsoft Access. It offers limited Macros, which can be a problem for automated tasks. The program maybe a bit too basic for what I am trying to accomplish for the solution.
Microsoft Excel
Although it is primarily a spreadsheet package, it could be considered to be used for the final solution. It has a wealth of options available, although none of them are there so as the program can incorporate databases, for example there are no query or report options.
However lookup tables could be used and if each sheet was a different table, data could be taken from one sheet and used in another.
Even though there is a large range of options, I don’t think that Microsoft Excel would be as good to use as Microsoft access.
I have drawn up a table below showing what each program has to offer.
Creating the solution from scratch
The following explanation explains how to replicate the system exactly when presented with an empty access database.
Creating Table 1
Open Microsoft Access – You will be presented with the screen below. Click the ‘Blank Access database’ radio button, as circled and then click ok
You will then be presented with the ‘File New Database’ option screen (below right). This window is where you decide where to save your database. Browse to the desired folder (1), by either using the drop down box at the top or the folder icons in the main window, and choose a file name for the new database. In the example I chose “Youngs Database”, and will use this throughout the example. Type this in the ‘File name’ box (2) and press the ‘Create’ button (3).
You will then be presented with the main database screen. From here you can access all the Tables, Queries, Forms, Reports, Pages, Macros and Modules that are made in the database.
To start with, create a new table by double clicking ‘Create table in Design View’.
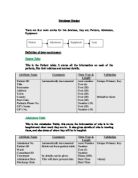
The field names must now be entered and data types distinguished so that data can now be entered. The field names and characteristics entered into the database are displayed in the tables in Appendix 1.
You must define at least one field before you can save the table, so I will show you how to input the data into this table, relating back to ‘Appendix 1’, at the end of the report. This method should then be duplicated to recreate the other tables in the database.
Looking at the criteria for the first table, tbl_employees, you can see the first field is Employee ID, which is the unique identifier for each Emploee. Every worker who is entered into the table will automatically be given a unique ID. So in the first field type Employee, as shown on the right, and then in the drop down box under ‘data type’, select ‘Autonumber’.
Beneath the table a selection of ‘Field Properties’ will now appear. You must now alter these according to Appendix 1. The criteria for employee ID is shown below.
Simply selecting values from a drop down menu alters all of these, with the exception of ‘Caption’, which must be typed in. The ‘Field properties box should now look like this;
. before you can input. To distinguish tables, queries, forms, reports etc, I will save it in the form (object type)_uniquetablename, in this case tbl_employees.
All the tables should now be created using the filed names and characteristics from the tables in Appendix 1. If a field name is displayed as ‘Lookup: Field Name’, then that field lookup and draws data from another table. In order to achieve this you must tell the table database to look up data from another table. Before altering fields to look up data, you should have all the tables complete and without any data in them.
One of the fields that requires values to be looked up is in the tbl_employee table and is the field, Vehicle ID. This takes data from the table, tbl_vehicles and displays the ID of the Vehicle, and registration number of the vehicle that the employee drives.
Open the table tbl_employees in design view by right clicking on it and selecting ‘Design View’ as shown to the right. Then go to the ‘Vehicle ID’ field and click on the ‘Data Type’ section for this field. You will then be presented with a drop down box with options in it. Then click on the option of ‘Lookup Wizard…’, it will be the last option. This is shown on the picture on the right. After clicking this you will be taken to the lookup wizard which helps guide you through the lookup process. On the first screen you will be presented with 2 options;
- I want the lookup column to look the values in a table or query
- I will type in the values that I want.
Select option 1, it should be the default selection, then hit the next button. You will be presented with a list of tables available for you to take data from. Select ‘tbl_vehicles’, as this is the table we want to take data from, then press the next button. You will be presented with all the fields in that table. This screen is shown on the top right of the next page
Select the top option (1), Vehicle ID, then hit the single right pointing arrow (2). Vehicle ID should now be in the ‘Selected Fields’ box and ‘Registration Number’ will be top of the ‘Available Fields’ box. Press the right arrow again and this move across to ‘Selected Fields’ also. Then hit the next button. You should now be presented with a screen whereby you can adjust the width of the columns of the drop down box when you are inputting data. Before doing anything else, uncheck the box that says ‘Hide Key Column (Recommended)’, this will then bring up the ‘Vehicle ID’ field in the box below. You should now adjust the width of the ‘Registration number’ field so that you can read all of the 2 words. Shown below is what the wizard looks like before and after making the changes.
Before After
Press next, then press next again, as the option you want (Vehicle ID) is selected. Finally type Vehicle ID in the box on the next screen, then press Finish. It will now ask you if you want to save now, so that a relationship can be created, select ‘Yes’.
You should now do the same for ‘Run ID’. However you will need to choose different options at various stages throughout the process, these are listed below;
- In step 2, choose ‘tbl_busruns’ as the table to take data from.
- In step 3, Move ‘Run ID’ and ‘Destination’ to the ‘Selected Fields’ box.
- In Step 5, Choose run ID as the unique column.
- In Step 6, type ‘Run ID’ in the text box at the top of the screen.
After
Work Schedule
Testing
Table layout for the tbl_customer table;
Table layout for the tbl_employees table;