Device drivers are programs that enable a computer system to communicate with a device, for example, a printer driver, which translates the computers data into the form that is understood by the specific type of printer you have connected.
The installation procedure for device drivers and for applications software under most operating systems is very similar and once you activate it the software walks you through the rest of the process.
Most computers come with a CD-ROM drive and so therefore, software is usually loaded from a CD-ROM. Before they invented the CD-ROM software came on floppy disk and you used to have to load several disks before the application was complete.
When installing new applications software, the program setup usually asks the user if you would like to create a new directory folder to store the new program in. it then suggests a name for the folder and a path, for example, if a program is called Cubase, it might suggest C:\Cubase.
Testing
Your installation and setup is only successful once you have tested it. This means that you will be able to perform each of these following actions without any problems:
- Powering up
- Accessing applications software
- Entering, saving, retrieving, and printing data.
Powering up
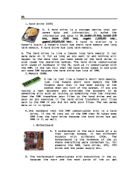
When you turn on the computer you should be able to hear the hard disk beginning to spin and you should also see the monitor flicker and if nothing happens, switch off the computer and check the cables to ensure they are connected securely. If you can only hear the power supply fan whirling and nothing shows up on the monitor then make sure the monitor is connected.
Accessing the applications
If your software has been loaded successfully you should be able to open up the program from Start, Programs and then by selecting the program you want to use or you could click on the desktop icon.
To ensure that each application is functioning properly, you need to test it and the following procedure would be adequate.
- Open the application
- Type <Test 1> with your initials and the date.
- Save the file as <Test 1> with an appropriate extension.
- Exit the application
- Restore the application
- Open the file
- Select print
- Save and close the file
- Exit the application
Your computer is now set up.