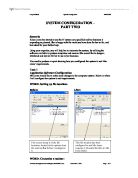
WORD: Design and configure a customised toolbar:
Before:
After:
Task 2
Below is the letterhead for Mrs Jones business. This letterhead has details about the address, telephone/fax, email and a website to suit her request.
Jones Corporations
278 – 280 Belfize Rd
Kilburn Park
United States
SE15 2LJ
Tel: 0208 208 3603
Fax: 0208 208 6303
Email:
Website:
Task 3
Explain how you found the logo.
I found the logo in Microsoft Word. These are the steps that I had taken to get the logo:
-
I clicked on the Insert icon on the tool bar in Microsoft Word.
-
In that drop-down box I selected Picture and another drop-down box appeared.
-
I then clicked on Clip Art.
-
On the right, appeared the clip art box, I then typed in ‘business’ in the search text and pressed search.
Before: After:
-
After, appeared the results of my search and I scrolled down and decided on my logo.
Explain in detail how you make the document a template.
To make my file a template I had to do the following steps:
-
I clicked on file icon from the toolbar menu. In that drop-down box, I then clicked on save as.
-
The save as box appeared, at the bottom I clicked on the save as type. Again, appeared a drop-down box, I then clicked on the document template.
-
I then clicked on save and it stored to the folder called Templates.
Before: After:
Task 4
Putting the template on the toolbar by recording it to a macro.
To put the template o the toolbar, I had to do the following steps:
-
I clicked on tools from the toolbar and a drop-down box appeared.
-
I then clicked on macro and again a drop box appeared beside it.
-
Following that I clicked on record a new macro and appeared record a new macro window box.
Before: After:
-
I then entered the word template into the macro name box and clicked on tools and the customize window box appeared. I then dragged the template/macro from the commands to the toolbar above. I also modified it by clicking on the modify selection, and chose a different icon to represent the template/macro.
-
I then closed the customize box and finished off recording. Afterwards I clicked on file from the toolbar and I then clicked on open from the drop-down box and the open box appeared, I looked for the file that I wanted the macro to record and opened the file and pressed stop recording.
Task 5
Attaching the template to a series of keystrokes from the keyboard.
To attach the template to a series of keystrokes on the keyboard I had to do the following steps:
-
I clicked on I clicked on tools from the toolbar and a drop-down box appeared.
-
I then clicked on macro and again a drop box appeared beside it.
-
Following that I clicked on record a new macro and appeared record a new macro window box. (screen dumps from task 4)
-
I then entered the word template into the macro name box and clicked on tools and the customize window box appeared.
-
I then clicked on the keyboard button and appeared the customize keyboard window box. In the box press new shortcut key, I typed in a series of keystrokes like Ctrl+J for example, and it assigned it to a macro from the keyboard.
Before: After:
-
After, I pressed on close and I clicked on file from the toolbar, then open and selected the file ‘template’ and opened it to finish off the recording and clicked on stop. This process has been recorded to a macro from the keyboard.
Task 6
If you perform a task repeatedly in Microsoft Word, you can automate the task by using a macro. A macro is a series of Word commands and instructions that you group together as a single command to accomplish a task automatically.
To create your own toolbar button with macro attached, I had to follow these steps:
-
I clicked on tools, record a new macro, click on the toolbar icon and selected the command tab. In the right hand side of the window, I picked up normal. Newmacro# and dragged it in the toolbar at the top of the screen. (Screen dumps from Task 4).
-
A copy of the macro button appeared in the toolbar. I then changed the appearance. To do so, I clicked on modify selection, click on change button image. I clicked on modify selection again, and clicked on default image, so that I just had the image instead of the text. When I was satisfied with the appearance of my button, I clicked ok. (Task 4 for screen dumps).
-
I then saw that the macro recording indicator appeared on the screen. Afterwards I clicked on file from the toolbar and I then clicked on open from the drop-down box and the open box appeared, I looked for the file that I wanted the macro to record and opened the file and pressed stop recording. (Task 4 for screen dumps).
- I tested the macro that I had recorded by clicking on the recorded macro button on the toolbar that I created to see weather it had recorded the process correctly.
You could create a macro also by using keystrokes, to save and print a document as this is a procedure you are likely to use on a regular basis. With the macro, the user will need to enter the instructions step by step. If the save and print macro is assigned to keys, it can be called up quickly, eliminating the need to enter the same commands each time.
These steps are as follows:
-
I clicked on tools, record a new macro, click on the keyboard icon and a new slide appears called customize keyboard. (Task 5 for screens dumps)
-
With the insertion point already positioned in the press new shortcut key box. I typed in a series of keystroke like Ctrl+L, assigned it and clicked close. (Task 5 for screens dumps).
- I then repeated the process from steps 3 and 4 from above on recording a macro. (Screen dumps from Task 5).
Task 7
When recording a macro, the macro code automatically shows you that you have made an error in the process of the recording.
Sub company()
'
' company Macro
' Macro recorded 12/12/2003 by H31069
'
Selection.TypeText Text:="jones jones corporations"
End Sub
Sub company()
'
' company Macro
' Macro recorded 12/12/2003 by H31069
'
Selection.TypeText Text:="Jones Corporations"
End Sub
Y:\svn\trunk\engine\docs\working\acumen4\98212.doc Centre No. 14342 Page of