When Oranges are tested it might become yellow, as there is some glucose present. We can predict these by knowing that are tree fruits, they have sugars but no starch, they are a good source of pectin, and these fruits have small amounts of other indigestible food fibres. Their most contribution is on vitamin C. that is concentrated in the white layers just under the peel. Oranges are good source of potassium, and they energy value for 100gr is 60kcal(250kJ).
For Lemons the colour might become blue/green, as there is trace of glucose. Even though they are fruits that taste sour and not sweet but still they have no starch and very little sugars (1 percent) no fat, no cholesterol, and only trace of proteins they are valuable only for their considerable supply of vitamin C. Their energy value is lower than the apples and oranges; it is about 15kcal(61.8kJ).
For Carrots that are roots, the color might become green, as there is little glucose present. Because they are formed by a swollen tap (main) roots. Their crisp texture comes from water pressure on the cell wall stiffened with the indigestible food fibers, cellulose, hemi-cellulose, and lignin. Carrots also contain small amount of sugars and provide pectin, very little starch and proteins, trace of fat and no cholesterol. In 100gr food the energy value is law approximately 23kcal(94.8kJ).
On the case of the potatoes is a bit difficult to predict the color because we have to consider the fact that it might be orange/red ore green depends if the potatoes have been in storage for a long ore short time but still the most common result is going to be blue/green or the colour is not going to change at all as they are tubers (roost) and they storage the glucose into starch. The swelling of sections of underground stems forms them and they are high-carbohydrate food with much starch and little sugar. In storage the potatoes starch turns to sugar so the longer a potato is storage the sweeter it will taste. They are also good source of vitamin C, B, nicotinic acid and potassium. Their energy value for 100gr is 87kcal(358.8kJ).
Methods and Materials
CAUTION: Before starting eye protectors need to be worn as during the experiment there is possibility of coming in contact with chemicals.
First of all, a series of glucose solutions of known concentration (1.0,0.8,0.6,0.4, and 0.2percent) need to be produced. In order to do this an electronic balance is required to weigh 1.0g 0.8g, 0.6g, 0.4g, and 0.2g.
The electronic balance is used in order to measure exact amount of glucose so that the colour obtained is the corresponding one.
Then the glucose is to weight in beakers where 100ml of water is added. The solutions are stirred with a glass-stirring rod until the entire solid dissolves. Each test tube is label with correspond glucose concentration, e.g. 2%. Using a medicine dropper (or a syringe) 1ml of each of these solutions is dropped in to a series of appropriately labelled test tubes, each containing 10ml of Benedict’s quantitative reagent.
The Benedict’s quantitative reagent is used so that to give different colour to each of the solution.
We are using medicine dropper (or a syringe) to get accurate mass of each solution.
ATTENTION: We have to make shore that the exact amount (10ml) of Benedict’s solution is added to all the glucose solutions as well as the same amount of glucose solutions so that we can avoid any errors, which might affect the results of the experiment.
Using a test-tube holder the test tubes are placed carefully in the boiling water bath, which has been prepared before the experiment started. Those are then heated for 8 minutes in a temperature of 90°C.
After 8 minutes (when there is no more colour changes) the test tubes are returned to the test tube rack using again the test-tube holder. Allow the solution to cool and any precipitate to settle.
A test tube- holder is used to handle the hot test tubes.
The apples, oranges, lemons, and carrots are cut with a knife and then grated harder with a grater.
The reason we are using knife and a greater is to obtain juice of the samples as by obtaining a juice of each food result can be obtained after the Benedict’s solution is added, which reacts only in solution. (Filter might come to use to filter the juice to get clean solutions of each food sample)
Than 1ml of each food solution are putt into the test tube with the corresponding label. 10ml of Benedict’s solution is added to each test
ATTENTION: We have to make shore that the exact amount (10ml) of Benedict’s solution is added to all the food solutions as well as same amounts of food solutions so that we can avoid any errors which might affect the results of the experiment.
Than these five test tubes using test-tube holder are placed into the hot water bath for 8 minutes on the temperature of 90°C. After 8 minutes (when there is no more colour changes) they are placed into the test-tube rack using a test-tube holder and they are left to cool in the air (this might need a over night settling as the solution have to be fully settled).
At this point what we have is 6-test tubes with glucose solution of known concentration label in appropriate way and having different colours. We also have 5-test tube labelled on the basis of food solution they contain and different colour one from another.
The last step to be followed is the measurement of the colour of each solution with a colorimeter. We are using a colorimeter to measure the colour because is the most accurate method to obtain data for each colour as well as find the right amount of glucose present. This can be don after all the solution has settle so that nothings affects the reading. Test first the colour of distilled water, which is colourless solution meaning no data should be read. We are doing this just so that there will be no mistake with the equipment used and also to have an expectation or understanding of the date data that will be obtain from the coloured solutions.
Now a small amount of each coloured glucose solutions is placed on the small containers of the colorimeter and the corresponding readings are recorded on a data table (the table is to be named glucose colour data or better table 1.1). Plot this reading into a graph, which will give the outcall calibration curve. This graph will have on the x-axis a range of readings of the colours of the glucose and on the y-axis a range of glucose concentrations.
ATTENTION: The measurements for the colour of each glucose solution are repeated for at least 3 times so that accurate result can be obtained. It might be the case that average readings have to be calculated if the data various from one measurement to another.
Than a small amount of each coloured food solutions is placed on the small containers of the colorimeter and than the corresponding readings are recorded on a data table (the table is to be named food colour data ore better table 1.2).
ATTENTION: The measurements for the colour of each food solution are repeated for at least 3 times so that accurate result can be obtained. It might be the case that average readings have to be calculated if the data various from one measurement to another.
Then these readings are to be plotted on the x-axis and a line upwards is drowned till where it crosses the line of the graph (calibration curve). From the point a horizontal line is taken so that in this way the required concentration can be stated for each food type.
ATTENTION: Attention need to be shown when the lines are drowned so that it can be as accurate as possible as this is only the way that can land us on having accurate concentration reading for each food tested
ADVICE: Sharp pencil to be used when drawing the graph or plotting the result as in this way thick lines can be avoid, which adds an error to the experiment.
When the experiment has finished all the equipment used are to be washed down the sink, all the chemicals are placed back to the restore room and all wasted product are thrown away. Leaving a clear environmental.
Results
Instant results
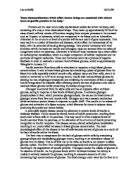
This shows a picture of the 5 substances in the boiling tubes, after heating with Benedict's solution.
The final colour of the solution depended on how much of this precipitate was formed, and therefore the colour gives an indication of how much reducing sugar was present this was confirmed by the readings of the colorimeter.
In general this can be explained with the diagrams drown underneath:
Increasing amounts of reducing sugar
Green Orange Red Brown
High light intense Low light intense
From the colorimeter readings the following results were collected for both glucose solutions and the food samples solutions. The readings represent the light intensity passing threw each liquid. From the results on the tables we can se that the light intensity decreases as the colour gets darker in other words the light intensity decreases with the increase of the amount of sugar present on the liquid.
Table 1.1 (Glucose standard solutions)
Table1.2 (Food samples solutions)
The tables and graph drown above are to show the results of experiment that was carried out in normal conditions (room temperature and pressure). Table (1.1) represents the readings of the colorimeter for the standard solutions. Table (1.2) represents the readings of the colorimeter for the food sample tested.
As the glucose concentration increases there is a change of colours from light pinks and oranges to deeper orange brown. This is indicated from the readings given by the colorimeter, which measures the light intensity passing through the liquid. Thus the darker the colour of the liquid, the lesser light passing through. Therefore the lesser light indicated a smaller number on colorimeter. A small number read by the colorimeter means a higher glucose concentration on that particular liquid.
The capital (A) letter close to the colorimeter readings stands for arbitrary unit.
Which is a made up unit not part in SI units system, nevertheless by using these units there is the possibility to represent accurate result and also to make more sensible the readings
.
The arbitrary units are first given to the readings of the standard solutions.
By measuring the colour intense of the solution a reading is obtained for each glucose solution of know concentration.
The same method was followed for the food sample where the colour intense was measure and readings were recorded on a table. The measurements had to be repeated for each sample so that an average value can be taken to give more accurate result.
At this point what we have is to set of data represented on to two tables, which are followed by the graph of correction curve.
By drawing the graph of the colorimeter readings (A) (y-axis) against the concentration of the glucose solution of known concentration (%) (x-axis) we get a graph which is a line almost linear. Then by knowing the colorimeter readings for each food sample we can estimate ore better quote the percentage (%) of glucose present on each sample. To do this we draw a horizontal line from the known value of colorimeter reading (y-axis) till it crosses the graph line. Then from the point were it crosses the graph line we draw a vertical dawn words to the x-axis were we can read the correspondent value of the glucose concentration for that particular colorimeter reading.
The data collected from the graph gives the final results shown on the table below:
Table 1.3
Discussions and Evaluation
Our data supports our hypothesis that the darker the colour the greater the glucose concentration is. By comparing the colour of the glucose solutions of know concentration with the food samples we can see the browner colours correspond to high glucose concentration. The hypothesis was further supported by quantitative test where the colours intensities were measured with a colorimeter. The hypothesis was supported in the way that the darker the colour the smaller the number on the colorimeter which meant lower light intensity leading to a higher glucose concentration.
We can conclude that dark red or brow colours have a low light intensity and are likely to indicate higher concentration of glucose. This colour relationship is probably true for all aldehyde sugars, although further experiments would have to be carried out to support this generality.
Based upon our result we hypothesized that the graph of glucose concentration was almost linear. The more glucose there is the darker red colour should be which would have a low light intensity. However the only way to show that the reaction equation is linear would be through further test or experiments.
While it may seem that our result provide a good reference for further experiment there is one major problem. We put 10ml of Benedict’s solution in all the test tube. We had chosen this rather large amount because in previous test we had put in 10 drops of Benedict’s solution in the test tube and had found that only the bottom part underwent a distinct colour change. The liquid at the top either stayed clear or was plane in colour. This is probably due to the fact that the concentration of the aldehyde sugar was very small on the tested food, but we erroneously conclude that we should have added more Benedict’s solution. In order to use our result now, other tests will have to use 10ml of Benedict’s solution as well. However, it would be best to carry out more experiment with varying amount of Benedict’s solution to see if the amount of the Benedict’s makes a difference in the colour change, especially because the typical amount of benedict’s solution used in biological test is 2 to 5 drops.
We tried to eliminate some of uncertainties of our lab with our controls; however, there were some problems that we did not foresee. One was the fact that there was a reasonable amount of precipitate, which did not settle easily. Therefore we had to leave the solutions over night for the precipitate to sink to the bottom of the test tube before we took any readings on the colorimeter. Because as we know as we know the colorimeter measures only the light intensity on solution and not precipitates.
Another was the fact that to estimate the percentage of the glucose present on the food samples, we had to use to the correction curve drown from the result of the standard glucose solutions which we aren’t shore if it was drown correctly. And also as we sad above to recognise the colour difference between the standard glucose solution and the food sample we had to use the colorimeter. Therefore there is a percentage error in this case as we cannot be 100% shore if the food solution was completely settle for the colorimeter to read the exact corresponding value for the light intensity passing through the colour mixture.
There were also many opportunities for human errors. No matter how careful we were, there is always the chance that we added a couple extra drops of Benedict’s solution in one test tube, or a couple drops more of a certain foods juice or standard glucose solution in the another.
To improve upon our experiment or to extend its usefulness, experiment can be repeated more often with further work on to greater variety of foods and to be taken average readings making the experiment more accurate. As I mentioned before, it would add credibility to our date if more trial are carried out and if only two ore three drops of Benedict’s solution is used