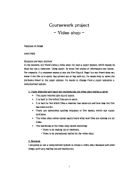
Visit To The Video Store
I went to the video store and gave them a questionnaire to answer. The questionnaire is in Appendix one. From the questionnaire I found out that the owner is only there on a weekly basis. The employee had a computer to use before but it was stolen in a burglary. So from this I was able to find that the employee has got computer experience. The name of the business is called Cinema World. They keep records on file paper since the burglary. They find this system untidy and want the shop to become paperless. Only the two employees use the system. There is always lose of records but fortunately they are records from months gone by. They don’t keep records and have not got a filling system. The employer always said that if he got a computer in again he wouldn’t know much about the software or hardware to buy.
Aims
My aims are
- To provide an easy to work database for the users.
- To design an organised database.
- To make user names and passwords for them.
- I want to keep it secure so I won’t let them have access to any options to be able to edit or delete the whole database.
- I will try to keep a paperless shop. The only paper I would want is the paper printed to keep manual records.
- Show the employees how to produce a report.
- Show the employee how to run a query.
- Show the employee how to send e-mail.
- To make letter for the customers, mail merge.
Explanation of the entities and attributes
Entities
An entity is a thing or object of importance about which data must be captured. All things aren't entities — only those about which information should be captured.
Information about an entity is captured in the form of attributes and/or relationships. If something is a candidate for being an entity and it has no attributes or relationships, it isn't an entity.
Attributes
An attribute describes information about an entity that must be captured. Each entity has zero or more attributes that describe it, and each attribute describes exactly one entity. Each entity instance has exactly one value — possibly NULL — for each of its attributes. An attribute value can be a numeric, a character string, a date, a time or some other basic data value.
I will draw up a table that will help you understand the entity types;
Logical data models
Logical data modelling is a graphic-intensive technique that results in a data model representing the definition, characteristics, and relationships of data in a business, technical, or conceptual environment. Its purpose is to describe end-user data to systems and end-user staff.
Various methods of data modelling exist, each using a host of conventions and tools. The most popular approach is called the entity-relationship (ER) approach, developed by Peter Chen in the late 1970s. Although a number of authors and tool designers have modified and expanded ER concepts, most still have a strong Chen flavor. Also, with the introduction of CASE tools, the number of diagrammatic conventions that the data modeler must master has increased sharply. (Taken from )
Entity Relationship-diagram
1 1
Customer can rent
Many videos
M M
VIDEO is a one to many relationship because one video can be rented by many customers.
CUSTOMER is a one to many relationship because one customer can rent many videos
Explanation of normalisation
Normalisation is a process for analysis, it takes out all the repeating information. It is a step by step method, which produces entities and attributes and reveals the relationship between entities.
Entity types – VIDEO STORE
Unnormalised
Customer (Customer_ID, Customer_surname, Customer_firstname, customer_street, customer_town, customer_postocde, customer_phone (Video_name, category, cert, rental_price, date_out, date_returned, video_copies))
1NF
Remove repeating groups
Customer (Customer_ID, Customer_surname, Customer_firstname, customer_street, customer_town, customer_postocde, customer_phone, Video_ID)
Video (Video_ID, Video_name, Video_category, Video_cert, Video_rental_price, date_out, date_returned video_copies)
2 NF
Functional dependency
Customer (Customer_ID, Customer_surname, Customer_firstname, customer_street, customer_town, customer_postocde, customer_phone )
Rent (Customer_ID, Video_ID, date_out, date_returned)
Video (Video_ID, Video_name, Video_category, Video_cert, Video_rental_price, video_copies)
3 NF
Customer (Customer_ID, Customer_surname, Customer_firstname, customer_street, customer_town, customer_postocde, customer_phone )
Rent (Customer_ID, Video_ID, date_out, date_returned)
Video (Video_ID, Video_name, Video_category, Video_cert, Video_rental_price, video_copies)
Task 4
User Documentation
Step one
In order to load up the spreadsheet you have to click on the Microsoft access icon on the desktop when this has been done then you will have the following appear;
You enter blank database by clicking on the and then clicking on the OK button.
Step two
Once I click ok for a blank databse the computer will ask me to select a place to save my work and what to save it as. I will save mine in my AVCE folder as Videodb.mbd.
Step three
The window for table’s queries forms reports, macros and modules. From here I will click the NEW button shown below.
Then the following screen will appear, I will then click design view which is highlighted below.
After clicking on new the window below will appear. I went to design view and then typed in the name I want the table to be saved as.
Deleting a record
To delete a record I placed a button on the forms as shown below
When I click delete a record a message comes up and asks if you are sure you want to delete the record like so:
To Delete a record click the delete record button.
Adding a record
To add a record in customer or in video I put in the main switchboard add a customer or video like so:
Amending a record
I put in Edit record for each form, video and customer like so:
After I clicked this it brings me to the first record of whatever form I open, customer or video form. I am able to change, edit or delete a record.
How to use a form
To fill a form in first you need to fill in the empty boxes. Some of the boxes will have a combo box. After all the boxes are completed you must save your work. If you need to go back and edit the form you can simply do this by clicking on the design view button on the top tool bar. This can be found at the left-hand side of the screen. This is my customers data entry form to fill it in you must use the next customer ID which is 3 digits long then fill in the customers surname it will automatically start with a capital letter because there is an input mask in. The first name is the same, the street is also the same. The town is a lookup table, which means you choose one from the list. The postcode is an input mask. The phone number is all numbers. The video ID is a lookup table so you could choose the video from the table.
This is a screen dump of my rent entry form. First you must find the customer in the ID field which is a look up. Then find the video they want to rent in the video ID Lookup field then the date must be typed in and if any specific date is mentioned
My other form is the video data entry form which to use you need the video number, name, category, certificate, rental price, the date out, the date returned and the number of copies there are.
Technical documentation
This is my design for the customer table as you can see the first field is the customer ID and it is a number it is also the key field for this table.
This is my design for the rent table there is no key field as there are two foreign key fields which means two fields are the key fields in another table.
This is the design for the video table the key field is the video ID.
This is an example of lookup as the video category has only a few possibilities I put it in a lookup table. Which means on the forms you can chose from the scroll down table. I have displayed how to make one later on in my assignment.
This is an example of validation, as the user must enter in the deposit for the video. It must be between £2 and £10. If it is not then a message comes up which explains you must enter a price between the following range.
This is an example of my input masks, I think best one for this is the postcode as all post codes are the same which is letter, letter number
Entering data into the database
The design screen below will now appear and then you can start to type in the attributes of the entities. These entities will be Customer, Video and Rent.
When we are in the design view we can then enter the data into the Field name column, this will be the Key field that is in the first row. I will not have an AutoNumber as the number that I want will be 5 characters long and AutoNumber’s will start at 1,2,3,4 and so on.
There is a little key shape at the side of the row number that indicates that the patient number is the Key field. In order for me to only allow 5 digits I type 99999 this will allow values from 00001 to 99999 to be entered in this field.
Creating a lookup box
To create a lookup you must first go to the field name you want to be a lookup. At the bottom there are two windows one called general and one called lookup, click lookup and this window will appear and you then click combo box.
When you fill this in and save it you can go to your form and the table you entered, as a combo box will be like this when you click on it:
Creating a relational database
When all the tables have been created then we have to create a link between the tables; this is called a relational database. To do this I must click on a button on the toolbar at the top of the page as follows:
After you click this button, this window will appear and you must link the fields to the others by clicking on the field name and dragging it to another table.
When I drag a field across and unclick in a different table this window opens
This shows the relationship between the two fields as you can see it is a one to many relationship type.
When you click create this creates the relationship and this will happen to the two fields. The line shows they are joined.
Creating the forms
To create the form you click new and this window will appear at this click form wizard and choose the table or query where the data comes from at the bottom of the window
When you fill in the data’s table or query this window will appear. You choose which fields you want to be in the form. Click next and the next window will appear.
This window will ask what set up you want your form to be in I selected justified
Basically this window asks you to select a background.
Click next and the following window comes up.
This window asks what you want to call your form. Type that in and hit finish and up comes your form.
Your form:
To change the form you click the design view button at the top left-hand side. This window will appear where you can change the layout, add in a title and buttons.
Creating A Report
To create a report to need to go to reports and new, this window will appear highlight report wizard then choose the table you want to create a report for.
After you complete the above window click ok and the following window will appear this window is for grouping your report choose one and click next
Then this window will appear which is for sorting your field’s e.g. in alphabetical order or by numeric order.
Click next and the following window will appear. This window will ask you what style you would like for your report and it also gives you a preview of the style, select one and click next.
This window asks you to choose the layout of your report, if you want it in landscape or in portrait view.
After completing the last window this window will appear which asks you to give your report a name as you can see I have named mine rprtReport.
Your report will look like this when you have finished and as in the form you can change the design by click the design view key.
Creating a macro
To create a macro you go to macros and this window will open up. It is blank now but when you fill in the actions you want the macro to carry out it will be complete.
As you can see I want my macro to open a form so I select this in the action I then have to select which for I want opened. I can also select the format in which the window is opened in.
When I am finished I must save it as you can see I have saved it as Mcrvideo.
I then must see if it is working. To do this I go to my form and go to the design of it, I then add in a button and select run macro when this is finished I can name the button. Which I have called close window as shown below.
Creating the main menu
To create the main menu I had to go to tools and add ins, then switchboard manager.
This window will appear, you then click edit to add in the actions you want carried out.
Here I clicked new to name the items on the switchboard and select its actions.
This is the window where I can type in the name, action and where it will take you to when you click on it.
This is what the main switchboard looks like. I put in a second menu and added a button in to take me to it. Its called the video menu.
This is what the menu looks like you can go to the video forms and the rent forms.
Data Dictionary
The best way for me to describe the validation that is used in this database is to show each of the single databases in tabular form;
Output from queries and reports
The output from the queries allowed me to create a letter. For example my database was on video hire so I merged the queries onto the letter document so that when I run the query I could see which customers hadn’t returned a video or hasn’t paid a deposit.
The reports let me view all customers or videos in a tidy format or order. I could get my customers in order of their surnames by alphabetical order or the video ID in numeric order.
In order to create a query you go to new and then highlight the simple query wizard and click ok.
This asks you to select the fields you want in your query after you select the fields click next.
This window will appear and asks if you want a detail query or summary query. Detail shows every field of every record, and a summary query is a choice of what fields you want calculated.
Click next when you are finished.
This next part asks for the title of your query and as in the forms, tables, reports and macros I have abbreviated the titles e.g. for forms I said frms, for tables I said tbls. So for queries I said qry. After I this was done click finish.
When you click finish this table will come up showing you your query. Mine shows the customers of the video library who have rented a video out and the deposit they have put down on it. I used this query for my merged letter.
When you go to the design view it will look like this, it shows the tables the fields came from. I have typed something in the criteria space which is [Enter customer ID No] this means the query is a parameter where you have to type in the customers ID number.
Structured Query language.
Database Structure
Acceptable data
In this database there are certain fields that need certain data ranges. These are things like the patient number, this field needs to have numbers that above 10000, as the patient number cannot begin with a zero. So you have to enter in the number into the Validation Rule. Below I have typed in that it is to be greater than (>) 10000
After you have got the validation rule you have to then put in the validation text to remind you what has to go into this particular field. I want to remind myself that this field needs to have a value greater than 10000;
Task 5
Testing of the Database
Testing number 1
Witnessed by________________
Testing number 2
Testing number 3
Testing number 4
Testing number 5
All the rest of the combo boxes work also but there is no sense showing them, as it will be very repetitive.
Testing number 6
Testing number 7
Witnessed by __________________
Testing number 8
ACCEPTABLE DATA
Time Management
Name: Centre no: 71655 Candidate no: 8080
Peadar Mc Kenna