Document 2: Invoice
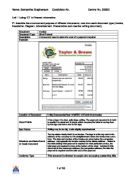
An invoice is a statement of how much money is owed for goods or services. They are sent out by companies to customers to say how much is owed for goods or services already received. When you go to the shops to buy something, you usually get a receipt. A receipt is similar to an invoice in that it shows you how much you spent on what and when you spent it.
This is example an Invoice:
Video Manufacture plc
New Trading Estate
Bridgetown
BS2 8RC
TEL: 0164 8115050 VAT REG No: 325/61784/55
FAX: 0164 811506
E-MAIL:
INVOICE
To: Taneytown Hi-fi Ltd Deliver to:
12 Station Road
Seattle
SE1 7JP
Document 3: Flyer
A flyer is a pamphlet or circular for mass distribution. This is why flyers are a good source of advertising.
Also flyers are cheap and easy to produce. Flyer can also be printed into magazines or newspaper; however the cost to go this may increase from just handing the flyers around.
Hers an example of a flyer:
Document 4: Letter
A business letter is a formal, written communication from one company or individual to another. Business letters have standard features. These include the following:
1. Company logo, address, phone and fax numbers, e-mail address, etc.
2. Reference numbers.
3. Date.
4. Name and address of the recipient (the person the letter is being sent to).
5. Greeting/salutation (Dear . . .)
6. Reference number and/or the subject of the letter.
7. Content of the letter.
8. Complimentary close (Yours . . .)
9. Signature of the person sending the letter.
10. Name and position of the person sending the letter.
11. A note of copies or enclosures (things included in the envelope with a letter).
This is an example of a letter:
TOM GREEN
69, Sillyo Road
London, Surrey, SW16 2AD (020) 8856-1734
(020) 8865-6789
[email protected]
28 April 2007
Johnny Knosville
34, Jack Assemt Street
Hollywood, Calforina, 78448
555 7885
Dear Friend,
In reply to your letter of July 18th, I have been asked by our Managing Director to inform you that Mr. Arthur Meyrick has worked here as a cashier for a period of three years.
During this time he has proved himself to be efficient and capable, and his only reason for wishing to leave us is to seek a more remunerative post.
Should he be successful in his application to you, our company will be sorry to lose his services; but, at the same time, we would wish him well in his new position.
Yours sincerely,
Tom Green
Document 5: E-mail
Electronic mail, a.k.a. e-mail or email, functions exactly as the postal service does - only the message doesn't cost anything to send or receive and it takes seconds or minutes to arrive instead of days.
Using email you can send short messages (and frequently long ones) to others. Some email systems have limits on message size while others are less restrictive. Some services accept message attachments (little packages or files attached to a message), while others do not accept them. Many email services handle a long email message by converting the entire text message into a file attachment.
On the Internet, the Post Office is what is referred to as mail servers, and street addresses are what are referred to as email addresses. Rather than airplanes and trucks moving the mail, it's done by communications networks with wires and computers transmitting and receiving the information.
An basic e-mail looks like this:
The e-mail example I am using is from Outlook Express, therefore functions may vary from other e-mail providers such as Hotmail or Yahoo.
Toolbar
The toolbar contains all the functions that a user is able to use in order to send a e-mail.
Attachment
Some mailers support "attachments", where you can specify a document to send through email. This allows people to share essentially any file in any format. GIF-encoded images, JPEG-encoded images, Word documents, WordPerfect documents, Photoshop files, Excel spreadsheets, and executable files are just a few of the types of documents that can be sent.
Priority
This is about the main concern. This function may not be included with every e-mail providers. In the case there are 3 priority levels: High, normal or low.
Sending button
This basically sends whatever you have typed in your textbox to your desired e-mail address who you what it to be sent to.
To button
In this box you must type in the e-mail address of the recipient.
Carbon Copy
A copy of a document, letter, or the like that is made
Subject line
A subject line that pertains clearly to the email body will help people mentally shift to the proper context before they read your message. The subject line should be brief (as many mailers will truncate long subject lines), does not need to be a complete sentence, and should give a clue to the contents of the message.
Textbox
This is the body of the e-mail where you can type your letter.
Document 6: Memorandum
A memo is a brief document hat is used to communicate with colleagues in the same office or organisation as you.
The following are the features you will find in a typical memo:
• The heading ‘Memorandum’ is normally centred, although it can be blocked to the left.
• The recipient and sender’s names, the date and heading all line up (are aligned at the same tab stop).
• The main body of the memo is written under a line, but it is not essential to have a line across the page — this simply makes for better presentation.
• The body of the memo is usually short and less formal than a letter.
• The sender’s initials should be handwritten at the end of the memo.
Note that, unlike business letters, memos do not have a salutation or complimentary close. This may seem unfriendly but, remember, a memo is often to or from people in the same organisation who would probably know each other quite well.
This is and example of a memo:
Memorandum
Date: 31/03/2003
To: Bill Goldberg
From: Tahamtan Pishgharavol
RE: Car repayments
I am having some difficulty in meeting the repayments for the car which I bought last year under the terms of the above agreement. To date, I have paid regularly every month, but I now find that my outgoings are more than I can afford.
I do not wish to default on my debt to your company and would therefore be most grateful if you would consider allowing me to make smaller payments over a longer period.
Please could you let me know if such a change to my existing arrangement is possible and, if so, what terms you is able to offer me?
T.P
Comparison 1: Letter
Comparison 2: Invoice
ACCURACY OF WORK
Verification
The word verify means to check that information is correct. Sometimes this is carried out quite simply by the operator reading the entries and checking them again against the original document. Sometimes a second operator will read the data out loud from the original document to the first operator, who checks on screen that the entries match. This is particularly useful for numerical data, as it is notoriously easy to make keying in errors with numbers and these cannot be spotted just by proofreading, whereas spelling or grammatical errors, or words missed out or repeated, will be noticeable.
Spell Check and Grammar check
Word will automatically check for spelling and grammar errors as you type unless you turn this feature off. Spelling errors are noted in the document with a red underline. Grammar errors are indicated by a green underline. To disable this feature, select Tools|Options from the menu bar and click the Spelling and Grammar tab on the dialog box. Uncheck "Check spelling as you type" and "Check grammar as you type", and click OK.
To use the spelling and grammar checker, follow these steps:
-
Select Tools|Spelling and Grammar from the menu bar.
-
The Spelling and Grammar dialog box will notify you of the first mistake in the document and misspelled words will be highlighted in red.
-
If the word is spelled correctly, click the Ignore button or click the Ignore All button if the word appears more than once in the document.
-
If the word is spelled incorrectly, choose one of the suggested spellings in the Suggestions box and click the Change button or Change All button to correct all occurrences of the word in the document. If the correct spelling is not suggested, enter the correct spelling in the Not In Dictionary box and click the Change button.
-
If the word is spelled correctly and will appear in many documents you type (such as your name), click the Add button to add the word to the dictionary so it will no longer appear as a misspelled word.
As long as the Check Grammar box is checked in the Spelling and Grammar dialog box, Word will check the grammar of the document in addition to the spelling. If you do not want the grammar checked, remove the checkmark from this box. Otherwise, follow these steps for correcting grammar:
-
If Word finds a grammar mistake, it will be shown in the box as the spelling errors. The mistake is highlighted in green text.
-
Several suggestions may be given in the Suggestions box. Select the correction that best applies and click Change.
-
If no correction is needed (Word is often wrong more than it is right), click the Ignore button.
AutoCorrect
Word automatically corrects many commonly misspelled words and punctuation marks with the AutoCorrect feature. To view the list of words that are automatically corrected, select Tools|AutoCorrect. This may be a hidden feature so click the double arrows at the bottom of the Tools menu listing if the AutoCorrect choice is not listed.
Many options including the accidental capitalization of the first two letters of a word and capitalization of the first word of the sentence can be automatically corrected from this page. If there are words you often misspell, enter the wrong and correct spellings in the Replace and With fields.
Correctness and Proofreading
Correctness means checking data to ensure that’s it is meaningful. It is perfectly possible to use all the verification techniques and still make error.
If an error is suggested in both spelling and grammar check, it is probable but not definite, that you have made a mistake. You need to look at the mistake and decide what the correct version is.
You must proofread (To read copy or proof for purposes of error detection and correction) your documents for errors, first on the screen and then on the printed copy. Once the data has been entered into the computer, none of us is keen to have to read it all again. Often our thoughts and ideas run faster than our fingers can type, so words are omitted or repeated, or the same sense is muddled and can be improved with minor changes.
After you have proofread your document on screen, you should print out a hard copy and do your final proof on paper. This is because reading on a screen and reading from a piece of paper is different, you may see errors on the paper that you didn’t catch on screen. Even if you are sure there are no errors, it may be useful to have your work re—read by ‘different eyes’: the eyes of your parent/guardian. When you created the document it was very much through your own eyes, so having it reread by someone else is a chance to see the impact and effectiveness of your work on them. There may be no errors as such, but perhaps someone else can show you a more effective or more interesting way to get your message across.
When you are proofreading, look for errors in these three main categories:
• Typos’ Misspelt words,
punctuation errors,
wrong numbers, repeated
words or phrases.
• Layout errors Text, numbers or
graphics in the wrong
place (including captions
and headings), incorrect
line spacing, and missing
items.
• Wrong fonts Mistakes in how you
have used font styles,
sizes, bold, italics,
For important documents it’s best to read your work several times, each time focusing on one of the areas above.
You may also find basic proofreading symbols useful, especially when you’re producing documents as part of a team.
These are the common proofreading symbols:
Back-up
Taking a back-up of the data from the hard disk drive of a computer or from the hard disk of a server running a network is vital. One certain fact is that a hard disk drive will not run forever. If a back-up is taken at the end of each day, then the most that can be lost is one day’s work.
There are many reasons for why people should create backs-up of all data they produce.
Here is some common one:
- Hacker – if a hacker breaks into your network, he has the power of deleting valuable data.
- If your computer is infected with a virus then there is a possible that data will be deleted depended on the virus.
- If your computer crashes and breaks and is need to be restored all data will be lost.
- If an accident happens and your processor is the damage you lose data as you may need to get a new processor, depending to the accident.
Here are three ways to avoid loss in data.
Often special tape streamer units are used which saves the data onto magnetic tape cassettes. These cassette tapes can typically hold up to 26 GB of data allowing all the data on the server’s hard drives to be backed up. A number of tapes should be used in rotation so that a back-up copy can always be kept away from the premises.
These tape back-ups should be kept away from the original data, in another building or on another site. Businesses may encourage office staff to take back-up tapes home with them so that data will not be lost through theft from the offices. Tapes kept on-site should be deposited safely each evening in a fireproof safe.
You can save work on your inbox, or if you have to e-mail addresses you can send data from on e-mail to the other.
The advantages of this are:
- That the only possible way you can loss the data is by having your account shut down.
- You can access your data from any computer that has internet access.
Disadvantages are:
- There is a limit on how much data you can have on your account.
This is how you can save information on your e-mail account.
- Go to your e-mail provider and sign-in
- Go to create mail
3. Then start to fill in the e-mail. (Images are shown on page 10)
To send an e-mail to yourself, type your e-mail address in the ‘To’ box and ‘Cc’ (carbon copy).
4. To get your data in a in an e-mail you need to attach it. NB you can only attach a limited amount of data. This again varies from different e-mail providers. This may not even apply to some e-mail providers.
5. Find what you what to attach and press attach.
6. You can now send this.
This is the most common way to store data, preferable documents as it holds 1.4 megabytes of information and it is very easy to save and load from a floppy.
Loading on a floppy disk
- Go to the A drive in My Computer.
2. Double click and go in.
3. Click on the documents you want and open them.
Saving
The there are many ways in which you can save data.
I find saving by cutting/copying and paste through My Documents is the easiest way.
1. Find the data you want and cut/copy and paste it into your Floppy drive.
2. Then go to your floppy drive and paste it in there.
Page Size and Orientation
Change the orientation page within the Page Set-up dialog box.
Select File|Page Setup and choose the Paper Size tab.
Select the proper paper size from the drop-down menu.
Change the orientation from Portrait or Landscape by checking the corresponding radio button.
Paragraph Attributes
Format a paragraph by placing the cursor within the paragraph and selecting Format|Paragraph from the menu bar.
Page Margins
-
The page margins of the document can be changed using the rulers on the page and the Page Setup window. The ruler method is discussed first:
-
Move the mouse over the area where the white ruler changes to gray.
- When the cursor becomes a double-ended arrow, click with the mouse and drag the margin indicator to the desired location.
- Release the mouse when the margin is set.
-
The margins can also be changed using the Page Setup dialog box:
-
Select File|Page Setup and choose the Margins tab in the dialog box.
-
Enter margin values in the Top, Bottom, Left, and Right boxes. The Preview window will reflect the changes.
-
If the document has Headers and/or Footers, the distance this text appears from the edge of the page can be changed.
-
Click OK when finished.
Headers and Footers
A header is text that is added to the top margin of every page such as a document title or page number and a footer is text added to the bottom margin. Follow these steps to add or edit headers and footers in the document: Select View|Header and Footer from the menu bar. The Header and Footer toolbar will appear and the top of the page will be highlighted as shown below.
-
Type the heading in the Header box. You may use many of the standard text formatting options such as font face, size, bold, italics, etc.
-
Click the Insert AutoText button to view a list of quick options available.
- Use the other options on the toolbar to add page numbers, the current date and time.
-
To edit the footer, click the Switch Between Header and Footer button on the toolbar.
-
When you are finished adding headers and footers, click the Close button on the toolbar.
Formatting Text
The formatting toolbar is the easiest way to change many attributes of text. If the toolbar as shown below isn't displayed on the screen, select View|Toolbars and choose Formatting.
-
Style Menu - Styles are explained in detail later in this tutorial.
-
Font Face - Click the arrowhead to the right of the font name box to view the list of fonts available. Scroll down to the font you want and select it by clicking on the name once with the mouse. A serif font (one with "feet" circled in the illustration below) is recommended for paragraphs of text that will be printed on paper as they are most readable. The following graphic demonstrates the difference between serif (Times New Roman on the left) and sans-serif ("no feet", Arial on the right) fonts.
-
Font Size - Click on the white part of the font size box to enter a value for the font size or click the arrowhead to the right of the box to view a list of font sizes available. Select a size by clicking on it once. A font size of 10 or 12 is best for paragraphs of text.
-
Font Style - Use these buttons to bold, italicize, and underline text.
-
Alignment - Text can be aligned to the left, center, or right side of the page or it can be justified across the page.
-
Numbered and Bulleted Lists - Lists are explained in detail later in this tutorial.
-
Increase/Decrease Indent - Change the indentation of a paragraph in relation to the side of the page.
-
Outside Border - Add a border around a text selection.
-
Highlight Color - Use this option to change the color behind a text selection. The color shown on the button is the last color used. To select a different color, click the arrowhead next to the image on the button.
-
Text Color - This option changes the color of the text. The color shown on the button is the last color chosen. Click the arrowhead next to the button image to select another color.
The Font dialog box allows you to choose from a larger selection of formatting options. Select Format|Font from the menu bar to access the box.
Bulleted and Numbered Lists
Click the Bulleted List button or Numbered List button on the formatting toolbar.
Type the first entry and press ENTER. This will create a new bullet or number on the next line. If you want to start a new line without adding another bullet or number, hold down the SHIFT key while pressing ENTER.
Continue to typing entries and press ENTER twice when you are finished typing to end the list.
Use the Increase Indent and Decrease Indent buttons on the formatting toolbar to create lists of multiple levels.
NOTE: You can also type the text first, highlight the section, and press the Bulleted List or Numbered List buttons to add the bullets or numbers.
Nested Lists
To create a nested list, such as a numbered list inside of a bulleted list, follow these steps:
Type the list and increase the indentation of the items that will make up the nested list by clicking the Increase Indent button for each item.
Highlight the items and click the Numbered List button on the formatting toolbar.
The bullet image and numbering format can be changed by using the Bullets and Numbering dialog box.
Highlight the entire list to change all the bullets or numbers, or
Place the cursor on one line within the list to change a single bullet.
Access the dialog box by selecting Format|Bullets and Numbering from the menu bar or by right-clicking within the list and selecting Bullets and Numbering from the shortcut menu.
Select the list style from one of the seven choices given, or click the Picture... button to choose a different icon. Click the Numbered tab to choose a numbered list style.
Paragraph Borders and Shading
1. Click anywhere in the paragraph of interest. Click on the Format option on the Menu Bar
2. Choose the Borders and Shading option.
3. On this menu first choose the Borders option and set your preferences for :
Setting: which is the type of border
Style: which is the line style for the border
Colour: the colour of border, and
Width: the width of the line of the border.
The Options button lets the user set the distance of the border from the top, bottom, left and right margins of the text.
4. The Shading option allows the user to set the background colour for the text using the Fill option. The Patterns option is used to specify a pattern of the background colour.
Evaluation
I have made a portfolio showing 6 documents, which I have produced, on my own. For 2 of my documents I have made comparisons with other business organisation. I did the comparing based on most common features of the document.
I showed of to keep documents as accurate as possible by spell check, grammar check and proofreading.
I showed the different ways in which you can enhance your work and also the different methods of backing up your data.