-
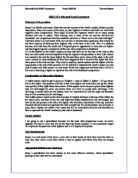
Formatting and conditional formatting are very important in making the spreadsheet easier to read and understand. Like I said above, you could use colour to make certain data stand out, different font designs, sizes, or by making it bold, Italic, or underlined.
Here is an example of “conditional formatting”, which you can see below:
Above you can see that all the months are formatted in the colour violet, the different terms e.g. summer, winter, and spring are all purple. The reason for this is because it makes it clearer and easier to understand. It will be quicker for the person using the spreadsheet to look up information. It is also very useful if lets say a group of people owed the school money; you could format them in red. I have also made it clearer to read by spreading out the information and making the titles bold etc….
- The “copy and paste” tool is also accessible in a spreadsheet along with “cut”. This can save you from having to delete a huge portion of work and then having to write it out again only this time in different cells. Like other software’s on a computer you can also save your work and use the “undo and redo” tool. This saves a huge amount of time, and makes it less stressful! Lastly you can save and delete the data, making it easy to make changes. Once you are trained and happy with using excel then you can learn about using other tools that will make your spreadsheet look more professional.
Design of the ICT system
Example 1.
Create new school record
Collect finance data Enter finance data Print off spreadsheet
Give head of department
data-capture form Load spread sheet check printer for paper
Head of departments Create new cell Print preview
Complete data capture form
Enter new data Print spreadsheet
Example 2.
Data capture form
Yes Error on form?
Completed by head of
department
No
Input by bursar Visual check of form
Validation Display error message
No
Valid?
Yes
New standard letter for each Mail merge
department
Letter to head of
department
Hardware Resources
For my solution I suggest that you use what’s known as a network. This involves a hub, a server, a modem and cabling. The server is a very big and powerful computer, and is the centre of the network. Without it, there would be less security, and no way of checking logging on passwords. The hub is a machine, which allows multiple connections to the server. Meaning it connects large numbers of computers together without all the hundreds of cables joining into the server.
The modem is what connects the computer to the Web. The bursar’s computer will be the only one that will have the modem as it connects single computers to the web via cabling plugged in to a switch. Without this system the Bursar’s computer will not be able to access the web. For my solution it is not absolutely necessary to include a router, but sometimes you might find that it will come in use.
Finally you will need cabling, which will join each computer to the server and hub via a cable. This will enable the Bursars department to access all the data from the server.
Obviously computers are going to be needed and I suggest desk tops PC’s instead of Laptops because they are easier to use in a network. The computer is the base of this solution as it contains the Excel software. A printer will come in handy when the spreadsheet needs to be printed. For example, if the data got so big that it took up too much storage space in the computer then it can be stored in a file, once printed. Scanners are also a great help when information on paper needs to be scanned onto the spreadsheet, or another file.
Below is a table showing the type of computer hardware that I suggest the school should use. I have also listed the reasons why I suggest this hardware along with their specifications:
Software Resources
For this solution for the bursar’s problem I have suggested to use the software Excel. It is a powerful spreadsheet, which fulfils our needs. It is reliable, known by many users, offers all the facilities we need as mentioned in the Specification part of the write-up above.
To allow the server to work, it is gong to need specific operating system. Windows NT4 is a more powerful operating system required to run a network, rather than using windows 98, or 95, and each Pc will have windows XP Pro. Office is the main software needed as it contains excel, word, outlook and PowerPoint. I am suggesting outlook because it is a very useful organiser. The bursar will be able to keep track all of his appointments etc.., Word enables memorandums to be sent to teachers and excel is the spreadsheet software which will contain and keep track of all the data the school has collected, in a quick and efficient way.
Data collection
Heath Mount School
Watton-at-stone
Stevenage
Herts
Tel: 01438 856734
e-mail
Department
Textbooks £
Videos/Cassettes
Computers etc
Equipment: Please specify
Photocopying estimate for year
Staffs travel
Staffs training
Subscriptions
Field trips/Visits etc
Any other requirements
£
I chose this particular layout in my data capture sheet because it makes it clear and professional. The bold text makes the important data stand out, and the dotted lines look neat, but also are there for a rough guideline on where to write down the information. Above I have used the schools logo, and down loaded from the web () different letters for the beginning of the schools name. This looks smart and proficient. I have also added the schools address, telephone number, and e-mail address. Most professional letters from companies or big businesses would look something like this, and I wanted to try and get this effect with my data capture sheet.
Data Validation
Data validation checks that the data of the right type. The computer can perform validation automatically whilst the data is being entered. There are four main validation techniques.
Range check: This checks that the data is within specified range e.g a person’s month of birth should be a number between 1 and 12
Presence Check: This makes sure that important information has actually been entered.
Check Digit: This checks that numerical data has been entered accurately. The final digit of a number is determined by a formula that uses all the previous digits. So if the numbers been entered incorrectly, the digit will be wrong.
Data type check: This checks that text hasn’t been put where numbers are needed, as an example.
Above you can see that where I have typed in the formula for cell d7 it has come up with #NAME? This shows me that the data I have used is not correct. Instead of typing =SUM(B7multiplyC7) I should have put =SUM(B7*C7). The spreadsheet recognises that “multiply” is incorrect, but if I used “*” then it will understand that I am asking it to multiply B7 by C7 and will calculate the data and give me a numerical answer.
Below you can see that I have corrected my mistake and replaced it with the correct formula and it has given me a correct answer.
I have also shown another type of mistake below. You can see that in C12 I have written in “one hundred and twenty” as text instead of numerically. The spreadsheet has spotted my mistake and come up with #VALUE! in cell D12.
Below you can see that I have corrected my mistake by writing 120 numerically, and the spreadsheet sees it as correct.
The reason why the above shows one with #NAME? and one with #VALUE! is because when the #NAME? error value occurs Microsoft Excel doesn't recognize the text in a formula. When the #VALUE! occurs it means that the wrong type of argument or operand is used, or the Formula AutoCorrect feature cannot correct the formula.
Data verification
This is a different process that the computer uses to ensure that all the data entered is correct and accurate. It checks that old data is the same as new data. There are two different techniques and processes of verification, which takes place.
- Proof reading- this is when somebody reads out aloud the data entered onto the system and then compares that data with the original data. Then if the person finds any different data they can easily edit and correct it.
- Double entry- this is when data is actually entered twice by two different people. The computer is then given the job to compare each one and find any differences of the two. Any errors found will be corrected which will make the spreadsheet more accurate as the bursar will know for sure that it is correcting mistakes.
There are a couple of problems with verification as double-entry is very time consuming and expensive, and proof reading doesn’t necessarily eliminate human error which also makes it time consuming.
Data Structures
In my spreadsheet all the numerical data was formatted as currency with two decimal points. The reason why I chose to use this formatting is because currency is more commonly used in spreadsheets and the decimal point makes it clearer to read. Most people use this sort of currency format for finance sheets such as this one with St Mary’s school, however the accounting format aligns the numbers and currency perfectly under one another making it clearer to read. Accounting is a more professional way of setting out numerical data, and does make is clearer to read, however for the business I am doing it is better to use currency.
Here is an example of currency formatting and accounting formatting:
Above is a screen dump showing how to format the cells on your spreadsheet. You can see that I have used currency, and 2 decimal places.
Currency Format:
Accounting Format:
Obviously to determine my numerical data, I need to have some form of formula that I could use to calculate the numbers.
- The formula I used for adding three pieces of unique data would have been =SUM(B39,B26,B17) as an example. Here is a screen dump below to show this.
-
To multiply data I would of done something like this =SUM(B4*C4), as an example. Here is a screen dump below to show this.
- The formula which I have used to add a group of unique numbers together is =SUM(D16:O16) as an example. Here is a screen dump below to show this.
- The formula below shows the random generator. You can see that I have typed in =RANDBETWEEN(10,10000) this will give me a random number between 10 and 10000. Every time I close the window, the number will change. Here it is £9,430, but as soon as I close the window the number will change to something else.
Output Format
I have decided to print out my spreadsheet in landscape format. The reason why I have done this is because it makes it easier to see all the data, as the spreadsheet is formatted in a way that fits more data in landscape form. Below is a screen dump showing how I could have changed it to Portrait or Landscape. If I wanted to I could also adjust the magnification and try to put all the data on one page.
I have gone into Page set up and clicked on the “page” tab. below the subtitle “Orientation” it shows Portrait format or Landscape portrait. You can see that I have used Landscape.
I have formatted my cells like the screen dump below to make it clearer to read. The colour formatting that I have used makes it easier to pick out specific data, and does this by separating it out.
- I could have also used grid lines to make my data stand out more. Here is a screen dump below to show how I would have gone about doing this:
I have gone into Page set-up and clicked on the “sheet” tab. You can see just below the sub title “print” there is a tick box with the word Gridlines next to it. By clicking in the box, it shows up the gridlines once printed, making it look clearer. I have also got a tick in the tick box next to “Row and column headings” so that it portrays the cell numbers on the side, and their headings.
Below is a screen dump of what my Expenditure spreadsheet would look like once it has been printed. You can see that it has got all the cell headings, and numbers on the side.
-
Finally using “comments,” (which I mentioned in specification) enables you to understand what each cell and its contents means but by looking professional at the same time. If the mouse is not resting on the comments it will hide them and only show a small red triangle when they are not needed, but if you wanted to print out your spreadsheet with the comments showing then by simply selecting “view” and then “comments” it will show all of them at the same time, pointing at the correct cell. To see how it’s done see fig 1, and to see the end result see fig 2 below fig 1.
Testing
It is always very useful to actually know if your spreadsheet is working otherwise it is a complete waste of time and money. I will know if it is working by using what’s known as the random generator. This will make the number random meaning it will change each time you close the document.
For example if I put in cell G13 =RANDBETWEEN(10,1000) the number will constantly change each time the window is closed but only in the borders of 10 and 1000. In this example below you can see that cell G13 has got a number £1,203. If my spreadsheet was working correctly then this number will change each time I close this document.
Once I closed this spreadsheet and opened it up again I found that my cell G13 had changed from £1,203 to £1,796. I am now satisfied that the Random Generator is working
I would also know if my spreadsheet was working by making sure that the calculations are all correct and change when needed to. We will be able to see this if the balances change accordingly. For example if we had a mass of new girls then the balances would change. Below is a screen dump of the original spreadsheet and another spreadsheet containing changes:
Original spreadsheet:
Altered spreadsheet:
User Documentation
My solution is operated on a network, and to access the network and find the data on the spreadsheet you will need to follow these step-by-step instructions
- Log on to the Heath mount’s school network. The I.C.T department will issue your username and password to you.
- Part of the desktop you see is shown below.
This is a screen dump of a shortcut to the “Heath mount Finance Package” where you will find the spreadsheet containing the schools data.
- Double left click on the Heath mount Finance package and this will launch the spreadsheet package.
Once you have successfully got into the spreadsheet you will find that in the bottom left hand corner of the spreadsheet there are 4 tabs each with their own title. These are different work sheets, which contain various data for the school. If you select each tab they will come up with different work sheets showing certain bits of data.
Money school Money school spends Money school gains or loses graphical representation
gains of balance
- To enter data into the Income worksheet you select cell B7 and enter the new fee for boarders. See fig below
- Above I have selected cell B7 and entered the new data for fees for boarders. I have typed 5525 and because the spreadsheet is set as currency it automatically changes the number to £5,525
- To enter new data for number of pupils, you need to select cell C7 and type in 230-see fig below. You can see that the cells containing fees for the winter term, Total # of students and annual total have been entered automatically saving you from having to do it.
- To insert comments is a very useful way of understanding data in each cell. Here is how to do it:
- Select the cell in which you would like the comment to be in and then select insert comment. See figs below
-
2.
Here you need to enter the data
explaining the cell
- To insert columns you need to right click the column next to the place where you want the new column and select “Insert”. See figs 1 and 2 below showing how to do it, and the result
- 2.
- To insert rows you need to right click on the number on the side to where you want the new row and select Insert. See fig 1 on how to do it and fig 2 with the result.
-
- It is always very useful when you know how to use a graph. This enables you to see the results of your spreadsheet in an easy way.
- Below is an example of how you can do this.
- Firstly you need select “Insert chart” and a dialogue box will come up. See fig below
- Above on the left hand side is a selection of different chart types that you could use and on the right is a selection of different chart sub-types.
- Once you have selected your choice you must then click on “Next” where there will be more instructions on what to do.
- Follow these instructions and you will get a chart that is suited to you on your screen.
- Below are three screen dumps of the tools that you will find in excel, which you can use to change your spreadsheet in any way. Here are some examples of what you could do.
If you want You can merge or You can change the
If you want to to make your centre the data colour of your font
Change the font, and font bold, Italic
The size Select arrows Or underlined
You can sort the data Here you can select
You can cut, copy and ascending or descending a graph
Paste your work
- To save your Spreadsheet you need to follow these instructions.
- Select “File” and then “Save”
- To print your spreadsheet out you need to follow these instructions.
- Select “File” and then “Print”
2. A dialogue box will appear on the screen asking what printer you want to use, the number of copies you want to print and which pages you want to print. See fig below
Evaluation
To evaluate I am fairly confident with my spreadsheet. I think it has worked well, and it seams to be checking and correcting any mistakes I made. I can see this when it comes up with errors like #VALUE! Or #NAME?. I like the way I have set out my design, and the colours I have used. This portrays the spreadsheet much clearer so that when looking for specific data it is easy to do. See fig below
I have also used lots of comments so that when you look back at the data on the spreadsheet the comments are there to explain what each cell means. I have liked the way I used the random generator, so that I know if my spreadsheet is working and also so it will give me random numbers so that my balance will change. I like the way I have set out my spreadsheet by having four different tabs each containing a different worksheet with dissimular data. See fig below.
Money school Money school spends Money school gains or loses graphical representation
gains of balance
All of the data wont actually fit onto one sheet any way but by using different sheets for specific data it makes it much clearer and more organized.
I set a time limit to complete my task, which was 2 weeks and I did it in about a week and a half, which I am pleased about because it didn’t take me as long as I thought. I didn’t waste any time completing my task but got the data that I needed quickly and efficiently.
I have also included three different spreadsheets only the data is slightly altered in two of them making the balances and the graph change. This helps me see that my spreadsheet is working.
I am pleased with the Excel programme in which I have used because it is very well known and training people to use it will hopefully not take too much time. It is an updated version so there is plenty of memory for all the data needed and for much more.
There are a few disadvantages with my spreadsheet and that is I didn’t include my “outings or Internet fees” in my expenditure as well as my Income. With both of these examples, the parents are paying for them, however the money for it is also going out in expenditure as the school pays for the Internet connections to the company etc… I could have also had more worksheets, which would separate my data out further into categories making it even more organized.
In general I am pleased with my spreadsheet. If I could go back and change a few minor details I would however they are not completely relevant.