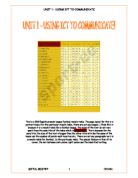
Software Detail-
Word processors and desktop publishers (DTP) have very similar features. Word processors have many new features, which used to be found only in desktop-publishing software.
Word Processors-
- Word processors are designed to be used for writing letters, memos, essays, reports, books and any kind of document where a large quantity of written text can be found. Text automatically ‘word wraps’ from the end of one line to the next, without having to press the ‘Return key’.
- Editing is easy in a word processor: you can easily change text by moving, inserting and deleting.
- Formatting text, which is changing the layout or the way text looks, is also easy. Examples are changing the style of the font (making letters bold, underlining, making text italic) and aligning or justifying text.
- Thesaurus and spellcheckers are other common features found in word processors.
- It is also possible to insert pictures, tables and many other types of objects besides text, but the software is not able to provide the flexibility in controlling these that desktop-publishing software can.
Desktop publishers-
- Desktop publishing is used for all type of printed material where the layout of different items is important. Examples are posters, business cards, leaflets, newsletters and banners.
- Every item in a desktop publishing appears in its own frame or box. For example, text appears in text frames and pictures appear in picture frames.
- Frames can be layered, so that items can be put over the top of each other. If the items are made semi-transparent, then it is possible to see several items, even though they are in the same position. An example is placing a text item over the top of a picture so that the picture can be seen.
- Items can be rotated and flipped to give even further flexibility in placing items on a page. Although these features are also available in some word processors, there are the limitations in using them compared with the desktop-publishing software.
- All editing and formatting features can be found in desktop publishers, and you can also spell check each frame separately.
- Each text frame can be linked to another for continuation, and sometimes if you put too much text inside a frame, the software will create a new frame for you.
Chosen Software-
My chosen software for this task is publisher, because it can provide me was a range of different features, Desktop publishing packages. A word processor is not always the best package to use to produce a document. If more control over the layout of a page is required or the document is to include many graphics, then a desktop publishing package such as Microsoft Publisher would be more suitable. Desktop publishers are often used to produce newspapers, magazines and leaflets.
Desktop publishing tools-
The main advantage of desktop publishing is that it is frame based. Text and picture frames can be laid out on the page, and moved and resized if necessary. Images can be imported from clip-art libraries and other software. The view of the page is WYSIWYG (what you see is what you get). Text can be imported from word processing software. Graphics can be imported from a scanner, a digital camera, a graphics package and clip art libraries.
Implementation Plan-
- Make the page landscape.
- Add page guidelines.
- I am going to add the hamster picture on the front page from file given.
- I am also going to add another hamster picture on the middle page from file given.
- I will insert the text needed for the middle page.
- I will then add my title on the front page and centre it.
- I will add the surgery details on back page.
- I will then format the text in the middle page, so it can be easier to read and identify the source you are looking for.
- I will then do the same for the back page.
- I will add a blue border for my title on the front page.
- Also for my basic text entry, I will put a light blue border around.
- The back page will have a different variety of borders such as one of them having a red border, which is for out of hour’s emergency.
- I will then add a gradient background to suit my hamster leaflet for the front page, middle page and for the back page.
Implementation-
Version 1-
This is the first version and had the selected files, imported.
The following information has been added for this Version:
Front and Back cover contents-
- Picture of a hamster. Imported from the shared files.
- Page has been turned to landscape. Click on file, page set up then change portrait to landscape.
Middle pages contents-
- Picture of a hamster. Imported from the shared files (same as the front cover).
- Information on ‘How to look after your hamster’. Imported from the shared files.
-
Picture had just been placed roughly in the centre of the page.
Version 2-
All the previous contents but with the surgery details added. Imported from the shared files (back cover).
The following information has been added for this Version:
Front and Back cover contents-
- Title inserted from word art. Formatted so it looks striking to the user.
- Surgery details on the back cover. Imported from the shared files.
- Margin has been added. This is so that one-page statistics will not disturb the others (however, it is not viewable on the printouts only on the screen).
Middle pages contents-
- Sub-headings had been bold, so it stands out to the user.
- 1 cm gap between the text and the picture. Right-click on the picture then picture properties then change the page distribution to 0 cm to 1cm. This is so that the text does not overlap the picture.
Version 3-
All the previous contents but with extra design features added. This is so that it looks excessively conspicuous.
The following information has been added for this Version:
Front and Back cover contents-
- Title had been changed. The previous one was just to plain and does not have any effect to the user. The new one is laid out in two lines and has an immediate result to the user.
- Surgery details has its own single transformation of formatting. The main heading has an aqua border, medium-lined. Stands out to the user.
- The details itself has aqua border but with a small line. Stands out to the user.
- Weekend surgery text, has to be prominent. As it is mentioned in the source booklet. It has an aqua border, thick lined. Because of this, it will be noticeable to the user.
Middle pages contents-
- Sub-headings had been underlined, so it contrasts with the basic text and will be picked up by the user that it is not included in the text.
Version 4-
All the previous contents but with the final changes to be made.
The following information has been added for this Version:
Front and Back cover contents-
- Coloured box added for the title. Blends in nicely with the picture when the user sees it.
- Picture also has a box around it. Suits as, high quality as the picture itself is formed as a rectangle.
- Surgery details all have the same coloured box around it, and the user will take this as that they are all critical information and that’s why there all linked together.
- The details all have the same coloured box around it, and the user will take this as that they are all critical information about the surgery details and that’s why there all linked together.
- Weekend surgery coloured box, has to be imperative, to the normal coloured box. It is much more darker and stands out superior than the others stand.
Middle pages contents-
- The coloured box is added within the whole text. This brings all the text together and makes it look precise whilst inspected to the user.
- Picture also has a box around it. Suits as, high quality as the picture itself is formed as a rectangle. In addition, because it has a gap between the text and picture itself, it makes it look more intriguing.
Final Changes-
The final changes going to be made on this design.
The following information has been added for this Version:
Front and Back cover contents-
- No changes will be made. As it looks stunning to the user already.
Middle pages contents-
- The basic text will be justified. By changing its left-aligned to justified. This will make it look more enhanced then it was previously.
Colour Print-
Advised not to for this particular Task. This is because the printout will differ to what is on the screen.
Testing Plan-
No specific test plan is needed for publishing.
Actual Testing-
No comparison with the testing plan because an order is not given to be carried out.
Evaluation-
Evaluating a publishing solution-
Performance criteria and desired outcomes for how to look after your hamster leaflet-
The leaflet will contain all required details:
I checked that my leaflet contained no mistakes by looking at it and comparing it with the book. The information of ‘how to look after your hamster’ was imported from the shared files. My leaflet has the title at the top. I put it at the top so that it made it easy to move around and made it large so when someone looks at the leaflet they, will know what it is about. I made reasonably conservative use of colour, but it was effective because the colour scheme was consistent for the names- the sky-blue and pale-green matched well with the details of the back page. I kept the same font name for each section, as it would have looked unprofessional if I had kept changing it.
I made a change in division of the page from A4 paper to two A5 sheets. I had to make sure that the picture of the hamster was not distorted, so I shrank/enlarged it by dragging any corners to its relevant size. The surgery details were on the back. This could not be changed academically but physically it can by editing/formatting it. This included things such as opening times) including weekends) and that weekend surgeries are for emergencies only. I had made it stand out, by enlarging it and putting a dominant border so that the reader gets the message loud and clear.
My leaflet was saves as ‘poster template’ in my GSCE ICT folder- I changed its properties to ‘Read-Only’ so I could not accidentally save over it when I later added more features.
The strengths for this software I have found:
- A DTP package lets you lay out pages in any way you want.
- It provides a range of fonts in a variety of sizes.
- Graphics can be put anywhere on the page.
- You could design the page before putting it together.
- The text and graphics can be prepared using other packages then imported into the page.
- Clip-art is available and can be used as ready-made illustrations.
- Various special effects can be produced.
The weaknesses for this software I have found:
- It has complicated features, which are difficult to use.
- Cannot explore the program to find out interior information.
Therefore, I come to the recommendation that the software is very easy to use for creating a leaflet and it does the job very well but with one or two difficulties. As a result, it has a rating of four, for use of this software.