Another important camera function that needed to be considered was Focus, focus is one of the most important functions for the PDX-10 because it enables you to adjust how you want a particular shot to come out whether that would be a blurry shot or whether it would be a clear quality shot it is very helpful as it helps you decide what type of shot you want.
Recording Audio
Before filming it is important to ensure that you have the right audio equipment with you if you need sound, there a few sound devices that were used in my group’s factual documentary such as Radio Mics and Shotgun Mic as those were the most relevant and important microphones we did not use any other microphones.
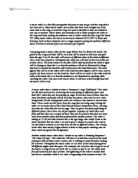
What is the purpose of these microphones? – The purpose of a Radio Mic is to provide anyone in television the ability to talk normally without any wires getting in the way, they are also notably used by anyone in the news industry, this is very helpful because it means that anyone with radio mics on can move around freely. radio mics normally require batteries as they are wireless in order to operate.
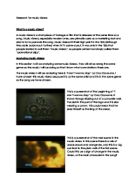
The purpose of a Shotgun mic is to capture good quality sound from within a short distance, the advantage of having a shotgun mic is that it can pick up any other kind of sound that other mics may have forgotten to pick up, Shotgun mics can be attached to a device known as a boom pole, this in many ways is helpful because the longer the pole is the more focused the sound will become so that the audio will be recorded in the right way.
Audio Levels
When filming with the PDX-10 or with any other professional camera it is very important to check your audio levels this is because if you have them set too high then the audio will be rather loud and at the same time would also be rather crackling, it is possible to lower the audio level while editing however this may make little or no difference to the clips recorded and could result in those clips having to be reshot in order to get the right audio level.
If the audio levels are set too low however then this would also be bad because you will not be able to hear as to what is being said while filming and even while editing there is always the possibility that if you adjust the volume levels to a high level while using Premiere Pro then there is a possibility that you still would not be able to hear as to what is being said on the clip that was filmed and may result in having to reshoot the whole clip all over again just so that you can get the audio and making sure that it is set at the correct level.
The Editing Process
Before editing on the factual programme could even begin we first had to open up the editing program that was going to be used in the project, in this case the program that was being used for me and my group’s project was Adobe Premiere Pro CS5.5. Once the program was set up the next thing to do was to consider what format the editing program was going to be set to, normally when Premiere Pro starts up it usually shows you a list of options that you wish to set such as whether you want the project to be set in Standard or Widescreen.
After that we had to capture our footage from the PDX – 10 camera by linking it up with the Apple Mac computer in order to do that though there is a device known as the Firewire cable that was required to capture footage from any camera to Premiere Pro, this means that by connecting the computer and the PDX -10 together that it’s possible to capture the footage from the PDX -10 onto the Mac providing you also have a DV Tape in the camera that contains the footage that is required to be captured. Bearing in mind however because it wasn’t always possible to use the PDX -10 to capture footage and because of that we had to use another device known as the Sony HDV deck, in some cases this was far easier to use because of the fact that it was able to rewind the tapes far quicker than the Sony PDX – 10 itself and also because of the fact that it had a longer lasting battery life than the PDX-10 which meant that I could go through more tapes without having to recharge the device for at least 3 hours.
Once that was done the next required step is to while also using Premiere Pro it was important to make sure what capture format the project as well as the videos would be set at, it could either be DV which is the normal version that is commonly used and doesn’t take long to export or it could be in HDV (High Definition Video) which means the finished project could be bigger in file size but would also mean that it would be rendered and displayed in higher quality while at the same time it could take a longer amount of time to export the finished project.l
The project itself once edited and completed was exported on Premiere Pro and took around 15-20 minutes to render, the file format that it was rendered in was Quicktime Media as that is the common video player used on Macs, despite this however there are other common formats that the project could have been exported in, these formats could have been WMV (Windows Media Video) AVI, MP4 (Mobile Phone Format), MPEG or even FLV, all these file formats are the most commonly used on not just Macs but also PC’s as well this is because they are easily recognised by various media players such as Realplayer or VLC and as a result they can be easily played without any issues.