Precautions
The experiment must be neat, to avoid accidents, also handling the micrometer carefully is important since it can be damaged easily.
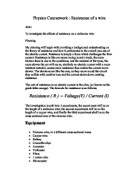
Resistance on the length of a nichrome wire
As I have mentioned earlier, the length of the wire will start from 10cm , and then move increase 10 cm each time in length until we reach 100 cm (1 metre). This range of length is effective enough to give accurate and reliable results, to add to the accuracy we will also repeat each length twice. The constant values, once again are:
- The wire will be nichrome and will stay as nichrome
- The voltage
- Cross sectional area
- Room temperature
1. I attach the nicrome wire to the metre ruler, and also wrap it round screws at both ends of the ruler, with pliers, and make sure that it is tight.
2. I will need to calculate the resistivity of the materials later on, so I will need to find out the cross sectional area. To do this I will measure the diameter at 5 different points of the wire for a better average , and then calculate the cross sectional area.
3. Now the circuit must be built, it will contain three batteries, an ammeter, a voltmeter, and a few crocodile clips to attach the wire with. The crocodile clips must me attached at each end of the battery , positive and negative. The wire which is connected to the negative end of the battery (wire A) will be connected to the ammeter, the exiting part of wire A, coming out from the ammeter will be connected to the nicrome wire depending on what length we wish to test.
4. Repeat step 3, except the wire on the other side of the circuit will not be connected to a ammeter, this wire (wire B) will be connected to nichrome wire also depending on what length we wish to test.
5. The voltmeter shall be placed at the bottom of the circuit, and 2 wires will be attached to wires A and B.
6. Now I will move the crocodile clips along the nichrome wire, beginning with 10 cm, I will record the current and voltage. And then move the crocodile clips a further 10 cm, until I reach a metre, after this is done, I will stop the experiment for a minute and then repeat this whole process to get 2 sets of results for greater accuracy.
7. For the resistance I will simple divide the voltage by the current
R = V / I
Length of a copper wire
As I have mentioned earlier, the length of the wire will start from 10cm , and then move increase 10 cm each time in length until we reach 100 cm (1 metre). This range of length is effective enough to give accurate and reliable results, to add to the accuracy we will also repeat each length twice. The constant values, once again are:
- The wire will be Copper
- The voltage
- Cross sectional area
- Room temperature
1. I attach the Copper wire to the metre ruler, and also wrap it round screws at both ends of the ruler, with pliers, and make sure that it is tight.
2. I will need to calculate the resistivity of the materials later on, so I will need to find out the cross sectional area. To do this I will measure the diameter at 5 different points of the wire for a better average , and then calculate the cross sectional area.
3. Now the circuit must be built, it will contain three batteries, an ammeter, a voltmeter, and a few crocodile clips to attach the wire with. The crocodile clips must me attached at each end of the battery , positive and negative. The wire which is connected to the negative end of the battery (wire A) will be connected to the ammeter, the exiting part of wire A, coming out from the ammeter will be connected to the nicrome wire depending on what length we wish to test.
4. Repeat step 3, except the wire on the other side of the circuit will not be connected to a ammeter, this wire (wire B) will be connected to nichrome wire also depending on what length we wish to test.
5. The voltmeter shall be placed at the bottom of the circuit, and 2 wires will be attached to wires A and B.
6. Now I will move the crocodile clips along the Copper wire, beginning with 10 cm, I will record the current and voltage. And then move the crocodile clips a further 10 cm, until I reach a metre, after this is done, I will stop the experiment for a minute and then repeat this whole process to get 2 sets of results for greater accuracy.
7. For the resistance I will simple divide the voltage by the current
R = V / I
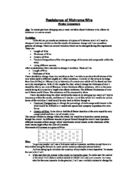
Resistance, of differing cross sectional areas
This is the final experiment, I have already tested the effects of resistance on lengths, of 2 different materials, I shall now test the effects of resistance, on the cross sectional area of the nichrome wire.
The constant values are as follows:
- The wire shall be nichrome
- Length of the wire, it shall stay at 50 cm.
- Room temperature
- The voltage
- The wires with different cross sectional areas, will stay at the constant length of 50 cm.
2. The diameters of the wires may not be perfect , so as before in the first experiment, the diameter is found at 5 points in the wire, by every 20 cm. I will do this by using the micrometer and the purpose of this is to give us an average. With the average I shall then calculate the radius and then with the radius I shall calculate the cross sectional area.
- I then repeat the steps made to build the circuit as was done earlier, and then slide the wires against each nichrome wire to keep the length as 50 cm for each wire. I will stop the experiment for about 30 seconds for each wire to keep a fair test.
- With the results I shall calculate the resistance using the forumula used earlier.
Prediction
Length of the Nichrome wire:
I predict that the longer the wire gets, the more resistance the wire shall have, relating back to the background knowledge, the electrons in the longer will collide more, and the shorter the wire gets, the less resistance the wire shall have.
Length of the Copper wire
I predict that the longer the wire gets, the more resistance the wire shall have, relating back to the background knowledge, the electrons in the longer will collide more, and the shorter the wire gets, the less resistance the wire shall have.
Cross sectional area of the nichrome wire:
I predict that the wire with the most cross sectional area will have the least resistance because the electrons will have more space to move, and also vice versa, the wire with the least cross sectional area will have the most resistance.
Obtaining Evidence
Length of the nicrome wire
This is the table for the results of resistance against the length of the nichrome wire, the cross sectional area was 1.11 x 10-06 m2
Results of resistance for the length of a copper wire, the cross sectional area was 3.07 x 10-06 m2
These are now the results for the cross sectional area of the nichrome wire. The average diameter of each wire was taken as follows
1.19 + 1.20 + 1.24 + 1.17 + 1.16 / 5
Average Diameter of wire 1 = 1.19mm
Then we must find the radius, Radius = ½ of diameter
Therefore:
Radius of wire 1 = ½ 1.19mm = 0.595mm
Since the cross sectional area will be measured in m2 I will need to divide the radius by 1000, then use the area of a circle formula , to find out the cross sectional area.
Therefore:
0.595mm / 1000 = 0.000595 m
π(0.000595)2 = 1.11 x 10-06 m2
Analysis
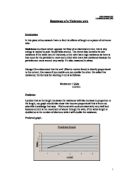
These are the Graphs for each table of resistance.
Conclusion
In my conclusion, I conclude that the wire with the least length had the least resistance, and this is evident from the graph. You can see that at 10 cm the resistance was about 0.10 or 0.11 ohms, also the wire with the longest length had the most resistance which in accordance to graph is at the length of 100 cm and at the resistance of 1.5 or 1.8 ohms . This also applies to the copper wire.
In regard to the cross sectional area, the more bigger the cross sectional area was , the lower the resistance was. From the graph and the tables we can see that at the lowest cross sectional area of 1.0 x 10-07 m2
The resistance was 2.23 ohms.
Evaluation
I think that the experiment was a success, the results were correct in accordance to the background knowledge and also the predictions made at the start
I think the few ways that the experiment could have been improved is a longer wire could have been used, about 2m, also I think that if I were to use different materials the theory would have been more accurate. Checking the wire with the micrometer in 10 different places wouldve also helped. However despite these facts I belive that generally the experiment was successful.