The resistance of an object all depends on what it is made of, by the temperature the object is at and the length and width of the object.
At a given temperature (if constant), the resistance is proportional to the objects length, and inversely proportional to its cross sectional area.
An objects resistance usually increases when the temperature increases. This is because when particles are heated the gain more energy and so the vibrate more. Because they vibrate and move around a lot more it leaves less space for the current to get through so we say the resistance has increased.
As seen above in diagrams 1 and 2, it shows (no. 1) the particles before heating and (no. 2) after heating.
The longer the wire gets the more atoms there will be acting as resistance in the wire and so it will be harder to get the charge through. So in theory when the length of the wire increases the resistance also increases.
If a wire of length 50cm has 100 atoms in it acting as resistance. When the length of the wire is increased to 100cm there should be 200 atoms. It would be harder for a charge of flow to get through 100cm of wire than 50 because the electric current has to dodge and get passed these atoms for the circuit to work.
However when the width of a wire increases the resistance should decrease. This is because there is more room between the particles and so it will be easier for the electrons to get through. It is explained in the diagram bellow.
Thin wire
High resistance
Thick wire
Low resistance
Controlled variables and accuracy
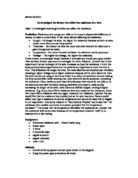
There are three main factors that can affect the resistance of a wire- temperature, thickness and length of wire. As explained earlier on I am keeping the length of wire as my independent variable (factor I am going to change). The two other factors must stay the same throughout the experiment. For example to keep the temperature of the wire constant I will conduct the experiment on the same day during the same lesson. I will do this because the room temperature changes daily. If on Wednesday the whether is hot and sunny I would get different results from when I would finish the experiment on the Thursday when it was cold. This is why I must complete my experiment in the same lesson as in days or even hours the room temperature could change enough to affect my results.
In my trial I will be using both an ammeter and a voltmeter. This will take up 6V from a power pack. I probably wont use this method in my actual experiment, as it does not obey ohms law. Ohms law states that: -
At a given temperature (if constant), the resistance is proportional to the objects length, and inversely proportional to its cross sectional area.
When using a high current like I will be doing for my trial experiment the wire will heat up causing the resistance to increase. This is all because when particles gain energy it makes them vibrate and move around a lot more, which increases the amount of collisions. If there are more collisions then it will be harder for the current to flow through the wire and so it could be said that the resistance is increased. This would be incorrect using this method.
In my actual experiment I will use a multimeter, which has a lower current, and I will leave out the power pack. This will ensure the accuracy of my experiment.
The other controlled variable is the thickness of the wire. I have set out to use 0.3mm width piece of wire but to be sure it is 0.3mm all the way across I am going to use a micrometer. A micrometer measures the thickness of a piece of wire very accurately. I shall pick a few points on my wire and measure them, if one or two are not the same then I will chose a different wire.
Throughout my experiment these will not be the only two things I will have to keep constant to keep my investigation fair. One of the main points is that I am going to have to use the same piece of wire. All different kinds of wire have different resistances and to use different types would confuse my experiment. Like the wire I also have to use the same crocodile clips throughout the experiment and I will have to take the resistance of them first. Different crocodile clips will have different resistances.
I am aiming not to get any anomalous results however if a mistake is made I will correct it straight away, just to thin out the possibility of points all over my graph.
Trial experiment
I had decided that before I conducted my actual experiment I am going to do a trial experiment. I did this so I could test my method and also decide on the thickness of the wire I would use for my actual experiment. To decide what thickness of wire I was going to use I tested two different pieces of wire, one thin one thick. When I analyse my results afterwards I will chose which length to use.
Apparatus diagram
Trial experiment 1 (0.3mm wire)
Trial experiment 2 (0.55mm wire)
After conducting my trial I have decided to use the wire with the width of 0.3mm, as this was the one out of the two that gave me the greatest range of results. From this trial I have decided that I am going to use a range from 0-55cms of wire.
In my actual experiment I will not use the same method as I just did in my trial. I don’t believe my trial was accurate enough as I didn’t use ohms law properly. Ohms law states that: -
At a given temperature (if constant), the resistance is proportional to the wires length, and inversely proportional to its cross sectional area.
However the temperature didn’t stay constant in fact it heated up a lot. This is all because 6V were going through the wire so it heated up. The resistance is increased when it is heated up because the atoms or particles in the wire more around a lot more and vibrate causing more collisions because the heat is giving them energy.
Apparatus
This is this apparatus I will be using for my experiment: -
1 multimeter (set as ohmmeter)
2 cables
2 crocodile clips
1m of 0.3mm thick wire on plank of wood
1 metre long ruler
1 micrometer
Diagram of apparatus
Method
- Set up apparatus. Connect the cables the appropriate way from the ohmmeter. Connect crocodile clips to the ends of the wire.
- Connect the crocodile clips together so that a circuit is formed (measure the resistance of components, to make fair test) record the results.
- Using the micrometer measure the thickness of the wire in three different points. If all results are the same carry on, if not get another wire.
- Connect one end of the 1m long wire to a crocodile clip. Measure 5cm with the ruler and connect the other clip.
- Switch on ohmmeter. Record results
- Disconnect 1 crocodile clip and switch off the ohmmeter. Measure 10cm of wire put clip back on and repeat stage 5.
- Repeat stages 5) and 6) for length of wires: 15cms, 20cms, 25cms, 30cms, 35cms, 40cms, 45cms, 50cms and 55cms.
- Disconnect all crocodile clips and switch off ohmmeter. Repeat stage 2
- Repeat stages 4 and 7.
- Disconnect all crocodile clips and switch off ohmmeter. Repeat stage 2
- Repeat stages 4 and 7.
- Return all apparatus.
- Work our averages for each length’s results.
- Find the actual resistance for the wire.
- Analyse results
Repeat readings
In both my trial and my actual experiment I did repeat readings. I repeat my results three times in my actual experiment in order to gain a good average. If one reading is incorrect due to a number of possible reasons, we can work out an average of three results to eliminate it. We use the average while plotting graphs when looking for things like patterns because the results fit in more.
This is how you find an average: -
Add up all of the results and divide by the number of readings you have obtained. This will give you an average.
Finding the resistance of a wire
In the circuit everything has some resistance. As to not include the resistance of these components we have to measure their resistance first.
In the experiment the resistance of 0cms of wire was 0.4ohms. To find the actual resistance of a 5cm length of wire we subtract 0.4ohms away from the average result (0.8ohms)
Range of readings
In the actual experiment I have decided to do like I said in the trial of 0-55cn in range. I have also decided to go up in 5cm intervals. Therefore I am going to have readings from 0, 5, 10, 15, 20, 25, 30, 35, 40, 45, 50, and 55.
Safety
Safety is always needed when working with electricity and so I need to follow these safety points: -
- Make sure equipment is safe; check all wires for breaks etc.
- Make sure experiment is nowhere near water as electricity will pass through water into you and can result in death.
- Behave in a mature manner
- Act serious
Predication
I predict hat the resistance of the wire will increases as the length of the wire is increased. I believe that my trial and my scientific theory prove this. The longer the piece of wire the more atoms and therefore more collisions. This will be difficult for electrons to go through and so creates a high resistance. I also believe that if you double the length of the wire you double the amount of atoms and collisions, and so there should be double resistance. I believe that my results will prove that length is proportional to resistance.
Obtaining evidence
Analysis of results
Conclusion
It is clear from my graph that the pattern of length being proportional to resistance is correct. Basically whenever I doubled the length the resistance also doubled. This resulted in a straight-line graph.
Looking at this graph it is clear to see that when you increase the wire in length you increase the resistance. This is because the longer the pieces of wires you get, the more atoms and particles that are inside. This makes it more difficult for the current to pass through.
This is exactly how I predicted. I predicted that as the length of the wire is increased so would the resistance. The relationship was proportional too. Overall my prediction was correct.
Evaluation of results
Accuracy
Overall I think that my accuracy throughout the experiment was to the best I could possibly do. I checked the width of the wire, I did the experiment on the same day and I even checked the current in the circuit itself before connecting it to the wire. My repeat readings were also very good I thought and I did not get any bizarre results.
I think I could have been more accurate with the measuring of the wire, but I will discuss this further in my improvements.
Improvements
First of all if I were going to change anything I would change the range of my data. As I measured for 0-55 I got 11 readings (which I thought was very reasonable) if I had more time I may have been able to do more. But I feel in the hours lesson this was reasonable.
I could have also gone up in smaller intervals to give more readings. This would be more accurate and may have further reduced any anomalous results.
Further work
I have only looked at one factor in this investigation, the length of wire. If I were to do this investigation again I could change the thickness of the wire rather than the length. I would need at least 8 different thickness wires going up in equal thicknesses.
I were to carry forward this investigation my controlled variables would be length of the wire and temperature of the wire. I would also have to keep the type of wire constant too. My prediction for this experiment would be that the thicker the wire the lower the resistance.
The controlled variable would again be the resistance as it should be less, as the wire gets thicker.