I made sure that the connections between wires and components was very secure to ensure accuracy.
The micrometer will be used to measure the diameter of the wire therefore allowing us to find the cross-sectional area which will come in handy for further investigation.
Resistivity
Resisttivity is the electrical resistance of a conductor of unit cross-sectional area and unit length. A characteristic property of each material, resistivity is useful in comparing various materials on the basis of their ability to conduct electric currents. High resistivity designates poor conductors.
Resistivity, commonly symbolized by the Greek letter rho, r, is quantitatively equal to the resistance R of a specimen such as a wire, multiplied by its cross-sectional area A, and divided by its length l; r = RA/l. The unit of resistance is the ohm. In the metre-kilogram-second (mks) system, the ratio of area in square metres to length in metres simplifies to just metres. Thus, in the metre-kilogram-second system, the unit of resistivity is ohm-metre. If lengths are measured in centimetres, resistivity may be expressed in units of ohm-centimetre
Method
First I will construct a circuit as shown below. The variable resistor represents the wire.
The first variable that I will investigate will be length.
I will measure the current (I) and voltage (V) for different lengths of wire of the same S.W.G., in this case 26. I will use a piece of wire that is just longer than 1m, to allow positioning of the crocodile clips so that the exact length of the wire used in the experiment can be achieved. I will, as accurately as possible, measure the length of the wire out with the metre rule. I will then decrease the length by 10 cm each time. So I will take 10 readings in total; 100cm, 90cm, 80cm, 70cm, 60cm, 50cm, 40cm, 30cm, 20cm and 10cm. I decided not to go below 10cm so that the wire will probably not heat up enough to have any significant effect on the results. Ten readings should also produce a good graph. Each time I will position the crocodile clips just outside the bounds of the length that I will measure with my ruler. I will then press down the push to make switch hard so as to allow total contact between the metal. I will then record the readings displayed on the ammeter and voltmeter. I have taken precautions that I hope will result in a fair test. I will repeat this experiment again for accuracy’s sake.
I will again repeat the experiment for accuracy’s sake.
During the course of the experiment I ensured that the wire never touched itself, as this would short circuit and hence drastically change the results.
I will then calculate the resistance from these values, using the formula R=V/I.
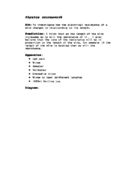
Hypothesis
Length
I predict that the resistance will be directly proportional to the length, this should result in a straight line graph. That is, if the length doubles, the resistance will too, and if the length halves the resistance will also halve. I also predict that short wires will be less resistant than longer ones. The reason that I think this is that resistance occurs when the charged particles that make up the current (electrons) collide with atoms in the material. This produces heat which is why resistors get hot. As the length of a wire increases the number of collisions also increases and therefore the resistance of the wire increases. Obviously, when the length of the wire decreases there are less atoms present in the wire and therefore fewer collisions and this causes the resistance to become lower. This also explains why the resistance increases with direct proportionality.
Extension:-
I predict that as the wire becomes thicker, it will become less resistant. And therefore, thin wires are more resistant than thick ones. This is inverse proportionality, i.e. if the cross sectional area of the wire doubles the resistance will halve and visa versa, if the cross sectional area halves, the resistance will double.
The reason for this is that a thinner wire will have a much smaller cross sectional area and as a result fewer electrons will be able to pass through the wire and the resistance will be higher. Using the same logic, if the wire has a larger cross sectional area, i.e. diameter, then more electrons will be able to pass unhindered through the wire and the resistance will be lower.
I should therefore end up with 3 types of graph.
Resistance in Ohms vs. Length of wire in cm
Resistance (Ohms)
Length of wire (cm)
Resistance (Ohms) vs. Diameter (mm)
Resistance (Ohms)
Diameter (mm)
The last graph was of diameter against resistance, which aren’t directly proportional to each other. However, as I have discussed the cross sectional area is inversely proportional to the resistance. The inverse cross sectional area can be worked out as 1/r², where is 3.14… and r is the radius, that is half of the diameter, of the wire.
This should be a straight line as the two are directly proportional.
The results are displayed on the following pages.
Section O: Obtaining Evidence
I stuck with my original plan, that I detailed in Section P and repeated each experiment. My results proved fairly accurate.
I was careful to show every reading to the same decimal place.
These two tables show my results from both runs of the experiment to investigate the relationship between resistance and the length of a wire.
Test One (Temperature is room temp. ie: 27 C)
Test 2 (Temperature is room temp. ie: 27 C)
Having repeated the readings I can also produce an extra graph showing the length vs. the average resistance. This should give a more accurate graph and help to control any anomalous results.
Section A: Analysing Evidence and Drawing Conclusions
Length vs. Resistance (Test One)
Length vs. Resistance (Test 2)
This is a graph of length vs. average resistance.
( I have used a line of best fit where appropriate).
This graph goes through the origin and is a straight line, thus proving that length is directly proportional to resistance. The line of best fit has been drawn and there are no radically anomalous results. It clearly shows my prediction to be correct. As the length of the piece of wire increases so too does the resistance.
If I say that at 20 cm the resistance is 1.3 Ohms and at 40 it’s 2.7 Ohms, I can then predict that if the resistance is 2.7 Ohms at 40 cm it will be about 5.4 Ohms at 80 cm. My results prove this.
There is however one hugely anomalous result which I will try to explain in the next section.
From these graphs, to sum up:
- The graph of average resistance versus length of wire, it can be seen that the two are directly proportional as it is a straight line, which passes through the origin.
- This is because the longer the wire, the more atoms of the wire collide with the electrons of the current and cause a higher resistance.
- Scientific knowledge that helped was knowing the V=IR formula and being able to make predictions and theories using it.
Section E: Evaluating Evidence
In general I feel that this investigation was a success. I learned or revised much knowledge of circuits and the hands on work, done individually, really helped to aid comprehension.
As I have already noted, my results do support my initial prediction very well. There is however, one very curious result, which is obviously anomalous. It is the 32 S.W.G. in both experiments concerning the diameter. In the first experiment the result was 0.81 A and in the second 0.90 A. Given the general trend in these results, which is downwards; the previous result of the 1st experiment was 0.12 and the 2nd’s was
0.11 A, I think that it is fair to assume that the results probably should have been 0.081 A and 0.09A, both of which would continue the downward trend of the other results.
The most curious thing is that in both experiments, it is the exact same point that seems to be incredibly erroneous. One possible reason for this, and indeed any other slightly anomalous results, is human error. However, it is extremely unlikely that I would have made the same mistake in reading the ammeter.
Another possible reason is that the ammeter I used for the 1st experiment was faulty and therefore it had some kind of a default that caused the spindle to go out of control after a certain point. However, I used a different ammeter for the 2nd experiment - they were carried out on different days. So unless I had the misfortune of using the same defective ammeter on both days, I can see no other plausible explanation for this result. I don’t think that any external factors such as heat could have such a dramatic effect on a result. This, to me, remains a mystery.
My other results, although good, were far from perfect, however, they do adequately show the theory here. I would estimate them to be within about 15% of the actual values that would produce a perfect straight line through the origin, (not counting the anomalous result).
One way of extending this experiment is to investigate another factor/(s), for example voltage or the material of the wire, e.g. nichelchrome (which I used) versus Constantine wire. I feel that my method was quite good, but were I to do it again, I would repeat the experiment with another ammeter and voltmeter as well and I would take more frequent readings for the length experiment. This would produce more accurate results as the values on the graph would be closer together and there wouldn’t be so much area on the graph where I have to ‘guess’ or ‘interpret’ exactly what is going on. I could have made my result more accurate by repeating them even more times, for example 5 times each. Another possible improvement would be to use different lengths of wire at different thickness’ to see how much the length of the wire affected the diameter of the wire.
I believe that my investigation was a fair test, I certainly tried to ensure that it was, but little inaccuracies like reading a millimetre or so out when measuring the length of wire cannot be helped. However, as I mentioned in the planning section, I made sure all connections were tight and was always on the lookout for other more unexpected things that could result in anomalous results later.
Although in this presentation I have only shown the values to 2 decimal places, in many cases I worked more accurately when constructing the graphs – I left excessive decimal points off the tables for the sake of clarity.
Indeed in the graph of 1/cross sectional area vs. average resistance, where there are many decimal points, by nature of the calculation involved, I used the full memory capacity of my calculator, well over 20 decimal points to ensure a fair test and accurate results.
One thing that I would definitely like to do, were I to repeat the experiment again, is to use a brand new cell to ensure that the voltage dropped as little as possible from conditions out of my control, during the experiment.
Of course, as I have note, my results were not perfect, I do not believe you could ever get them to be, even using very sophisticated equipment and trying to foresee all possible problems. However, one other point that I feel I should improve upon, is the handling of the wire. As we were measuring lengths of wire out against a metre rule and cutting it ourselves too, it was difficult to ensure great accuracy, also the location of the crocodile clips, which I tried my hardest to keep constant, would not have always been the same.
I would keep all of my apparatus in a box between lessons so I could be sure that no discrepancy, no matter how small could have been caused by a different cell or connecting wires.
I feel that if I were to do this experiment again, I would carry it out even more successfully and accurately and as a result would achieve better values and graphs. However I do not feel that the conclusion would have been much different, so this experiment will suffice. However, if I was to carry out the experiment again, I would definitely keep an eye out for that mysterious anomalous result!
For the further investigation I could use a table like this to record my results: