However, the real advance came in the form of gas lamps. Developed at the beginning of the 19th Century, these lamps offered high intensity lighting to the theatre that had never before been seen. The gas lamps were also highly versatile in terms of varying light intensity. With a set of valves, you could accurately control how much gas came out of each light, therefore changing the level of light for that lamp. The gas lamp also heralded the birth of the spotlight. Here, a strip of lime was inserted in the mouth of the lamp. The lime burned very brightly, giving a spotlight on the stage. This is where the phrase ‘being in the limelight’ comes from.
However, these gas systems had many shortcomings of their own. As well as being highly dangerous (risk of fire and explosion,) the gas lamps gave off the rather unpleasant smell of burnt gas, something that was not very appealing to the audience.
Stage lighting today
As you can see from the history of this technology, stage lighting has been through many twists and turns to get where it is today. So what exactly happens now? Well, the first key advance is the development of the electric light. This seemingly obvious point has simplified things beyond belief! Instead of running gas pipes all around the auditorium, and creating a huge fire hazard with all that fire, we now have electric cables, and filament bulbs, which are much safer and simpler to install. So, how does the system work? Below is a diagram to illustrate this:
The control desk, or board is the actual interface of the stage lighting system. It can control the brightness of all the lighting channels in the system. A lighting channel is basically one or two lights (or lanterns) that are connected to the system. There are generally two sets of switches. This enables you to set up the lights for the first scene, and then easily move to the lighting set up for the next scene without having to frantically change all the switches. The control desk can also store different lighting combinations in its memory, so that lighting combinations for a whole production can be accessed at the flick of a switch.
The Dimmer packs are the modules that dim the lights, and are controlled by the control desk. The dimmer packs come in two types. The first type dims the lights by lowering the voltage passed through the lantern(s) on the channel. This acts like a dimmer you would find in your house. The second, and more sophisticated type of dimmer pack works by sending pulses of light to the lantern, in effect turning it on and off extremely quickly (around 10,000 times a second.) When the light is dimmed, the light is turned on and off more slowly, giving a dimmer light. This is a much more accurate system and has generally superseded the old type.
The plug modules, or patches consist of a large bank of plugs. There is a plug for every lantern socket on the stage. To avoid confusion, the plugs are numbered so they correspond with numbers on the sockets. These plugs then plug into channels on the dimmer packs. The lights are not hard wired into the dimmer packs to allow you to use different sockets, as well as change the channel of certain lights.
The data cable carries the data from the control desk to the dimmer packs. There are two types of data interfaces in use today. The first is called the ‘analogue 0 – 10v’ system. This system, used in our school, dims the lights by giving each channel its own cable. The cable carries a voltage of between 0 and 10 volts to the dimmer pack. If the voltage is low, then the light will be dim, and vice versa. The disadvantage of this system is that you need one wire for each channel, and in larger set-ups, it can be difficult to wire all the dimmer packs. Also, your lighting board needs to be enlarged to cope with more than 24 channels (as more outputs are needed from the board to carry the extra cables.)
To overcome these problems, a digital system has been developed. This is called DMX512, so called because it can carry data for 512 channels on only two cables. This is a much simpler system in terms of wiring and cost, as it means you can run one wire around the whole theatre. This system is set to replace the old analogue system.
Different types of lanterns
There are many different types of light that are available. Here is a brief summary of each kind of light (remember all lamps ca be angled as required):
-
Fresnel Spot This is an adjustable lantern that can be used as a spotlight (light focussed in one spot) or a floodlight (light spilled out into a larger area.) It is named after the man who developed its compact and cheap design. The edge of the spot has a soft edge to it, so that different lights can blend in with each other more smoothly. The light is useful for short throws (distances) but not for a very large area.
-
Pebble Spot This, as the name suggests is a dedicated spotlight that gives a crisp, sharp spotlight on stage. It is called a ‘pebble spot’ because of the cobblestone like texture of its reflector, which improves beam clarity.
-
Profile Spot The profile spot is so called because it is able to take the ‘profile’ of a stencil placed in front of it. The lantern then projects an image of the stencil (known as a gobo) onto the stage. The sharpness of the beam is fully adjustable.
-
Follow spot This is a profile spotlight mounted on a small tripod. It can be used to follow the action on stage. The lantern features an ‘iris blackout’ which enables the operator to cut the light instantly.
- Floodlight Like the wood varnish, this “Does exactly what it says on the tin!” A Floodlight has no lens, simply sending the light out all over the stage rather like a standard lamp we have at home. They are used to provide a basis for further illumination, e.g. giving enough light for the audience to see the stage.
How to use stage lighting
Having invested in a whole stage lighting system, everyone concerned would like to see it put to best use. But how do you go about doing this? Basically, the starting point for any lighting technician or lighting designer understands the correct way to direct light onto the stage. This is an incredibly complex art, and took me many hours studying of books and the Internet before I got a clear idea about what was going on.
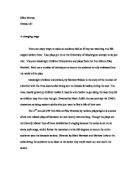
The first thing you need to know when deciding where to position lights is that you are lighting for a theatrical performance. Therefore, instead of simply trying to illuminate everything as brightly as possible, the emphasis should be on creating a ‘look’ that best compliments the action on stage. The primary concern is the actors, and the way they look. It is important not to simply shower them with lights from all directions, as this will simply create a flat, featureless image that the audience will find boring, and the actor will find frustrating, as it limits their potential to express themselves with their faces; something that is a key part of drama. To illustrate the difference lighting can make to the features of an actor, here are some pictures of the same actor lit from different positions:
As you can see from these pictures, the position of the lights is crucial. If too much light is simply shone onto the actors, then you end up with a dull, and lifeless production. Changing the light source can transform things dramatically; lighting from below, or directly above create dramatic effects that can really add tension and drama to a play.
However, for many situations, the optimum lighting conditions are those in the picture entitled ‘balanced light.’
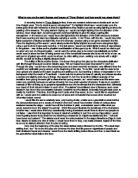
However, how do achieve these different effects? To understand how to position lights to get the effects described above we need to remember that actors move around when on stage. We also need to remember that as the actor moves from one part of a stage to another, their position in relation to a particular lantern changes. Therefore, someone standing directly under a light will have a different shadow to someone standing slightly to the left, as well as having the light cast differently on their face. This is extremely unnatural, and means that any lighting effect created will be completely destroyed if the actor moves from their original spot. Therefore, to ensure continuity across the stage, lights are hung so that the actors face is always being illuminated in a similar way (or as close to this as is practically possible.) This is known as ‘fanning’ the stage with light.
Here is a diagram to illustrate this:
As you can see from the top diagram, the lights have been angled, so that the shadows and light distribution remain almost constant as the actor moves around stage. If you do this, then you will achieve the ‘balanced light’ look shown in the photograph above.
The diagram below shows what happens if you only have one spotlight covering an area. In such a situation, the actor will be lit extremely unnaturally and the light distribution will vary terribly as the actor moves across stage.
The next important point in stage lighting is the use of colour. Colour, as you can imagine can really liven up a stage. It can create many different lighting looks and moods as well as making a drab stage look like it is really a dark alleyway, or a warm sunny meadow.
Lanterns can be coloured by placing special tinted plastic films known as gels in front of the lanterns. Gels are so called because they used to be made out of gelatine many years ago. They are now made out of special heat resistant and flame retardant plastics that are far safer than gelatine.
Gels are available in hundreds of shades of colour, which are chosen by the lighting designer from a swatch book. To mix colours, you can either put several gels behind each other on the lantern or mix them by shining several lanterns of different colours onto the same spot. The latter option is a better idea as it offers greater control of the colour (different colours can be dimmed,) as well as being brighter. This is because if you put several gels behind each other, more light is absorbed by the gels, resulting in a hotter lantern and a darker image.
Generally you should not use more than three colours at a time on stage, as more will simply confuse the audience. However these colours should be carefully chosen, as colour used just for the sake of it looks messy and amateur. An example of an interesting lighting effect that will enhance a production would be a stage lit in a dark blue light with a single sharply focused spotlight in the centre. This would really compliment an alleyway set, with the yellow light as a streetlamp. When the actors stand underneath it, they will be lit directly from above, giving interesting shadows on the actors.
Here is a diagram of how to create different hues using the three primary colours on three lanterns:
How to plan the lighting
The first thing that needs to be done when considering the lighting for a production is to read the script. This will tell the lighting designer exactly what is going on, and gives them an idea of what sort of lighting would be appropriate. For example, a play with scenes in a club would benefit from many differently coloured lights, flashing or alternating. Or a scene in a drawing room would benefit from balanced yellow light, with a bright, yellowish spotlight near the window to represent the sun.
After having an idea of what kind of lighting you want for the play, you need to decide where you want to position your lanterns. When deciding this, bear in mind the rules about keeping actors shadows constant, and about mixing colours. The next step is to create a lighting plan. These are similar to electronic circuit drawings, in that they are not artist’s impressions, but technical drawings. In lighting plans, certain symbols are used for different types of lantern. There are other symbols for specific brands of lantern, but here is a key of the generic lanterns:
Here is an example of a theatre lighting plan for a particular performance:
In this particular lighting diagram, the positions of each light are given, along with their channel number. We are also shown where the main parts of the scenery are to be located. Certain lights that are directed at specific parts of the scenery (such as the door,) are labelled as such, so that there is no confusion about where the lantern should be pointing.
One of the main advantages of a lighting system is the ability to direct light to different parts of the stage at different intensities. This allows the lights to concentrate the audience’s attention on one particular part of the action, leaving the rest of the stage free for any later developments in the scene or scenery changes. Also, lighting up a small part of the stage can create an atmosphere of loneliness for whoever is in the light, showing how they are cut off from the rest of the world.
One thing that is important when deciding where light should be directed is making sure that it does not go to places it is not needed. If there is nobody in the corner of the stage, then lighting it will merely make the stage seem bigger than it needs to be for the audience, and distract attention away from the main action.
After doing a lighting plan, the next thing to do is to draw up a cue sheet. This is a piece of paper that tells the desk operator when to change the lighting ‘look.’ The cue sheet has a memory location or the channel set up you want to use, a page number from the text, and a specific quote or action that will be the cue for the lighting change.
When writing the cue sheet, the transitions between different lighting looks need to be considered. One effective way of moving from one scene to another is the cross fade. This is a technique that can be applied in many ways. For example, if you have come to the end of a very quiet scene, or the scene has ended in silence then normally you would fade out to darkness slowly. Examples of such a scene include a death, where someone passes away quietly on stage. Leaving the lights up for a few seconds before fading them out is a good idea in such cases. Another example of when you would fade out normally is when the stage is cleared of people. When the last person is leaving, fading the lights out looks quite good. However this is all really down to the personal judgment of the lighting designer.
In a fast or violent scene, you may want to fade out very quickly at the end. This is called a dead blackout. Examples of this are a knife about to be plunged into a person. If you cut the lights immediately before the knife goes in, the rest is left to the audience’s imagination, making this a very interesting effect to use.
If you have a scene where a group of people move from one area to another (for instance from their home to the park,) you can cross fade between the two lighting banks (the two sets of channels.) This is another interesting effect to use as it shows the audience that the characters have definitely switched location. For the example above, you could change from warm yellow lights, to dim blue and white lights as the actors move from one part of a stage to another. This effect can also be used to change the mood of a scene almost instantaneously.
Safety when using stage lighting systems
Not wishing to state the obvious, I am sure you all know that modern stage lighting runs on electricity, which is EXTREMELY DANGEROUS!!! I am not underplaying this for one minute; if you touch a live wire in a circuit, you will be literally cooked alive, or thrown across the room possibly killing yourself in the process. Stage lighting systems not only use electricity, they drink up copious amounts of juice, often enough to power an average household (with every appliance switched on full.) Therefore, if extreme care is not taken when handling lanterns, dimmer packs and the like, you could wind up, well dead (or seriously burned.) The following precautions must be taken to ensure the safety of yourself and everyone around you:
-
Always ensure that the power is disconnected from the plug or the fuse box before making changes to the plugs or the data cables
-
Always make sure the dimmer packs are disconnected from the power when connecting lanterns to the lighting rig. Even if the socket you are using is not plugged in to the dimmer pack, the rig may have become electrified because of a fault elsewhere.
-
Never place lanterns that are on separate power phases within 2 metres of each other. Sometimes, electricity companies provide more than one electricity supply. These are called phases. If an operator were to touch any part of both phases, they would be dead, pretty much instantly. Therefore, lanterns should be placed apart to avoid this. Best of all, use different phases for different parts of the theatre (one phase for the lights on the ceiling, and one for the audience lights etc.)
-
Never place flammable materials near a light. During use, lanterns can reach very high temperatures, so the risk of fire is greatly increased. Make sure paper, cloth and scenery are kept safely away.
In addition to electrical safety issues, lanterns are made out of metal, and can weigh up to 10kg. Therefore, it is important to be careful when handling them. It is quite probable that you could kill someone by dropping a lantern on his or her head so make sure that you are careful. Lanterns must always have a safety chain around them, strapping them to the lighting rig. This is an extra precaution against lights falling down onto people. The cable that runs from the lantern to the socket must also be treated carefully. Before it is connected, it must be inspected for damage, as a loose wire could electrify the whole rig. When putting the lantern, wrap the cable securely around the bar, to prevent it falling in front of the light an melting, as well as acting as an anchor if the lantern falls of the rig.