Main Heading
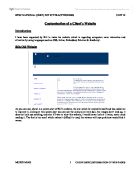
I wanted the main heading to be font impact, alignment to the center, font size 30pt and colour white, so I entered the code as shown below on the external CSS page.
As you can see from the screen-shot above, the first code that is under H1 which stands for heading one is the main heading, I made the font impact, text alignment to the center; I made the font size 30pt and the colour white after doing this I came out with the outcome shown below.
I did this for all pages as Bill wanted the theme to be the same throughout the website
Table
I wanted the table’s background colour blue therefore I entered the code on the external CSS page as shown below.
As you can see from the above screen-shot I made the table background colour blue. I wanted the first table to be different from the others so I made it unique using the class method, as shown below.
The screen-shot above shows that the first table was created using the class method and the next table was normal and the screen-shot below is the outcome.
2nd Heading
H2 stands for the second heading which I call the sub-heading, I wanted this heading to appear using the CSS box model, and also I wanted this second heading a different font from the first heading so I will choose font-family Arial and the font colour will remain white, I am going to align it to the center with the font weight being bold, finally I will leave the background same as the first heading, the screen-shot below is showing the code which I entered on the external CSS page.
As you can see from this code, I used the CSS box model for the 2nd heading, I made the padding top and bottom 3%, the border thin , style groove and background colour blue also the text colour I made white. I aligned the text to the center; I made the font weight bold and the margin-right 10px.
Introduction
I wanted the introduction to be created using the CSS Box Model and the border-width to be thin, text alignment to the center, font Arial and margin-right 10px, so again below Is a screen-shot of the code which I entered on the external CSS page.
The above screen-shot shows the CSS box model which I used where I made the padding top and bottom 5%, the border width thin, text alignment center, font Arial and finally margin-right 10px. As I want to make this text box and another text box on the homepage different from the other texts I will use the class method as shown below.
After using the class method I came out with the outcome shown below.
Text
I wanted the font to appear as font-family Arial, text alignment set as Justify, font size 12pt and the text colour blue. I did this by entering the code on the external CSS page as shown below.
As you can see from the screen-shot above which is showing the code which I entered I made the text font Arial, text align Justify, font size 12 pt and the font colour blue. Below is a screen-shot of the outcome.
Pictures
I wanted all the images on the website to have a border round them and also I wanted the border to be blue. I did this by entering the code on the external CSS page as shown below.
The above screen-shot shows that I made the border of the pictures width thin, style ridge and colour blue. As I wanted the images to have a unique border which will be different from the rest of the borders I used the class method, below is the screen-shot of the class method which I used to do this.
After doing all the steps above you can see on the outcome on the right a thin
Blue border is around all the images.
Bullet Points
I wanted to create the bullet points to appear as square shapes and to be colour red, also I wanted the text to be font-family Arial and aligned to the left as well as font size to be 12pt, style bold and colour red. Again I did this by entering the code shown below on the external CSS page.
The code above shows that I made the bullet points style square. I made the font of the text Arial, alignment to the left, font size 12pt, colour red and the style bold. Below is the outcome of the code which I entered.
Finally the screen-shots below is the finalized website.
Homepage
Service & Cost
Intermediate PC
JavaScript
JavaScript is used to make a website more interactive, for example, to make images move around the page or spin on its position, JavaScript is a way to add animation to an item, its use attracts more visitors, in other words this is a scripting language used un HTML to add features and make a website more interactive.
Mouse over Technique
This is also known as the roll over technique. This is a technique used on a webpage to change the colour of a link when you scroll over it, as soon as you scroll away from the link it changes back to its original state. Below is a screen-shot where this technique is taking place.
I designed these links using MS word using text box, where I made the coloured the background blue and text white. After creating the links on MS word I then imported these to MS Paint where I saved them as images (gif files).
The screen-shot above shows the code used of when the roll over technique needs to be changed.
Scrolling Text
I wanted to let the viewers know that the site was still under construction therefore I used JavaScript to create a banner to notify the viewers. The code which I used is shown below.
The screen-shot above shows that the message that was inserted was set to a time limit to go from one end to another I did this by the settimeout and programmed it to scroll at a time of 1 second, and also I programmed the substring at 1 message length at (0,1).
Below is a screen-shot of the scrolling text in a banner which is the outcome from the code.
Flashing Price
On the intermediate pc page, I wanted to make it interactive therefore I used JavaScript to make the price tag flash, in other words blink. I did this by entering the code as shown below.
As you can see from the screen-shot above I programmed the price to blink, the settimeout (blink speed) every second, and the styleswitch which I made visible for about 3 milliseconds and hidden for the rest.
Below is a screen-shot of the blinking text.
Popup Box
As the website is still under construction and not all links work I created a popup box to let the viewers know, so when they do click on a link, a popup box will appear as shown below.
To create this I used JavaScript and below is a screen-shot of the code which I used to create this popup box
As you can see from the code above, after SRC it reads “linkalert.js”, this is another file which will open up on the popup, this file is shown below, and it contains the message which will be displayed on the popup box.
Test Plan