General Schlieffen only put some of his soldiers around the eastern areas. He did this because we wanted France to attack there so that he could bring the rest of his troops to attack from the north, leaving the French taken aback. Furthermore, Schlieffen planned that the rest of his soldiers not used in Alsace-Lorraine would accompany him in the north where the surprise attack would happen. The amount of soldiers there would be was 90% and they would be sent to attack France all the way through Holland and Belgium. Once they were in France they would seize Paris and then France would have to surrender as they would have no other choice. As soon as France has been defeated by the Germans, the troops would be sent to Russia and start a battle with them.
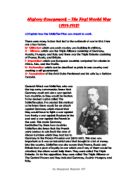
For the Schlieffen plan to succeed, it depended on many things. Firstly, the army that was around the north would have to be very large and they would need men from the southern army guarding Alsace-Lorraine. Secondly, it relied on the French being defeated in Alsace-Lorraine and not being able to fight back quickly enough. Thirdly, the plan also counted on the Dutch and Belgians not to defend themselves. But that wasn’t the case, as they did defend which caused a real problem for Germany as it slowed down their soldiers. Fourthly, it depended on its soldiers to walk 35km per day with superb logistics. This means the handling of troops in battle supplied with food and equipment, ammunition etc. Fifthly, it relied on the British Neutrality which meant that Britain wouldn’t join in the war as they took neither side in the war. But that’s not what happened. They sent over the British Expeditionary Force (BEF). They were a small group but highly skilled in battle as they showed they slowed down the Germans in the Battle of Mame. The last thing the Schlieffen plan needed to succeed was a slow Russian mobilisation which meant the Germans thought it would take the Russians 3 months to fight back. They thought this because Russia had a poor infrastructure; e.g.-poor communication and transport links. The Russian leader Tsar Nicholas II (1894-1917), shown in this picture here on the left, was a weak leader and Russia had proved to be a fading power after losing the Russia and Japanese war in 1905.
Overall the main idea of the Schlieffen Plan was to have a quick victory into France.
b) Why did the stalemate develop on the Western Front?
Once the plan did go ahead, it failed because of many reasons. One of them was that General Helmuth von Moltke, who was the new chief of staff after General Alfred von Schlieffen died in 1913, changed the Schlieffen Plan.
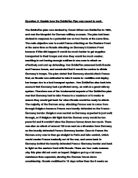
The Schlieffen Plan actually never failed as it was never used. Von Moltke changed it. This means that if General von Moltke did go ahead with the Schlieffen plan, Germany might have won the war. The picture on the below shows what actually happened when the plan was being used. As you can see the German forces are blocked by the allies.
The definition of a stalemate is when there is a deadlock in a battle situation when neither side can make any progress. This basically means when no further action can take place.
This essay will discuss the causes of the build up to the stalemate.
One of the causes of the stalemate was the setting up of the trench system. This was a network of underground tunnels dug up by both the sides to conquer each others territory and to protect themselves from any attacks from the opposition. These trenches were created as Germany still occupied some parts of France and Belgium and that German soldiers be required to hold on to these parts at any costs. The proceeding British and French troops also began to dig trenches as they were to quickly understand that it was almost impossible to break these lines of trenches. It was difficult to break the trenches as they would be built in the shape of a zigzag and there would be at least three lines of trenches making it much harder to destroy. So if some one threw a bomb, it will only cause damage to a small area of the trench not the whole line. As I mentioned before there were about three lines of the trenches. You can see this in the diagram opposite.
Every trench would be guarded by chains of barbed wire that was 30 metres deep. The first line was the front-line, followed by the second line which was called the support trench and finally the third line was the reserve trench. Every part of the trench was known to a fire-step which was a kind of stool that a soldier could come and stand on to fire or just to look out for the opposition’s trenches. They would usually fire with machine guns. All these trenches were interlinked to one another by communication trenches which would be used for carrying food supplies, soldiers and equipment. This caused the stalemate because each side was scared to attack one another in case of injuring themselves because they knew that if they went on to ‘no-man’s-land’ they would get killed as the opposition were ready. Therefore it was seen safer just staying where you were, in your trenches as you were hidden and well equipped.
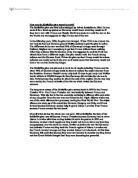
The second cause of the stalemate was the failure of the tactics for the generals to win the war. The general’s strategies did not always go to plan. They were always trying to break through the enemy lines. Many generals thought that if they put a small amount of soldiers along a section of the western front and out number the enemy, they could encircle the opposition and therefore win the war. Since the Schlieffen Plan had failed, Germany wasn’t so sure what to do as they didn’t have a plan. As for France, they too weren’t quite so sure what to do. An example of a general is General Haig who is pictured here on the left. His full name was Field Marshal Earl Douglas Haig and he was the commanding officer of the British Army. He repetitively killed many of his own troops due to the tactics and moves he made during the war. An example of this is in some cases the British troops were out numbered and they had been ordered by their general to go knowing that death was coming their way as the Germans had far more troops. This basically caused the stalemate as most of the generals did not have proper solid tactics in order to win the war therefore they were not quite sure what they were expecting.
Overall, I think the tactics played an important role in developing the stalemate on the western front because the generals hadn’t planned what to do to win the war so they were confused and decided to stay put in their trenches causing a blockade. When the generals did decide what to do, they weren’t always 100% sure. It was wrong of Haig to kill so many of his own men and what he called a plan was not a plan. If the Schlieffen Plan had been done properly then Germany would have most likely won the war.
A third cause of the stalemate would be technology such as weaponry. Each side would have many weapons as they had just been introduced at that time. Each side would have weapons like tanks, machines guns and grenades. One type of machine gun that would have been used in this war was the Lee-Enfield which is shown below. This gun was able to fire numerous rounds and was also capable to kill someone over 1,400 metres away which came in very handy in the war. Gas would also have been used to attack the opposition as it was very effective because some gases would kill instantly such as chlorine where as others such as phosgene would kill them in about 1 to 2 days. However, the allies soon began to use other methods to counteract these attacks. These methods included things such as pieces of cloth which had been drenched in urine. This helped the ammonia in the cloth to weaken the chlorine. But it didn’t always go to plan. Since now and then if the weather wasn’t looking to good and you let a gas bomb off the changes in wind direction could alter the path of the gas towards the wrong course. Gas masks were first produced in 1916. This caused a stalemate as both the opposition were always trying to out do each other with different more powerful weapons. So if one side had gas, the other side would have gas masks to avoid getting killed. The final cause towards the development of the stalemate was air surveillance. This was essentially aircraft, fighter planes and air ships. These were also newly produced weapons and weren’t used a lot for the attack of the opposition. They were mainly used for spying investigations on the enemy. These planes could straightforwardly find out the oppositions movements which could help them prepare for any attacks that will try to be made. Some planes did have the occasional machine gun attached to it and it was also able to have bombs dropped down below. An example of a plane they would use is an Avro 540 which is shown above. It was created in 1915, and has only space for one person, the pilot. The plane allows you to store lots more fuel than the old model and is able to stay in the sky for quite a long time which would be helpful for spying on the enemy lines. As you can see there is no machine gun on this plane so it is obvious that this plane would have been used for spying missions. These planes were also used as ‘spotters’. The job of the spotter was to see how precise there aim was and what needed to be improved to get their bullets to the right mark. This information would then be given to artillery. But this took too much time as the only form of communication with the artillery was to drop messages to them. It could sometimes take quite a while to spot for a small number of guns.
On the whole, I think that technology was far more developed than tactics and this led to a lot of deaths and the continuation of stalemate. Also, in most cases the technology was still quite primitive and under-developed and failed to give either side any real advantage.