Preliminary Work
I did some preliminary work to find out what lengths of wire to use, and what current to use.
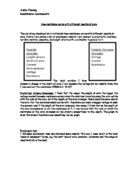
Using the equipment shown in the diagram, I found that if I use a wire the length of under 30cm, it would have too much current flowing through it, so the minimum length of wire to use is 30cm. Whereas the maximum length to use is 150cm, because there is no current flowing through it as the resistance is too high.
Also I found that I cannot use a current larger than 0.5 amps, because it will heat the wire which causes the atoms to vibrate more, so the current has more chances of collision and changes it’s resistance.
I have decided to use the lengths of 40cm, 60cm, 80cm, 100cm and 120cm, and to use a current of 0.1A and 0.2A.
Fair Test
To keep this experiment fair, I will need to keep two things the same,
-
The type of wire- because the atom arrangements are different in different metals. So using 40cm of copper wire would have a different resistance than a 40cm of Constantine.
-
The cross-section of wire- because they will have different number of atoms because it will be thicker or thinner.
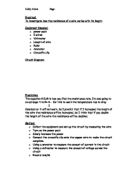
Apparatus
I will use the following apparatus,
- Power Pack
- Ammeter
- Voltmeter
- Constantine wire, lengths of 40, 60, 80, 100, 120 cm
- Crocodile clips
- Wires
- Multi-meter
Diagram
Method
- Set up apparatus as in the diagram
- Use the 120cm of Constantine wire, and set the current at 0.1Amps.
- Read off the voltage, and record it in a results table.
- Repeat steps 1, 2 and 3 but use a current of 0.2Amps.
- Once you have recorded the results, you need to work out the resistance. To do this you have to divide the voltage by current.
E.g. 0.18V/0.1A= 1.8ohms
- Once you have worked out the resistance for the two different currents, we have to work out the average resistance. To do this you have to add the two resistances together then divide by two.
E.g. 1.8 + 1.85 /2= 1.825
- When you have done this, repeat the whole experiment using the different lengths of wire, 40cm, 60cm, 80cm, and 100cm
Results
Diagram 2
Method 2
- Set up apparatus as in the diagram.
- Using just the multi-meter, and the wires, measure the resistance through them. Then take away that resistance from the end measurement.
- Then use the 120cm of wire as the resistor.
- Turn on the multi-meter to ohms.
- Read off the resistance off the multi-meter, which calculates the resistance automatically. Put the reading into the results table.
- Repeat steps 1, 2, 3, 4 and 5, with the different lengths of wire, 100cm, 80cm, 60cm, and 40cm.
Results
We are doing this second experiment as a check as it is a more accurate way of measuring resistance. The first way we did the experiment was the long way, whereas we just used a multi-meter in the second, which worked out the resistance for you. If we compare the results from each experiment, we find that they are very similar. If we look at the table below we can see that the maximum difference is 0.325.
Conclusion
From my graphs I can tell you that resistance is proportional to the length of wire. The graph of the first method isn’t very accurate. Many of the points are off the line of best fit; this will be because I used the voltmeter and ammeter method, which isn’t very reliable.
The graph of my second method is more accurate and reliable, because I used a multi-meter. Most of the points are on my line of best fit.
From my graph it shows that my hypothesis is correct. That if the length of a wire doubles so does the resistance. Look at points labelled 1 and 2 on the multi-meter graph. Point 1 is 60cm long and has a resistance of 2.6 then at point 2, 120cm and has a resistance of 5.2. This shows that the resistance doubles and has proved my hypothesis very well. There are many points on my graph that I can pick out to prove that my hypothesis is right aand support it.
Resistance is caused by the electrons in an electrical current, which collide with atoms in a wire through which they pass. So the longer the length of wire, the resistance will increase because it will suffer collisions for a longer time.
Evaluation
I thought this experiment was quick and easy to carry out because it was fairly straightforward but I came across a few problems.
For example I couldn’t keep the wire straight so short circuits would occur affecting my final results. Also both the ammeter and the voltmeter fluctuated so we didn’t always get the right reading. This too affected the results. When we used the multi-meter it automatically sent out a current and voltage and so worked out the resistance itself.
Measuring the wire also caused a problem. It would coil up while measuring it. I had to ensure that when I attached the crocodile clips the distance between the clips would have to be the correct length.
If I were to do the experiment again I would change the way we measured the wire. I would attach the clip at the start, then measure the wire, and then attach the second clip so I would have the correct measurement of wire.
I can say that the conclusions I have got from the results are fairly safe. My results support the prediction over the range investigated. It would be better to have more readings, say increasing by 5cm instead of 20cm to get more readings. By doing this I would get a better range of results and more points on my graph.
Overall I think my measurements were fairly accurate. From my graphs I can see the multi-meter test was more accurate because only 3 out of the 5 points were slightly out of the line. I think I had these anomalies in my results because of the problems I had.
As before I explained that the first method wasn’t very accurate because I didn’t always get the exact measurements I wanted to work out the resistance so therefore my 2nd experiment had slightly different results, because of the different equipment I used, like the voltmeter and the ammeter, and then substituted them with an multimeter to produce a better, more accurate set of results.
As an alternative investigation I could look at how wires of different cross-sections, affect resistance.