Graph Conclusion
During the preliminary you could see, feel and smell that the nichrome wire got very hot, this was a major problem because the temperature had to be constant. The resistance of a wire is only constant if the temperature remains constant. If the temperature changes the resistance changes and so the results would be affected. The reason why the wire got hot is because we exceeded the current carrying capacity of the wire. Each cable has a rating of how much current it can carry before over-heating. We tried to pass too much current through and too short piece if wire. If we had made the wire thicker or reduced the current, the wire would not over heat. I decided to change the lengths of wire; this would increase resistance which would lower the problem of heat also I noticed that the data was too close together when I plotted the graph therefore I will make the intervals between each length 5cm rather than 2cm this will give me a clearer picture when plotting my results in a graph; the tested lengths were 20cm, 25cm, 30cm, 35cm, 40cm, 45cm, 50cm, 55cm and 60cm. I also lowered the differences in voltage: 0v, 0.5v, 1v, 1.5v, 2v, 2.5v, 3v, 3.5v, 4v, 4.5v and 5v I lowered the voltage because I felt that the wire got too hot therefore if I reduce the voltage that reduces current which reduces the heat problem as I was not sure about the wire length’s maximum heat so I felt I should lower the highest voltage used because I did not want to start a fire; these two changes gave a larger set of results. Another change was adding a variable resistor; the change reduced the heating effect majorly by lowering the current in the circuit and helped to carry out fair test. I also decided that after each set of tests on each piece of wire I would turn off the power pack straight away while I get ready for the next set, e.g. adding to the table. This was a simple and easy way to lower the problem of heating. In addition to those changes I noticed that measuring the wire to the correct length was a problem and changing the length was time consuming, so I added a retort stand, clamp and a set of 100g weights. I tied a knot at each end of the nichrome wire and attached one end to the weights and one end to the retort stand keeping the wire straight. This saved time changing the length of the wire it also made the length measurement more reliable because I we could clearly see the wire and put the ruler directly next to it, although in an ideal experiment I would use different wire for each test. This was not available as the school’s supply was limited. With this change the chances are that the wire may have stretched because of the mass at the bottom and the heating, so I decided to add as little mass as possible that was still effective and use a micrometer to keep checking that the width of the wire was consistent. A smaller change was I decided to do four repeats on each length and voltage, the more tests I did would give me a better average for the wire length and it would also be easier to identify outliers, when I identified the outliers I will do an additional fifth test to reassure my results.
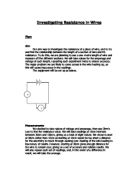
Method & Strategy
Equipment
Precision and reliability is a key part of this investigation it is vital that me and my group selected the correct equipment which would give us precise results with as little outliers as possible, but we had to weigh up precision and time; because we were in school time was a major issue, I believe that we balanced the two issues very well because we had enough time at the end to retest our mistakes and get all the results we needed. I have the most precise results possible with the amount of time allocated and the equipment on offer. We used our preliminary effectively to see what we needed to change; we changed many key factors but this helped make the test better.
Variable DC power pack – To provide power into the circuit
Connecting wires – To connect the circuit together
Crocodile clips – To attach the Nichrome wire into the circuit
Nichrome wire – The independent variable
Ammeter – To measure the current in the circuit
Voltmeter – To measure the voltage, as the power pack is less accurate
Variable resistor – To reduce the problem of heat
Retort stand – To attach the clamp to
Clamp – To attach the wire to, to straighten
100g slotted masses – To attach to the bottom of the wire and to the retort stand to straighten the wire
Ruler – To measure the length of wire
Bulb – To add resistance and give a visual image that the circuit is working
Micrometre – To measure the width of the wire with high precision
Fair and Safe Test
To make the test safe we must approach the wire with caution if it has heated to a high enough temperature, one reason which we noticed during out preliminary is that we should raise the length of the wire, lower the voltage and raise the controlled resistance, as I mentioned earlier, the reason for a wire temperature rising is that when a current passes through a wire collisions occur between the electrons and the ions and when collisions occur the electrons lose kinetic energy in the form of heat energy making the overall temperature of the wire increase. Also I will make sure I only use the minimum amount of slotted masses needed to straighten the wire and make sure my group and I stay clear of the dangling masses, in case the wire gets overheated and snaps, this would lower the chances of the masses hitting somebody’s foot and causing damage. To make the test fair I must keep the test as consistent as possible, for example:
- The same apparatus must be used throughout the experiment
- The same method must be used to collect ever set of results.
The Test
For the test I worked in a group with 3 other people.
- The apparatus were collected and laid out with spares in case certain components are faulty.
- A simple series circuit was the constructed to test all components.
- When everything was working correctly the circuit was made.
- The resistor was then set to 11ohms.
- The retort stand and clamp were set up.
- The nichrome wire was then cut to 800mm (80cm)
- After that the wire was tied to the clamp, and to the 100g slotted weights, the slotted weight were hanging in the air still.
- Crocodile clips were then added, one at the top near to the clamp, making sure they are not touching; and the other the one was the measurement being tested away from the top crocodile clip.
- Both the ammeter and the voltmeter were set to Milliamps and Millivolts.
The power pack was then switched on. One person in the group, adjusting voltage, looking at the voltmeter rather than the power pack as it is more accurate; and writing down results.
- After each test on a wire length, a person in the group would use the micrometer to test the cross sectional area of the wire and make sure it hadn’t been stretched each measurement came out at 0.20mm on the micrometer. At each test of the width I made sure that the micrometer was regular before the test. I did not encounter the problem of stretching because my group only used the weights that were needed and we would let the wire cool adequately after each experiment.
- When my group and I started collecting results, we got them done very quickly and had a whole lesson left, so we took time to look at our results and retest a few that we had problems with.
- We retested the whole 25cm set because of two problems; the first problem is that for some reason the wire got exceptionally hot with one test, and another time we realised that we had unfortunately been using wrong measurements due to a lack of concentration.
- We also retested 7 results in the 35cm test because for an unknown reason they were very different to the other results we had.
- Four were retested in the 45cm test because the voltmeter was jumping.
- And 9 results were tested again in the 60cm set because the wire got hot again.
- We retested because we believed that all of these 4 problems were outliers for one reason or another, so to make the test fair we had to do the test again.
The recorded results were then plotted into a graph that showed a positive correlation between current and voltage. A second graph was then drawn up, between the calculated resistance and the length of wire.
Strategy
This experiment counted on there being 3 main variables, Voltage, Current and Length of wire, these all needed to be measured with precision. The Voltage was measured across the Nichrome wire with a voltmeter we measured it in volts, rather than using the rough estimate of power from the power pack which doesn’t take into account the resistance. The current was measured with an ammeter, which measured in amps. The length of the wire was measured with a 1m ruler; the wire was perfectly straight due to the gravitational pull of the earth pulling the slotted masses downwards which kept the wire straight making it easier to measure with precision.
There was also many other variables which we had to control as we were not depending on them for a result.
Over heating of the Nichrome wire – the heat was a very hard to control, because we had little instruments available, we reduced the current which lowered the heat, also we increased the wire lengths which have a larger maximum current value.
Width of the Nichrome wire – due to the problem of heat and the weights there was a chance that it would stretch the wire, we made sure that this didn’t happen by only using the minimum weight needed, and we checked in 5 different places on a wire 3 times an experiment to make sure no stretching happened.
Resistivity – Calculation from my data
Electrical resistivity (also known as specific electrical resistance or volume resistivity) is a measure of how strongly a material opposes the flow of electric current. (Definition of Wikipedia.) This basically means that if something has a low resistivity it allows electric current to pass easier than if something has a high resistivity.
To evaluate how accurate my work was, I needed to calculate the resistivity of my length of wire, as it is nichrome I will then look on the internet for the standard resistivity of nichrome wire and I will then be able to make comparisons to how close or how far my wire is to what it should be. This will then enable me to look at how I could improve the experiment; I predict that it won’t be the standard resistivity of nichrome because when tested it would obviously have had more repeats than I did, would have had more and more accurate equipment than I did because they would have had more time and funding to work out the averages.
The equation for resistivity is below:
ρ = Resistivity (Ωm)
R = Resistance (Ω)
= Length of the piece of conductor (m)
A = The cross-sectional area of the conductor (m²).
I then calculated what each letter was in numerical value for my data.
To work out A I need to work out the radius of my wire length
The diameter was 0.2mm
0.2/2 = Radius
Radius = 0.1mm
A = πr²
A = π x 0.1²
A = 3.14 x 10^-6 m²
By plotting the average resistance against length on a line graph I could use the use the formula:
M =
M = The gradient of the line
L = Average length of the wire
L = 45
R = Resistance for the average length
R=18.01
I calculated this all together and came out with the answer:
ρ = 1.25 x 10^-6 Ω
Then I looked on various websites on the internet and found that the actual resistivity of nichrome was:
-
x 10^-6 Ω
Now if I convert these two into numbers I get:
Resistivity of my wire: 0.00000125 Ω
Actual resistivity of nichrome wire: 0.0000011 Ω
As you can see these numbers are very close together yet my wire is not exactly what the resistivity of nichrome is, this is because of the impurities of the wire, inaccuracies of the testing environment, temperature not being constant or the instruments not being 100% accurate. All of these are expect when doing an experiment in school conditions rather than laboratory conditions, at school I use equipment that has been used hundreds of times before, also the apparatus I used to measure the current and voltage with only basic, and in labs it would all be worked out and added by computers. Although all of these differences I believe the accuracy of my test was very good, I was a mere 0.00000014 Ω away from what the laboratory tests calculated the resistivity to be.
From my resistivity graph I can see that all of the points for average resistance are very close to the line of best fit, the line of best fit shows a proportional correlation between resistance and the length of the wire, by all of the points being very close to the line of best fit it gives me a lot of confidence in the accuracy of my experiment.
Conclusion
NOTE: Data points 1v, 0.11A & 1.5v, 0.15A = Orange outlier and regular red. 4v, 2.9A = Pink outlier, regular blue. 4.5v, 3.3A = Pink outlier, regular blue and yellow. 5v, 0.36A = Pink outlier, regular yellow.
Towards the of the graph the range bars overlap, and the last wire lengths are practically the same, this should not happen, therefore gives me a somewhat uncertainty about my results however I believe that this is an issue because I measured the current in amps, and as the length of the wire increased a more precise unit was needed to measure the current, in recollection I believe I should have measured it in milliamps. For most of the others it wasn’t much of problem because the gaps were large between each wire length, but as the wire got longer the lengths became closer and harder to tell apart when using amps.
Outliers may also have been down to a lack of accuracy when measuring wire. With the wire being hung from a retort stand it made it difficult to measure accurately. However with the time restrains it was probably the most effective way.
The experiment did have outliers. I have talked about the many reasons outliers were involved in my experiment and I will go onto look into more detail in the evaluation, but another reason could have been because of the measuring of the wire, the wire wasn’t always measured with 100% attention because my group and I were discussing the previous results, also we didn’t have enough time to get a more accurate measuring method than a 1m ruler which wasn’t very accurate.
Despite the anomalies the trend of the results showed that the experiment obeyed ohms law. The wire length of 25cm was retested as you can see on my table of results because it had a large amount of outliers the other possible outliers are highlighted as well. As you can see most of the outliers were together with others not just randomly, this leads me to think that there was a constant problem rather than on just on occasion; most likely the temperature. However I feel the most likely cause for this number of outliers would be that I did not measure the length of wire accurately and the heat of the wire. As above most of the outliers are over the line of best fit which is either because the length of wire was too small of the wire was hot causing a change in the resistance. The lines of best fit tended to go through the range bars of the data, which shows exactly what I set out to see. Also the outliers on the longer wire lengths were more separated; I believe that this is because I didn’t read either the ammeter or the voltmeter correctly
The basic test of how reliable my experiment was is when I plotted the resistance graph, the further away from the origin the less reliable the test was, because obviously the resistance for 0V and 0A is 0Ω, when I worked out the average resistance for each wire length I excluded the results for 0V because I felt that actual average is, as you can see it crosses the Y axis at just over 5Ω.
Evaluation
My group and I attempted to keep all variables under control, but we found this very hard, we reviewed the experiment and suggested improvements for what we could change if we were to do it again.
Even though I increased the wire lengths and the difference between each wire length after the preliminary, overheating was still a large issue, as you can see from my graphs; the lines of best fit were straight. Which compared to my preliminary graph showed a vast improvement on controlling the heat of the wire, but there was still outliers, especially wire length 25cm where I found different 4 outliers, I am not 100% sure what caused these anomalies but as they were all together I assume that the problem was the heat of the wire, it could be for many reasons such as the power pack not being turned off between each experiment or it could be because as you can see from the graph, the shorter a wire the smaller the resistance therefore the wire could still be hot from the last test which would effect the results I collected; there are many things I could change to combat the problem:
- One would be to start with the longest length of wire and get smaller, rather than start at the smallest and get larger. Starting with the smallest could have been one of the issues I had in regards to the wire still being hot when I started testing the next length. The heat effects the results less as the wires get longer therefore if I start with the longest the next wire length will be effected less
- Also to reduce heat I could use a wire with a larger diameter this would decrease resistance in the wire therefore reducing the heating effect.
- If I wanted to keep the same wire lengths, same voltages, and same current the only way I could reduce heat effectively would be to increase the diameter of the wire. This would increase the cross-sectional area therefore reducing resistance which as explained earlier means that there will be less collisions between elections and ions therefore reducing heat.
- In addition I could use a wire with a lower resistivity; the lower the resistivity the lower the resistance therefore the lower the heat.
-
The formula for power is P = I^2 x R
P = Power
I = Current
R = Resistance
This means that if I reduce the resistance then I reduce the power. Therefore if I reduce the power then the heat will be lower as well.
I can happily say I feel my conclusion is strong and I feel my data and tests have agreed with my hypothesis, although there are certain outliers I was able to retest them and single them out, I did not include them in my range bars or my averages, I can also see how accurate my results are by looking how close the lines of best fit are to the range bars and I feel that they are reasonably close, when Ohm’s Law applies the lines should be straight which they are, I feel I used enough accuracy and precision with the apparatus I used to get a good clear set of results, although I’m sure about the 55cm and 60cm calculations which I would like to retest using milliamps as a measurement I still feel I collected enough correct evidence to feel strong that my hypothesis was correct, and that my conclusion is correct too.