Variables:
1. Temperature: If the wire is heated up the atoms in the wire will start to vibrate because of their increase in energy. This causes more collisions between the electrons and the atoms as the atoms are moving into the path of the electrons. This increase in collisions means that there will be an increase in resistance.
2. Material: The type of material will affect the amount of free electrons which are able to flow through the wire. The number of electrons depends on the amount of electrons in the outer energy shell of the atoms, so if there are more or larger atoms then there must be more electrons available. If the material has a high number of atoms there will be high number of electrons causing a lower resistance because of the increase in the number of electrons. Also if the atoms in the material are closely packed then the electrons will have more frequent collisions and the resistance will increase.
3. Wire length: If the length of the wire is increased then the resistance will also increase as the electrons will have a longer distance to travel and so more collisions will occur. Due to this the length increase should be proportional to the resistance increase.
4. Wire width: If the wires width is increased the resistance will decrease. This is because of the increase in the space for the electrons to travel through. Due to this increased space between the atoms there should be fewer collisions.
Apparatus: The apparatus used will be: A power pack, voltmeter, and ammeter, length of wire, metre ruler, cables, and crocodile clips.
Safety Precautions: Make sure that that all connections are safe and that the power pack only stays on four volts. Also make sure that the wire is allowed to cool sufficiently after each reading.
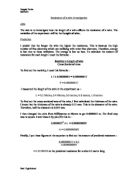
Preliminary experiment: I have done a preliminary experiment to determine the wire I will use in the main test. The three wires being used are nichrome, iron, and copper. We will cut ten centimetres of the wire, run four volts from the power pack through it, and measure the average resistance over three times to decide which wire is suitable.
From the experiment I found the following results:
So therefore from these results I can conclude that I will use the nichrome wire. Even though this has the highest average resistance, the others heated up very easily and in some cases melted, so therefore they could be a liability to the experiment and nichrome is the safest option.
Method: Step One
Gather all the apparatus
Step Two
Put it together, making sure safety precautions are met and that there are no loose connections.
Step Three
Place the crocodile clips at the 10cm mark on the metre ruler. Put the power pack on four volts and measure the current and potential difference.
Step Four
Do the same for all the rest of the measurements with a 10cm difference. Make sure the power pack is reset or turned on and off before each measurement is taken.
Step Five
Repeat the experiment two more times to assure it is a fair experiment. The length was the only variable that was changed and other variable remained constant.
Step Six
Put away all the apparatus.
Results: From the experiment I obtained the following results for the resistance of the nichrome wire and the three mystery wires.
Analysis: From the results I have come to some conclusions which I can now take evidence from to prove scientific theory. I have plotted a graph with the average results for every length. The results mean that the longer the length of nichrome wire there is then the higher the resistance will be. This is due to the number of free electrons in the material. In a longer length of wire the more times electrons will collide with each other and with other fixed electrons and impurities. The results show a trend. This is that the voltage and the current rise or fall in proportion to each other. The results show a strong positive correlation, again proving that the longer the wire the more resistance. This relates back to my hypothesis (which has been proven) – the more collisions there are and there the movement is slowed and resistance is increased. From the average results on the graph I have inserted a line of best fit which intercepts most of the points. Along the line of best fit I have put in three lines which represent the three mystery lengths of wire. They show my predicted length which I have obtained by making a cross-section from the resistance which I worked out previously.
Evaluation: In my experiment I managed to fulfil the beginning aim sufficiently which was to find out whether certain variables affected the resistance of a wire. It is obvious from my results that length and to some extent, temperature affects the resistance of a wire. I think a majority of my results were fairly accurate as I carried out my experiment well, in my opinion. There are many odd results which are mostly located in my second part of the experiment. This involves results moving up or down rapidly from one to another. I think this is because the nichrome length of wire became over heated in some instances as I didn’t let it cool sufficiently between readings. This could be avoided if three lengths of nichrome wire were use for three times around or if I used some water to cool the wire the experiment which would make it a fairer test. To improve the experiment I could use three lengths of wire alternately, but to improve further I could do the experiment three times simultaneously so the results are more independent. Again that would make it a fairer test. Another experiment that I could carry out would be very similar one, where I would use different lengths of nichrome wire (and later in the experiment I would use other wires of a different thickness) and a LDR (Light dependant resistor) to see how much the light would change from different amounts of resistance being attached to it. The equipment used would be a light dependent resistor, a power pack, two 5cm lengths of nichrome wire, copper wire and iron wire, crocodile clips, and cables. Also a torch or lam will be needed. I would predict that the LDR would be brightest when attached to the iron wire as that has the lowest resistance out of the three wires. Safety precautions would include keeping the power pack on four volts so that the wires and LDR wouldn’t over heat in the experiment. Variables are the amount of light shone on the LDR, the length of the wires, the thickness of the wires, the temperature of the wires and the LDR, and the material of the wire. The steps of the method would be as follows: Step 1 Gather all apparatus
Step 2: Before starting the experiment make sure no outside light or any light from other sources can affect the LDR.
Step 3: Create a circuit with nichrome wire attached to the LDR and shine the torch on it for twenty seconds and measure the brightness of the LDR.
Step 4: Allow wire to cool sufficiently and redo the same two more times.
Step 5: Repeat the last two steps with the iron wire and then again with the copper wire.
Step 6: Put away all the apparatus.