The three bullets found at the scene will be compared with each other to establish which two came from one weapon and which came from the other. To establish which of the actual weapons the fatal round came from by comparing the control rounds fired from the two weapons to the fatal bullet.
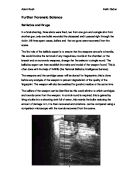
Weapons also leave distinctive marks on the cartridges. These combinations of striated action marks and impressed action marks are unique to each weapon. If the weapons were semi automatic as most now are, then ejector, chambering and firing pin impressions will be left on the cartridges. Below are four cartridge cases apparently fired from the same weapon. As can be seen the two on the left clearly show strong similarities under a comparison microscope. On the right it is plain to see that the firing pin impressions do not match.
In semi automatic weapons where the rounds are automatically ejected and breached, further marks are left. These are extractor claw marks and breaching arm marks. Following are some examples ejection and breach marks found on cartridges.
Ejector mark
This shows a comparison of chambering marks left as the weapon loaded the round from the chamber into the breach.
Along with the ballistic evidence mentioned beforehand, presumptive tests for blood should be carried out on the bullets to find out which passed fatally through the victim and trajectory markers can be used to identify where the offenders and the victim were positioned. The combination of all this evidence should be enough to prove beyond reasonable doubt which weapon and possible offender killed the victim.
Scanning electron microscopy coupled with dispersive x ray analysis provide detailed evidence and identification of gunshot residue which can be compared to manufacturers of ammunition.
Scanning Electron Microscopes (SEM) create a magnified image using electrons in place of light waves in conventional light microscopy. SEM’s provide a very detailed 3D image at a far greater magnification than is possible through light microscopy. The images produced are in greyscale due to them being created without the use of light waves. An example image is shown below (head louse at approximately x1000 magnification). Colour can be added after the image has been produced, although the colours are not necessarily an accurate rendition of the sample. One of the downsides with electron microscopy is that the samples have to be arduously prepared and must conduct electricity (due to the nature of an electron microscope). This can be achieved by coating the sample in a very thin layer of conductive material, often gold, in a process using a sputter coater. The sample is then placed in a vacuum chamber, this is because the radiation used in electron microscopes is of such a short wavelength that air particles would interfere with the image. The electron beam is then focused onto the specimen through a series of electromagnetic rings. Near the specimen a set of scanning coils move the beam back and forth over the specimen point by point, row by row. The information is the collated and a 3D image is the generated by computer.
When the primary beam of electrons hits the surface of the sample, the energy gained by the surface is dissipated in a number of ways. These include back scatter electrons, secondary electrons as well as the production of characteristic x rays. Back scatter electrons occur when the electrons from the primary beam rebound after reacting with the nuclei of atoms that make up the sample. These electrons are energetic and can therefore originate from deeper into the sample and produce images with poorer spatial resolution. This may appear to be a downside but instead it provides highly qualitative analysis of the elemental composition of the sample. This is because a back scatter image of a flat surface is brighter n those areas that represent parts of the sample with a relatively high average atomic number than those that correspond to regions of low average atomic number. All atoms that have the same atomic number are atoms of the same element, therefore allowing the identification of elements present in the sample.
Secondary electrons produce images of high spatial resolution and these provide a lot of information regarding the surface topography. This happens because the protruding part of the surface appear as bright areas, whilst the indented areas appear dark, as they would if illuminated by light.
The bombardment of the sample with the primary electron beam will cause it to produce characteristic x ray photons. Each photon released is a consequence of the ejection of an electron from the inner shell of an atom. An ejection such as this leaves a gap in the inner shell. If this gap is filled by an electron from an outer shell of the same atom, an x ray photon of the same energy that is characteristic of the atomic number of the atom is released. This allows the analysis of the energy of the photons released and establishes elemental composition of that part of the sample that is immediately under the surface area being radiated by the primary electron beam. It can be tuned to the energy of one of the characteristic x rays of an element of interest, in this case elements such as lead, tin, antimony, barium, potassium and sulphur. This enables an image of the distribution of these elements in the surface portion of the irradiated sample. These images are known as maps and can be used to calculate % elemental composition of the gunshot residue and compared to manufacturers’ compositions of primers and propellants in their ammunition.
There are three levels of classification of illegal drugs in the UK. Class A is the most serious with Class C being the least.
An example of Class A, B and C are given below
MDA, MDMA (ectasy) Class A
Amphetamine Class B
Benzodiazapine Class C
There are three reagents that could be used to identify the drugs through presumptive spot testing. These are Mandelin’s reagent, Marquis reagent and Liebermann’s reagent. The table below shows the colour changes expected with each of the drugs.
Reference
Jackson, A. (2008). Forensic Science. Essex: Pearson Education Ltd.
Langford, A. (2005). Practical Skills in Forensic Science. Essex: Pearson Education Ltd.
http://www.firearmsid.com/A_FirearmsID.htm (29/05/10)
http://www.monzir-pal.net/.../Barbiturates%20and%20Benzodiazepines%20Presentation.pdf (29/05/10)
http://www.sciencedirect.com/science?_ob=ArticleURL&_udi=B8JJ5-4SD2HKY-6&_user=10&_coverDate=10%2F31%2F1967&_rdoc=1&_fmt=high&_orig=search&_sort=d&_docanchor=&view=c&_searchStrId=1357832982&_rerunOrigin=google&_acct=C000050221&_version=1&_urlVersion=0&_userid=10&md5=0172b8567e2a1762a91ec5523029afa5 (29/05/10)