These results I have recorded from are final preliminary results from the experiment that I will be doing for our actual experiment. This is also the table that I will record for my results in for my actual result.
To calculate the % of concentration on diluting the original 2% solution:
Volume of yeast solution
Concentration of Yeast= Volume of yeast+ Volume of water X 2%
Now knowing this calculation I know how I can change the concentration and how I can get some good results. I can do this by changing the volume of yeast; I say this because when I change that the number in the equation will change.
Once I had decided to test concentration for my experiment I now had to make sure I knew how I could control my other variables to make sure that I got accurate and fair results. If I didn’t control the variables I would get inaccurate results because the other variables may be changing through each different solution. These are the methods I will have to take to make sure that I control all of the variables: Before each experiment that I do I have to make sure that I use a thermometer to test the temperature of my yeast solution. I will keep them at room temperature; however the temperature of the room may change so I will then have to use a water bath to make sure that it is the correct temperature. If the temperature is only 1-2° then that will not matter so much.
Before I got to these results I did an initial experiment and got another set of results, however these results that I got were not reliable even when repeated the experiment twice for one amount of concentration. Our initial experiment involved me using the yeast granules instead of the yeast solution which I changed to for are final results. Here are the results we got which we decided were not reliable:
I decided not to do this experiment because when I added more concentration the yeast granules were getting stuck at the top of the reaction tube. I performed the same experiment twice at that concentration to make sure it wasn’t a false result but the same thing happened again. This made are results unreliable and I realised that I wouldn’t be able to use this as our experiment. So I to get round this problem I would use the yeast solution mixed with distilled water so the yeast wouldn’t have got stuck at the top.
The next results that I got were more reliable and the experiment was easier to run and I got better results. So after doing two test runs I have been able to come up with a successful method that worked well for me and it showed with a good set of results in preliminary. Looking at both experiments that I did we came to the decision that are second experiment was reliable and easy to perform to make sure that I got a reliable set of results. I also choose to do this method because my previous one wasn’t getting me the results that I was expecting and I knew that I defiantly couldn’t do that one. The method that I have chosen to do is easy to perform and the results are more on the line of what I was expecting through my scientific knowledge.
I did preliminary experiments to test that I were using the right amounts of product and that I were using the correct equipment. In preliminary I found that the delivery tube that I was using didn’t work because it wasn’t clean so we made sure before I used it we cleaned. We also found that all other equipment that we expected to use worked well and was successful.
I also decided to do preliminary investigations to check that all are apparatus was working and to make sure that they were the right choice for this type of experiment. I found that the practicality of the apparatus was fine and that they were suitable for the experiment that I was performing. I went through each piece of equipment to check that it wouldn’t affect the results I got at the end. To make sure that I got a reliable set of results I needed to make sure that my equipment wasn’t going to affect that.
Plan
Equipment
.Small water bowl- I will use this to make sure that I don’t lose any water out of the burette when I hold it down.
.Burette- Used to measure the amount of hydrogen produced when I do the reaction. Easy to use because it has all the figures on it already
.Clamp- I will use this to hold the burette upright
.3 Small holding jars- Will be used to hold the reactants in before they are put into the boiling tube
.3 measuring cylinders- I will use this to measure out the correct amounts of all the reactants
.Boiling Tube for reaction (must be able to attach to delivery tube) - I will use this to perform the reaction in
.Delivery Tube- This will be used to allow the hydrogen to travel from the boiling tube to the burette to measure how much water is displaced
.Stopwatch- This will be used to know the time we have to stop the reaction going through the delivery tube.
.Hydrogen peroxide (30ml) - This will be used as a reactant in the reaction
.Distilled water (20ml) – This will be mixed with the yeast solution
.Yeast solution (20ml) – This will be used as the catalyse in the reaction
. Holding Wrack- This will be used to hold the boiling tube and measuring cylinders in.
.Thermometer- To make sure that the temperature is the same so that it is a fair test.
1) First fill a small water bowl so that it is ¾ full with normal water- This is done because you need to put the burette which is filled with water (later on in the plan) in the water bowl to make sure that no water is lost before the reaction.
2) Then fill a burette with normal water. You must then put the burette filled with water into the water bowl upside down so that the tip of the burette is facing up. This must be done quickly as you could lose water, so make sure, that after the water is still exactly on 50ml- We use the burette to measure the amount of water that is displaced so it needs to be exactly on 50 to be exactly sure about the amount of water displaced. We choose to use a burette because it was easy to fill and to adjust water to make sure that it was on 50ml. It was also easier to measure the amount of water that was displaced.
3) To keep the burette upright you must get a clamp to make sure that the burette doesn’t fall on its side and water is lost- We choose to use a clamp as it was easy to use and it was helpful in doing are experiment. Without a clamp you would have to have someone standing next to it holding the burette which isn’t practical.
4) Collect 3 holding jars and 3 measuring cylinders and a holding wrack- We will use these to measure the reactants to make sure we have the correct amount. We will use the jars to hold the reactants in before we pour them into the boiling tube. The holding wrack is important to hold the measuring cylinders upright.
5) Then you will need to get the boiling tube which has to be attached to a delivery tube- It needs to be attached to the delivery tube as that is where the displaced water will go through and then up the burette. The jar should be a smallish size as we are measuring air leaving the reaction tube from the reaction.
6) After you must attach the delivery tube to the boiling tube and then carefully lift the burette up and stick the other end of the delivery tube up the burette- The delivery tube is one of the most important things in this chemical reaction. We use the delivery tube to transfer air lost by the reactants through the delivery tube and up the burette which is filled with water. This is how the water is displaced.
7) Then you will need to collect a stopwatch- The stopwatch is used to measure how much water is displaced in 20 seconds, it is a much more reliable way than just counting 20 seconds.
8) Then you will need to collect the reactants which are: a jar full of hydrogen peroxide, yeast solution and distilled water- These are the reactants that we have choose to do to investigate. The hydrogen peroxide will act as the catalyse.
Before I use my reactants I must test the temperature of them to make sure that it is a fair test and that I control the variable temperature. When I do this I am making sure that I am keeping a fair test because I am controlling the variable.
9) Now firstly you must label all the three jars and the three cylinders with what reactant the will have in them. So one jar and one cylinder must be yeast solution, another must be hydrogen peroxide and one must be distilled water- This must be done to make sure that none of the reactants mix before going in the reaction jar. We do this to makes sure that it is a completely fair experiment.
10) Then measure 5ml of Hydrogen Peroxide. You do this by pouring hydrogen peroxide into measuring cylinder and measuring 5ml and then pouring the hydrogen peroxide into the jar- This why we use the measuring cylinder because we need to make sure that the amount is fully accurate, again to lower the risk of inaccurate results.
11) Then measure the yeast solution. This is the variable in the experiment so it will be 5 different amounts start by measuring 5ml the exact same way as you did for the hydrogen peroxide- Again you use the measuring cylinder to make sure that the amount is accurate and you get reliable results.
12) Then you must measure the distilled water. For the first one you don’t need to measure any because the yeast solution is at 5ml- Again when you are measuring you use the measuring cylinder to get reliable results.
Here are the measurements that will need to be used for each test:
1-5ml Hydrogen Peroxide, 5ml Yeast Solution
2- 5ml Hydrogen Peroxide, 4ml Yeast Solution, 1ml Distilled Water
3- 5ml Hydrogen Peroxide, 3ml Yeast solution, 2ml Distilled Water
4- 5ml Hydrogen Peroxide, 2ml Yeast Solution, 3ml Distilled Water
5- 5ml Hydrogen Peroxide, 1ml Yeast solution, 4ml Distilled water
13) After you have the correct measurements you pour the yeast solution into the reaction tube, making sure that you poured it all in. Also if you are mixing distilled water which you can see from measurements above you pour that into the boiling tube so you have the yeast solution and the distilled water- This why we use the reaction jar, it is where the reaction takes place which releases air which goes through the delivery tube.
14) Finally you must get one person to grab the stopwatch and get ready to start timing. The other person must pour all the hydrogen peroxide into the reaction jar and immediately close the lid on the reaction jar. Once the lid is closed the other person must start timing- The lid on the reaction tube must be easy to slide on as this has to be done quickly as you don’t want to lose gas out of the jar it must go through the delivery tube.
15) You allow this reaction to continue for 15 seconds and then you take of the lid on the reaction jar. You must then measure how much water is displaced- This is why we use the burette as it is easy to measure the amount of water displaced as it has the units along the side of it.
16) After you have done the first test you must clean out the reaction jar with normal water, refill the burette back up to 50ml and measure out correct amounts for the next test. You then must just go through the following steps again.
Fair Testing
When doing any experiment you have to make sure that every experiment is fair and that you are going to get results you can trust. In my experiment the things that I have to watch to make it a fair experiment is the temperature. I will need to measure the temperature of the reactants before we use them, they have to be the same or it would not be a fair experiment. I will also have to make sure that when I am measuring the amounts of reactants that I am using I must be precise, if not I will get dodgy results that don’t really fit with what I predicted will happen. I will also need to be precise on calculating when to stop by using the stopwatch. The experiment must stop after 15 seconds to make sure that again they all get the same time to react. If this changes it will again ruin the experiment and leave me with inaccurate results.
Results
Red= Oulier
Interpreting Data
After looking at my data and looking at the graphs I can come to the conclusion that yeast concentration does have an effect on the amount of water that would be displaced. Although I have to doubt the reliability of this statement as I have some very different results for each test I did with the same amount of yeast concentration. After looking at my results I decided that I had a few outliers in my data. The ones that I regarded as outliers were highlighted red in my results table. I would decide if they were outliers if they weren’t like any of the other results I got or if they just didn’t follow the pattern that we were seeing e.g. at 3ml of yeast at tests one and two you can see that one value is too high and one is too low, this is an example of how the results are varied but I can decide on which one I think is correct due to the other results that I got. This also affects my graph because I have got rid of results that would have affected the averages and the error bars. This makes my conclusion less reliable because the results are not very consistent and are widely spread out. However you can still see that the line on my graph has an upwards trail which is what I expected before I started the experiment. I decided to do one graph that showed the average of all three tests for each concentration, other than those which I regarded as outliers. I did this so I could put error bars in which could show the variety in my results. From this graph I can see that the line follows what I predicted which was as the concentration increases the amount of water displaced increases. This is good evidence which I can use to increase the reliability of my concluding statement. However again all my outliers and my error bars show me that my results are very varied and are maybe not completely accurate. On the graph the error bars are not that large, however I must take into account that I had 4 outliers that would have changed the averages and the sizes of the error bars.
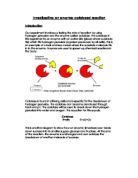
The scientific reasoning behind why the concentration of yeast affects the rate of reaction is mainly because a more concentrated solution has more molecules in a given volume. This leads to more collisions between enzyme and substrate taking place resulting in an increased rate of reactions. I would predict that as the concentration got bigger the rate of reaction will also get bigger again because it has more molecules in the same given amount of volume. It is like thinking of 5 balls in a box, they will probably bump into each other after about a minute. If you put 10 balls in a box there are more balls to bump into each other so it will probably only take about 30 seconds. This is exactly the collision theory which basically says that the more concentrated a solution is the more likely for quicker reaction, because there are more molecules bumping into each other. As you can see from each test I found that I got a variety of results. Reasoning for this maybe the pH of the solution, if the pH was different due to some reason because maybe someone poured something else in the jar of hydrogen peroxide or yeast solution the results would have understandably be different. This is because pH affects the rate of reaction if the solution is a strong acidic or strong alkali mixture the shape of the active site will change leading to it becoming denatured.
If I was to make a conclusion from the results I got and the graphs I made I would say that increasing the concentration of yeast creates a faster and bigger reaction. However to be definite I would have to do more research as my results look quite unreliable as there is a big variety within each concentration of yeast. Although my results back up the initial scientific understanding. They also follow a similar pattern and all go in the same direction which is positive. So I don’t think my results are completely unreliable however the wide variety in results is not good and would need to be repeated to become more confident in your results
Evaluation
After looking at my results I can see that there is a big variety and that means that there was a fault in my method of collecting data or a problem with the apparatus chosen to use. After I recorded the results I knew that the results were a bit funny so I checked all the apparatus to check to see if that was the problem behind the odd looking results. I noticed we had a faulty delivery tube. The problem was that even when we took the lid attached to the delivery tube of the reaction jar the other end of the delivery tube was still producing bubbles leading to more water displaced for a further 10 seconds. I noticed that when I put my thumb over the end of the delivery tube it stopped picking up gases. This shows me that the delivery tube was picking up the air in the atmosphere. This faulty piece of equipment could have been a reason why we got strange results. Next time if I was doing this experiment I would put more effort into testing all of my equipment before I start, I will stick with the same equipment however I will check all of the equipment to make sure that it was working before I started. However I think that the rest of our equipment worked well and there were no problems. I feel that the experiment was fairly easy to carry out and it didn’t take long meaning we could get three sets of results for each amount of concentration.
On the other hand I feel that our method was good but if we were to get a heavily reliable set of results we would need to make some improvements. I think one major problem that we were missing from our method was making sure that all the other variables were constant. We needed to include at some point before the reaction time to check the pH of the solution. Especially as our experiment ran other a few days the pH may have been different meaning that there might have been a slight change in the temperature of the solution. Our method did work well though because we made sure that we collected all the equipment at the beginning it meant that we could work through it quickly especially when it was performed with a partner.
If you look through my data you cannot defiantly say that these results are 100% reliable. I say this because we have a large variety of results. In all different amounts of concentration I have found at least 1 outlier in all three tests. In the 3ml yeast concentration the results were so spread out that it was hard to see which one was around about the correct result. Another minor problem with the data is the fact that I only have 5 different concentrations, if I was to get a stronger and more reliable set of results I would have had to of tested more concentrations to see if the line on the graph went in the same direction. Another thing that could have made my data more reliable if I would have further tested each concentration 5 or 7 times each then you could really get a nice set of results that should start to show real evidence that backs up the scientific understanding. I would have performed these steps initially but it would have taken up more time. Time is a problem for all scientists as they are usually pushed to get the best result as quick as possible and it is also financially better to get your evidence out there before anyone else can.
Conclusion
After looking at my data I would say that there is a strong correlation between increase in yeast concentration and faster rate of reaction however for this to be positive I would need to collect more results with the improvements I decided to make for my method.