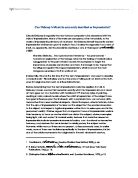
MIDI-track construction.
In all, I used eleven Midi channels, each with there own separate ports. All the ports are numbered “port 1-1, port 1-2” etc with the exception of “port 1-10” as this is a preset Drum and percussion channel.
I had set my BPM count to “120”, as I was trying to create an R&B kind of track.
For each channel, with the exception of the drums and percussion (ports 1-10), I chose a sound from the MU50 sound module via the control strip.
With the exception of the 2nd bass line, which I recorded live, I used the pencil command to draw in all the notes that make up my track. This was useful to me as I am not a competent or confident keyboardist, and my timing etc would have been bad. With the pencil and hand tools I was able to better construct riffs, and copy them to make multiple bars. This saved me a lot of time, as I did not have to keep going back to the start if I messed up a live recording. The only problem with using the tools to construct my track, was that the velocity stayed the same level, meaning that I had to painstakingly set the level for each note to make it sound less flat, but more fluent.
Once I had finished my track, I needed to mix it so the sounds would all be balanced.
This was done by adjusting the volume on the “mixing desk window”.
Although I had mixed the track, I was still not done with the volume command. I needed in parts, to make the sound automatically increase or decrease, like at the start or finish of certain channels. I did this by going into the volume command of the chosen channel, in the control strip. Once volume was selected, a straight line appeared right the way through the channel. I then used the pencil command to draw what I wanted i.e. a raised line. This then increased the volume.
With the pan controls I did exactly the same as the volume command. I set the pan to my preferred positions in the mix window, then went to specific channels and drew lines to make the panning move when the track was played.
The last controller I used was pitch bend. I used this while recording the 2nd bass line live, by toggling the pitch bend controller on the synth during recording. But if you were to access the pitch bend option in the 2nd bass line channel, you would see a wavy line, as the computer had also recorded this information live.
I did not use any other controllers such as sustain etc, as I didn’t feel they were appropriate in my track. However, to access them you just have to go to controllers in the command box of your selected channel, and choose which one you want from a whole range. To use these functions, you use the same tools as you use for the volume and pan.