Material The type of material will affect the amount of free electrons, which are able to flow through the wire. The number of electrons depends on the amount of electrons in the outer energy shell of the atoms, so if there are more or larger atoms then there must be more electrons available. If the material has a high number of atoms there will be high number of electrons causing a lower resistance because of the increase in the number of electrons. Also if the atoms in the material are closely packed then the electrons will have more frequent collisions and the resistance will increase.
Length If the length of the wire is increased then the resistance will also increase as the electrons will have a longer distance to travel and so more collisions will occur.
Thickness If the wires thickness is increased the resistance will increase. This is because of the increase in the space for the electrons to travel through. Due to this increased space between the atoms there should be more collisions.
The two factors I have decided to measure are the thickness and length because it would be easy and simple to obtain and record the data for these two factors.
Safety This is not a dangerous experiment; however it will still be carried out with great caution. Electricity should always be handled with care. This is what I am going to do to improve the safety.
- Handle the power supply carefully.
- I am going to only use a voltage of four volts so the wire will not burn.
- Be careful when touching the wire, as it may be hot.
- Start on the lowest current, so the wire then will not melt or burn instantly.
- Be careful when cutting the wire.
- Make sure hands are dry when use electricity
- I will keep the working area tidy and dry, to avoid short circuiting.
- Make sure the mains to the power supply is switched off when removing the wire from the circuit to be measured.
Fair test
In order for this experiment be fair, I must take repeats. I will read the ammeter and voltmeter carefully. The room temperature must also be kept constant. I will use the same ammeter, voltmeter, and power pack, throughout the experiment. To get accurate results I will use a digital ammeter and voltmeter. The voltage going through the circuit will be kept the same every time. Also, the same wire will be used every time so that the material of the wire remains the same.
In this experiment two factors will be changed – the length and thickness of the wire. I will perform an investigation on each variable one at a time, so I don’t get mixed up with the variables. All other factors will be kept the same. These precautions will make my final results more reliable and keep anomalies at a minimum to make the entire investigation more successful.
Apparatus
The following apparatus will be used in the experiment.
- Power supply
- 7 Wires
- Ammeter
- Voltmeter
- Wire cutter
- Variable resistor
- 2 crocodile clips
Method
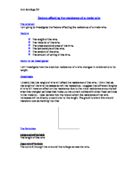
First, the power pack was set up with wires leading out of it. The power pack was set as 4v and was at a direct current supply. The wire was connected to an ammeter and then to a resistor by crocodile clips. The voltmeter was placed parallel to the resistor as this allows us to see the potential difference across the wire. Then, the wires were joined up and run back into the power pack. I have shown how the circuit will be connected on the diagram
For the length, I started at 20cm and then turned on the power pack. When I got readings from the voltmeter and the ammeter, I turned the power pack off and then resized the length of the wire using the 1m ruler by placing the crocodile clips further down to a 40cm length. Then, the power pack was turned on again and took down the readings from the voltmeter and the ammeter. Once again, I turned off the power pack and resized the length by placing the crocodile clips to a 60cm length. I did this method by adding 20cm every time until the length of the wire was 1 meter long and as I went along, I obtained down the results. I repeated this method 2 times to give us an average, so I could get more accurate results. The variables in this experiment were the length of the wire and the thickness of the wire. The same procedure were used for the thickness experiment apart from the length was kept constant at 50cm, and the thickness was changed between 26,28, 30, 32, swg
The readings from the ammeter and voltmeter were plotted in a table. Hereafter, the resistance was worked out by dividing the voltage by the current. Then graphs were drawn
Prediction I predict that when I increase the wire’s length, the resistance will increase. This means that when the electrons travel along the wire they are constantly hitting atoms, if the same amount of current is passed through a longer piece of wire there will be more collisions hence more resistance.
For the thickness I predict that if the wires thickness is increased the resistance will increase. This is because of the increase in the space for the electrons to travel through. Due to this increased space between the atoms there should be more collisions, which would result in an increase in resistance.
Results
These results are the averages taken from the 2 experiments, I did for each factor.
Accuracy as possible we need to make sure, firstly, that the length and thickness of the wire is measured precisely, making sure that the wire is straight. We must also make sure that the wire is straight when we conduct the experiment. If it is not, short circuits may occur and bends and kinks in the wire may affect the resistance. The reading that we take of the voltage should be done fairly promptly after the circuit is connected. This is because as soon as a current is put through the wire it will get hotter and we want to test it when heat is affecting it the least, i.e. at the beginning.
Analysis The graphs has turned out like I predicted and my results are fairly accurate. I have worked out the resistance, according to Ohm’s Law, using the equation;
R = V / I
From my graph, I have found the pattern that the higher the voltage, the higher the resistance becomes. The graph shows that as the length and thickness of the wire increases, so does the resistance of the wire. An example of this is when the experiment was taken for the length at 40 cm. The resistance was 0.024 Ω.
When 20 cm more was added on, the amount of resistance at 60 cm was 0.034 Ω. The reason for this occurring is because the current has had to pass through more atoms in the wire so there is more resistance for the current.
There were no odd results received on my results and every thing came out as expected.
I could not find any patterns within the results but the graph still looks correct. Also with the graph, the line of best fit on the length graph steadily increases and at the end, the line straightens out. This was expected because there was plenty of heat generated and the atoms will be moving about a lot. The current will find it hard to pass through all the atoms so there is plenty of resistance. Also, the obvious outcome of the results is that the longer the wire, the more resistance there is, due to more atoms for the current to pass through. I identified that the longer the wire, the more resistance. With the 2 repeated experiments, the difference between each one is very small. As current is the amount of push going around the circuit, the amount of push will be decreased if the length of the wire is increased. Everything that has happened with this experiment was as I had expected.
Conclusion I have found that my prediction was correct. I said that the resistance will increase when you increase the thickness or length, and as you can see from the graphs, both which show very strong positive correlation, this was correct. This proves the fact that the longer or thicker the wire is, the more collisions there are between atoms and electrons. So if the wire increases in length or thickness, so does the resistance. If the wire decreases in length or thickness, so does the resistance.
Evaluation
In this experiment, the errors that could have occurred were: -
The length of the wire was not very accurate, as I could have measured the wire off a few millimetres, which could have affected the whole experiment.
The value on the ammeter and voltmeter could have varied, leading to people writing down different results. This could have affected the experiment because people would have written down a higher or lower result for the voltmeter and the ammeter so that the worked out resistance is higher or lower.
The power pack might have not been turned off during the change of the wire so heat would build up, leading to more resistance on the next experiment of the wire.
If I were to make improvements to the experiment, I would have tried to make the wires length and thickness as accurate as they can be, but in this experiment, there were no extremely odd results.
Another experiment that I could have done that would make the experiment fairer was to keep the wire under a constant temperature. The circuit would be the same but the wire would be in an atmosphere where the temperature wouldn’t affect the resistivity of the wire.
The reason why this way would make the experiment fairer is because there would be no slant at the end of the graph for the length, if the results were put into a graph. Without the constant temperature, there is more resistance if the temperature rises, due to atoms with kinetic energy. With constant temperature, there is the right amount of resistivity there should be, making the experiment a very fair test. Although it won’t be perfect, it will still decrease the amount of atoms moving about when they are hot.
Most errors in our experiment were encountered in the measuring of the wire. This is because it simply was not very practical to hold a piece of wire straight, whilst holding it next to a ruler and then trying to accurately fix crocodile clips to the right part on the wire. Also I do not feel that the crocodile clips were always fixed securely to the wire with a good connection. This also meant that they were easy to move about on the wire changing the length of it. Errors rarely occurred in the setting of the current and the reading of the voltage. Another example of this is the wire was never totally straight when we started the experiment, which may also affect the resistance of it
I do not think that doing any more results in our experiment would have made it any more accurate. I feel that the only way to make it more accurate would be to use a different method – perhaps were we had a bar that did not bend in place of the wire. We could even use a rheostat in place of the wire, because it is essentially a long coiled wire that is connected at different lengths to change the resistance of the circuit.
The results would then have been more reliable and would definitely produce better results, however the results in this experiment are fairly reliable and they did support my prediction. So all in all I think this was a good experiment and best that could have been done with the time and resources available.