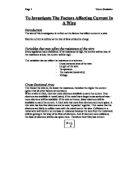
To investigate how current affects the resistivity of a wire.
To investigate how current affects the resistivity of a wire.
Planning
Aim: the aim of this experiment is to investigate how current affects the resistivity of a wire.
Discussion: atoms are made up of a positively charged nucleus surrounded by negatively charged electrons. In solids one or two of the outer electrons in each atom are used to bond with atoms that hold the solid together. In a metal these electrons are free to move throughout the solid to anywhere they want. These are usually known as "de-localized free electrons". An electrical current is a flow of charged particles and therefore the free electrons can flow through the metal if a voltage is applied to the metal.
The resistance of a wire is where a metal wire is placed in an electric circuit and the voltage from the battery makes the electrons flow through the wire. They collide with metal ions whilst doing this and this process slow down the flow. Therefore resistance is the measurement of how easily the electrons can move through the metal- a low resistance means that the electrons can move easily and a high resistance means that the electrons cannot move so easily.
The current is the measurement of how much charge flows per second.
I=Q/t
Current represents the number of electrons flowing per second, as the charge on each electron is the same. If the resistance is high ten the flow of electrons is slow and therefore the number of electrons per second is reduced, i.e. the current is reduced.
If the metal is heated the metal ions will vibrate more thus there is a greater chance of an electron colliding with a metal ion and so the flow of electrons is reduced. (I.e. the resistance increases)
The most common analogy is that if you consider yourself to be an electron and are walking through a crowd of people (the metal ions). Now consider that if those people are standing still you can easily walk through the crowd. However, if those people are not standing still and are constantly moving about in all directions (like on a dance floor) then you are much more likely to collide with at least some of these people and hence overall speed is reduced.
Factors affecting resistance
In a wire, which has a large cross sectional area, there are fewer chances of collisions between electrons and ions than in a narrow wire. This decreases the resistance in the wire, which increases the current.
Material of wire ()
Some metals like copper are good conductors. Their atoms are arranged in a crystal lattice and they have a 'sea' of free electrons that can flow easily in the spaces between the atoms
Nichrome wire also conducts electric current but it does not have as many 'free' electrons as copper. Nichrome has a higher resistance ( .rho) than copper. The resistivity of nichrome is higher than the resistivity of copper.
These 3 factors combined mathematically give the equation;
R= L/A
Where R = Resistance in
= Resistivity in ohm per meter
L = Length of meter
A = Cross sectional area in meters squared
The resistance of a wire is also affected by the temperature of the wire. When the wire is hot the atoms in the wire vibrate more rapidly. This increases the chances of electron/ion collisions. This increases the resistance in the wire, which decreases the current.
Preliminary work
The reason for doing a preliminary experiment is to test my planned procedure and to establish the range within which my measurements will be tested. It also gave me a good opportunity to test my planned procedure was correct and if there was anyway in which I could improve it. It also allowed me to figure out what voltage to use for the experiment.
In my preliminary work I measured the length of the wire and took nine measurements, starting on 20cm and going up by 20cm each measurement, up to 200cm. However, I noticed that between some of the readings there were big gaps for the resistance and the current and resistance and thus I have decided to measure the length of the wire starting on 10cm and going up by 10cm each measurement, up to 100cm. This will give me 10 readings and to be sure I intend to take repeat readings, which I should prove to be a sufficient ...
This is a preview of the whole essay
In my preliminary work I measured the length of the wire and took nine measurements, starting on 20cm and going up by 20cm each measurement, up to 200cm. However, I noticed that between some of the readings there were big gaps for the resistance and the current and resistance and thus I have decided to measure the length of the wire starting on 10cm and going up by 10cm each measurement, up to 100cm. This will give me 10 readings and to be sure I intend to take repeat readings, which I should prove to be a sufficient amount.
Also in my preliminary work I used a voltage reading of 2, 3 and 4 volts from the power pack, these proved to be good volt settings because it did not give me currents that were so high they were off the scale (of the ammeter) and also wasn't too low either. This gave me good results and therefore I've decided to use it in the real experiment
Apparatus:
2 circuit wires
metal wire 2m in length (Nichrome wire 285WG)
A Power pack
An Analogue ammeter
2 crocodile clips
meter ruler
Method: First I will get all the equipment listed above together and set up the circuit like shown in the diagram on the second page. I will then check that all the equipment about to be used is clean and in working order. I will then set the power setting to two volts because I found that in this preliminary experiment it's the best voltage to use due to this voltage being low enough to be safe and high enough to get a good reading. Then I will place the piece of nichrome wire in its correct position. I will then securely connect a crocodile clip to each end of the wire and place the meter ruler next to it. I will make sure that the first crocodile clips is level with the point 0cm on the meter ruler. The other clip will be placed at the positions I stated earlier, from 20cm to 200 cm measuring every 20cm. I will then make sure the ammeter reads off as zero before I switch anything on. Then I will turn on the power pack with one clip on 0cm and one on 20cm (to start with); I will then read off the measurements from the ammeter. Then I intend to switch off the power pack and record the results that were just obtained. In turning off the power pack I will make sure that the wire does not over heat and also hence keep it a fair test (because the temperature affects the resistance). After the wire cools down I will move the clip from 20cm to 40cm, turn the power pack on and taking the reading for the current and voltage once more. After I've taken all the readings up to 200cm (with 20cm intervals), I will then do the same again for repeat readings.
The need for accurate results is essential for this experiment to allow me to gather evidence that will conclusively support my predictions is correct and to verify ohms law aswell.
Results; the results I obtained on doing my preliminary experiment were,
Length of wire in cm
Current of wire at 2 Volts, in Amps
Current of wire at 3 volts, in Amps
Current of wire at 4 volts, in Amps
20
0.21
0.54
0.92
40
0.13
0.28
0.48
60
0.09
0.20
0.33
80
0.07
0.15
0.25
00
0.06
0.12
0.20
20
0.05
0.10
0.17
40
0.04
0.09
0.15
60
0.04
0.08
0.13
80
0.03
0.07
0.11
200
0.03
0.06
0.10
Prediction
I predict that as I increase the current flowing through the nichrome wire the resistance will hence increase. I have come to this conclusion as a result of my research into resistance, voltage and current.
Fair test: To ensure that my experiment is a fair test I intend to be sure that all the variables, which affect resistance, except the length of wire, are kept the same.
I will allow the wire to cool down in between readings so over heating doesn't occur.
I will keep the temperature the same. I will also conduct all the readings and measurements in the same room and on the same day so the room temperature and atmosphere is relatively the same. However, there are bound to be temperature changes throughout the investigation and I hope that they are not substantial enough to cause the investigation to go wrong.
I will keep the cross-sectional area of the wire the same by using the same wire for each measurement; thus the cross-sectional area of the wire will not change. Not changing the wire will also mean that the resistivity of the wire will remain the same. The voltage running through the wire will always remain the same throughout the whole experiment as this will also ensure a fair test, one in which only the length of wire will be changed.
Safety: To ensure that my experiment is safe I will have to be extremely careful when dealing with the electricity. I must be careful not to touch any wires while the power is on and those that have an electrical current passing through them, because I may get burned.
Obtaining evidence
Method: First I gathered all the equipment listed together and set up the circuit like shown in the diagram on the second page. I then checked that all the equipment about to be used was clean and in working order.
I then set the power setting to two volts (for reasons stated earlier in my preliminary work). Then placed the piece of nichrome wire in its correct position. I then securely connected the two crocodile clips to each end of the wire and placed the meter ruler next to it. I then made sure that the first crocodile clip was level with the point 0cm on the meter ruler. The other clip was then placed at the positions I stated earlier, (from 0 cm to 100cm measuring every 10cm). I then made sure the ammeter reading was off as zero before I switched anything on. Then I turned on the power pack with one clip on 0cm and one on 10cm (to start with); I then read off the measurements from the ammeter. Then I switched off the power pack and record the results that were just obtained. In turning off the power pack I mad sure that the wire did not over heat and hence keep it a fair test (because the temperature affects the resistance). After the wire cooled down I moved the clip from 0cm to 20cm, turned the power pack on and started taking the reading for the current and voltage once more. After I'd taken all theses readings up to 100cm (with 10cm intervals), I then did the same again for repeat readings.
The need for accurate results is essential for this experiment to prove my prediction is correct and to verify ohm's law as well and from my results I think I've shown this. I made 10 readings altogether.
Analysis
To give me some idea of what length of wire and what voltage to use I conducted three preliminary experiments. In each of these experiments I increased the testing length by 20 cm each time.
From these preliminary tests I found out that it is best to set the power pack at 4 volts for the most accurate results. Also I shall only use a piece of wire that's 1m long. So for my final experiment I shall use a 1m piece of wire and space my crocodile clips out at 10cm intervals thus using all of the wire, again for accuracy and reliable results. I will also do the test 5 times for reliability and also it will be easier to construct a graph with more data. I used reliable and precise scientific equipment that gave me a good degree of accuracy as it displays up to two decimal places.
Final Experiment
Exp. 1
Exp. 2
Exp. 3
Exp. 4
Exp. 5
average
Length of wire
(cm)
Current (amps)
Current (amps)
Current (amps)
Current (amps)
Current (amps)
Current (amps)
0
.49
.57
.49
.50
.59
.43
20
0.87
0.86
0.88
0.87
0.89
0.87
30
0.61
0.62
0.61
0.61
0.62
0.61
40
0.47
0.47
0.47
0.47
0.48
0.47
50
0.38
0.38
0.38
0.39
0.39
0.39
60
0.32
0.32
0.32
0.32
0.32
0.32
70
0.28
0.27
0.28
0.28
0.28
0.28
80
0.25
0.24
0.25
0.25
0.24
0.25
90
0.22
0.22
0.2
0.22
0.22
0.22
00
0.20
0.20
0.20
0.20
0.20
0.20
Conclusions
From my results table I can see that the longer wire allowed less current to pass through it, as the current flow was more in the shorter wires. This can be explained as the long wire offers more resistance than the short one as the current has further to travel. As in a long wire there are more ions than in a short wire therefore more ion collisions, the electrons also have further to travel. From these results I was able to produce an accurate graph.
As can be seen from my result tables and more clearly from my graph my original prediction stands to be correct. My graph is a smooth downward curve of points on the graph but I have placed a line of best fit in which all my results remain relatively close to, the rate of decrease in current is greatest at the shorter lengths. As the length increases the current decreases because of the larger number of ion collisions in the longer wire. I think this because atoms are made up of a positively charged nucleus surrounded by negatively charged electrons. In solids one, or two, of the outer electrons in each atom are used to bond with atoms that hold the solid together. In a metal these electrons are free to move throughout the solid to anywhere they want. These are usually referred to as "de-localized free electrons". An electrical current is a flow of charged particles and therefore the free electrons can flow through the metal if a voltage is applied to the metal.
Current represents the number of electrons flowing per second, as the charge on each electron is the same. If the resistance is high ten the flow of electrons is slow and therefore the number of electrons per second is reduced, i.e. the current is reduced.
If the metal is heated the metal ions will vibrate more thus meaning that there's a greater chance of an electron colliding with a metal ion and so the flow of electrons is reduced (I.e. the resistance increases) as seen in this experiment.
From this investigation it can be seen that the length of wire clearly does affect the resistance of the wire. As can be seen from my graph, the longer the length of wire the lower the current became and we had a higher the resistance, hence resistance is proportional to length of wire.
The resistance of a wire is where a metal wire is placed in an electric circuit and the voltage from the battery makes the electrons flow through the wire. They collide with metal ions whilst doing this and this process slows down the flow of electrons. Therefore resistance is the measurement of how easily the electrons can move through the metal - a low resistance means that the electrons can move easily and a high resistance means that the electrons cannot move so easily. In this experiment it is clear that there is a low resistance when the length of wire is short but as the wire gets longer the resistance also increases, i.e. resistance is proportional to length of wire.
I believe that my results support my prediction because I said that as the length of wire would increase the current would decrease and that current, resistance and voltage are all intertwined and related to eachother very specifically. The final results are also compatible with the preliminary results I have.
Overall Evaluation
I enjoyed this experiment because it was safe, quick and easy to do, the only challenging part was trying to keep the wire straight on the table and trying to get a measurement that was as precise as possible, as the wire wasn't and wouldn't lie flat on the desk it was hard to get a really accurate measurement of its length.
The procedure I used for my investigation was appropriate and quite accurate because I was able to obtain a decent set of results. I was also able to draw a good graph from my result tables and hence could form a good conclusion. From my graphs I can see that I obtained a good set of accurate results as all the points are arranged around the lines of best fit, and are all quite close to the line this is because I did the experiment a few times for reliability. This tells me that I must have carried out an accurate investigation otherwise I would not have had the same success.
I also made sure that during the experiment, all the variables except the length of the wire were kept the same. I allowed the wire to cool down after each reading. This is done to keep it a fair test in that if the temperature of the wire increases, then the resistance of the wire will also increase so therefore it was helping to make the investigation a fair one.
I also tried to keep the temperature the same by doing the experiment in one room all the time at room temperature and recording and measuring at relatively fast rate. I kept the cross-sectional area of the wire the same throughout the entire experiment to also help make it a fair test. I did this by using the same piece of wire for each measurement. In not changing the wire I also kept the resistivity of the wire the same as the material of the wire could not and did not change.
If you look at the graph for my initial readings you can see there's one anomalous result. This is occurs when the length of wire is 20cm. The anomalous result could have happened because either the wire may have been over heated for that particular reading, hence the resistance increases, or, the result may have been misinterpreted due to human error, i.e., I may have recorded the incorrect reading from the ammeter or put the crocodile clips on the wrong length of the wire.
However in spite of this minor setback and despite these problems this experiment provided me with good enough results. I could have repeated the experiment even more times for even greater reliability. From my results I was able to produce accurate graphs and the points on these graphs are close to the line of best fit on the graphs. However, an investigation can always be improved upon and I feel I could improve my investigation by:
) Using a digital ammeter to reduce human error.
2) Leaving the wire time to cool down between readings to help make it a fair test.
3) A longer wire
4) Water bath
5) Higher voltage
6) Variable resistor
7) Volt meter after power pack
In my opinion my results were sufficient enough to form a good conclusion. I took 50 readings in total. All these points on my graphs are close to my line of best of fit, apart from my anomalous result, so I think I am right in saying that my results are accurate and can support my conclusion.