Hypothesis and Prediction
The photographic film will clear up fastest when the enzyme is at its highest concentration. The time that the photographic film takes to clear will increase as the concentration of the enzyme decreases.
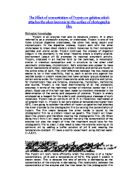
The trypsin will work more efficiently when the enzyme is of a higher concentration, pH 8 and a temperature of 40°C. The graph I predict is shown below. This is because the rate of activity is decreasing as the concentration of the enzyme is decreasing. The relationship between the concentration of the enzyme and the time taken for the photographic film to clear is a linear one because as one increases the other decreases and the graph will tend to have a constant gradient.
Time taken
for film to
clear (mins)
Concentration of enzyme (%)
Key Variables
- Temperature
- pH
- The volume of buffer solution used
- The size of the piece of film
- Volume of enzyme
- End point
- Time taken for photographic film to clear
-
Temperature at which the reaction occurs should be less than 40°C and should be kept constant throughout by placing the experiment in a water bath.
-
pH should also be kept constant at its optimum pH 8 by using a buffer solution.
- The volume of buffer solution used should be kept constant in each test-tube
- The size of the photographic film pieces should be kept constant 1cm by 1cm.
-
The volume of trypsin solution placed in the test tube should also be kept constant at 1cm3.
- The end point is obtained when the photographic film is totally clear.
- The time is recorded as soon as the film is placed into the test-tube and stopped as soon as it is totally clear. I will not continue after 40 minutes of the start of those that take longer than 40 minutes to clear.
PILOT STUDY
APPARATUS LIST
Trypsin solution
Buffer solution of pH 7/8
Photographic film (exposed)
A pair of scissors
3 Stopwatches
1 Black China wax pencil
1 Beaker (100 ml)
1 1-cm3 pipette
1 10-cm3 pipette
20 Test tubes
Water bath (>40°C)
4 Test tube racks
6 Plastic graduated dropper
White stickers
1 Pipette filler
Distilled water
White sticky labels
2 Thermometers (50°C)
Universal indicator paper
1 25 ml beaker
METHOD
First of all I’ll make a serial dilution of trypsin. I’ll start by placing 10cm3 of trypsin solution in a test-tube. Then I’ll take 1cm3 from this test-tube and put it in another test-tube. To this second test-tube I’ll add 9cm3 of water. I’ll take 1cm3 from the second test-tube and put it in another test-tube and add 9cm3 of distilled water to this test-tube. I’ll continue doing this till I obtain 0.0001% of the original concentration.
After making the serial dilution I’ll cut the photographic film into 1cm by 1cm pieces. Then I’ll measure 1cm3 of each solution made and put it into different test tubes and label them. Then I’ll place a piece of photographic film in each of the test tubes and start the stopwatch simultaneously. I’ll do the same for all the concentrations and I’ll also do one with distilled water and I’ll take three readings or each of the concentration to get a more reliable result. I’ll record the results in a table as shown below:
And my summary table will be as shown below:
Results
I was not able to obtain any results, as the film was taking too long to clear as the experiment was left at room temperature and the pH wasn’t maintained.
Analysis
As the film did not clear within 40 minutes of the start of the experiment I realised that I would need to keep the experiment for longer or increase the concentration pf the trypsin.
On further research I realised that trypsin works best at a pH 7.5 and a temperature of 40ºC and therefore I’ve decided to place the whole experiment in a water bath of 40ºC and add a few drops of buffer solution which has a pH 7.5.
Risk Assessment
1) Apparatus
Hot Water Bath: Take care and use tongs when removing and placing the test tubes in the water bath and also when removing the lid as the steam can burn.
2) Chemicals
Trypsin Solution: It has a low risk. Keep the solution in a clearly labelled container. It is an irritant. Avoid any spillages. Wear a lab coat and a pair of safety spectacles while handling the enzyme.
3) Living Organisms/ Environment
When washing up the trypsin solution from the test tube rinse it of in large amounts of water and avoid the water with the trypsin and the silver nitrate from the photographic film splashing back and dispose off the photographic film carefully in a dustbin.
Main method
I’ll first make a serial dilution of the trypsin and label each test-tube of the concentration it is. Then I’ll place 1 cm3 of each solution in different test tubes. Then I’ll place each test-tube in a water bath of 40°C for 3 minutes or until they all reach a temperature of 40ºC. I’ll measure the temperature of each solution using a thermometer and make sure they all are at 40ºC. While they’re all coming to the same temperature I’ll cut the photographic film into 1cm by 1cm pieces. As soon as each of them reaches 40ºC I’ll add a piece of photographic film to each of the test tube and simultaneously start a stopwatch. As soon as the film clears totally I’ll stop the stopwatch and record the time taken for the photographic film to clear in the table. I’ll repeat the experiment three times for each concentration and record the results. I’ll then calculate the average time taken or the photographic film to clear after which I’ll plot a graph of average time taken for photographic film to clear in minutes against the concentration of enzyme in percentage.
Results
Average time taken= Trial 1 + Trial 2 + Trial 3
3
Conclusion
The graph shows that as the concentration of the enzyme increases the time taken for the photographic film to clear decreases. This shows that the protein gelatine is broken down faster by the enzyme trypsin if it is at a higher concentration. There were no anomalies in my results. The error bars were relatively small showing the accuracy of the results.
Evaluation
The results seemed to be quite reliable as they were quite close to one another and the graph was approximately a straight line showing that as one increases the other decreases.
Analysis
Trypsin acts to denature proteins. In this case the protein is gelatine. The trypsin denatures gelatine found on the photographic film and therefore releases the silver bromide which dissolves into the solution making it turn from clear to brown.
Limitations
- As the film started clearing the solution started turning cloudy and brown making it difficult to observe when the film was totally clear therefore altering the results a bit. This cannot be modified unless there was a way in which we could make the solution clear again without altering any of the reactants and changing any variable.
- When the concentration of the trypsin became lower it was not possible to get the readings as the photographic film took too long to clear and therefore it would have been better I started with a much higher concentration and therefore could have obtained more readings which did not take longer than 40 minutes.
- As the film cleared and the intensity of the solution increased I could have used a colorimeter and measured the intensity of the solution. As the film cleared the intensity would increase and therefore when we come closer to the film becoming totally clear making it easier to judge the point when the film is totally clear.
Bibliography
-
Internet:
-
Internet:
-
Internet:
-
Internet:
-
Internet:
- AS Unit 2 Text Book: Exchange and Transport, Energy and Ecosystems By John Adds, Erica Larkcom, Ruth Miller
-
Internet:
Internet: