Word processing:- Word processing is very easy to use and a nice newsletter can be created by using this software. Though we can create newsletter by using this software but still this software is not made for creating newsletters. Which indicates us that, there will be some back lock while we will use this to create the newsletter.
There are two software in DTP, which I will be able to use to create the newsletter. Microsoft Publisher and Adobe Pagemaker.
Adobe Pagemaker:- This is one of the famous software for DTP. Professionals use this software to create mind-blowing newsletters, magazines, posters etc. The main problem for using this software is, it is very hard and we have to learn how to use this software. This is quite complicated for the beginners.
Microsoft Publisher :- This is also famous for designing the newsletter, magazines and posters. This is also quite user friendly and doesn’t need any advanced knowledge to operate that. There are loads of newsletter has been already created for us, so we can use that, which will save our time even more.
After looking at both the software, I have decided to use Microsoft Publisher for my solution.
System requirements for word processor (Microsoft Publisher) :-
Windows 98 or higher
233MHz or higher processor.
16 MB ram.
10 GB hard drive.
160 MB available hard disk space
Hardware requirement:-
1 Colour monitor.
2 Printer (bubble jet will be fine for this project because, it doesn’t need to have a magazine quality print out.)
3 CD-ROM.
4 It will also be a good idea if they have a floppy disk drive because, this will enable them to back up their data (monthly bill) in a 3½ inch floppy disk drive, so that when their hard drive crashes or computer get effected by the virus than they will be able to use the data from the floppy disk.
Below I have given the screenshot of Microsoft Publisher.
Below I have given the data flow diagram of the project which is currently done without any help from IT.
DATAS ARE SENT TO
SECRETARY FROM DIFFERENT CLASS
TYPES UP
RECHECK AND RETYPE
PHOTOCOPY IT SEVERAL TIMES
PUT THE NEWSLETTERS IN TO THE ENVELOP
DESPATCHED
Below I have given the picture of the typical newsletter which is created without any help from IT.
Before I start creating the solution, I should outline what this newsletter will contain. Well I can’t be very precise on what the data will be about because every week it is new data comes from different sector. As a rough, there will be some graphic design in the newsletter with some pictures as well.
Below I have given a rough guide of how the final solution will look like.
DESIGN
Below I have given the flow chart of how the proposed solution will work.
We can use create the newsletter very quickly by using the newsletter wizard
To use the Newsletter Wizard
-
If the Microsoft Publisher Catalog is not visible, click New on the File menu.
-
Click the Publications by Wizard tab.
-
In the Wizards pane, click Newsletters.
-
Click Blends Newsletter and then click Start Wizard.
-
Read the introduction, and then click Next.
-
Select Mountain and then click Next.
-
Select 2 Columns and then click Next.
-
Select the No option and then click Next.
-
Select the Other Address option and then click Next.
-
Select the Double-Sided option and click Next.
-
Select the Other Organizations option.
-
Click Finish.
-
Save your newsletter by clicking Save on the File menu.
Customizing your newsletter
Now that you've created the basic newsletter layout, you can drop in headlines, articles, and clip art to customize your newsletter.
To enter information on the first page of your newsletter
- Zoom in on the publication in one of the following ways:
-
On the Standard toolbar at the top of the screen, click the plus sign (+) to zoom.
-
Click the Zoom drop-down box next to the plus and minus signs and then select a magnification from the list.
-
Press F9.
-
Click the placeholder text "Newsletter Title" and type Summer fields Tutorial. AutoFit is activated, so the text will get smaller as you type to fit in the text box.
-
Click the placeholder text "Newsletter Date" in the upper-right corner of the newsletter and then type Summer or the month your newsletter will be published.
-
Click the placeholder text "Lead Story Headline" and type School will be closed on 7th may or the title of your lead story.
- Click the placeholder text below the Lead Story Headline. Type your story into this frame or paste a story into the frame from Microsoft Word (or other word-processor).
- Double-click the lead story graphic. When the Clip Gallery appears, select a graphic appropriate to your story.
-
Click the text "Secondary Story Headline" and type Year 11 trip to drama or the title of your secondary story.
- Click the placeholder text below the Secondary Story Headline. Type your story directly into this frame, or paste a story into the frame from Microsoft Word (or other word-processor).
- In the "Inside this Issue" frame, click anywhere on the text "Inside Story" and type the title of the next article you want in the newsletter. Add as many stories as you plan to have in your newsletter.
-
On the File menu, click Save to save the changes you have made to your newsletter.
To insert an existing story
- Create and save your story using your word processing software.
- In the Newsletter, click anywhere in the text frame.
-
On the Insert menu, click Text File.
- Select the word processing file with the story you want to insert.
-
Click Insert. The story will appear in the text frame.
To enter information in the inside of the newsletter
- To go to the second page of the newsletter, click the page icon with the number 2 on the Status Bar, which is at the bottom of the Publisher window. You should see a page icon for each of the pages currently in your newsletter.
-
On the Newsletter Wizard in the left pane, click Inside Page Content. The Inside Page Content Wizard allows you to change the layout of the page to accommodate the information types you may want to add to the newsletter.
-
In the lower-left pane, click the Calendar with 1 story option.
-
In the drop-down box in the left pane, select Right Inside Page.
- Continue to customize headlines and articles as described earlier in this lesson.
-
On the File menu, click Save to save the changes you have made to your newsletter.
Entering captions for graphics
No matter how good an illustration is, a caption can tell the readers even more. In the newsletter, each of the Picture frames also has a caption frame attached. You can also insert caption frames in your publications.
To change the caption
- Click the story graphic on the bottom of page 2.
-
Press F9 to get a closer look at the caption.
- Click the caption and type a sentence describing the significance of the graphic or picture to your lead story.
- Click outside the Text Frame.
-
Press F9 to zoom out to see the whole page again.
Adding or deleting extra pages
We can add or delete pages. It depends on the contents of the news letter.
To add extra pages
-
On the Insert menu, click Page. The Insert Page dialog box appears.
-
In the Left Page drop-down box, select the layout you want for the page.
-
In the Right Page drop-down box, select the layout you want for the page.
-
Click OK to add two pages.
To delete extra pages
- To go to the second and third pages of the newsletter, click the page icon with the number 2 or 3, which is at the bottom of the Publisher window.
-
On the Edit menu, click Delete Page.
-
Select Both pages.
-
Click OK to delete the pages.
Inserting a Drop Cap
Sometimes a fancy first letter (called a Drop Cap) in a paragraph catches the reader’s attention. The Drop Cap can also help fill a page that does not have a lot of text. In order to perform this task, we must already have a story in the text frame.
To insert a Drop Cap
- Go to the lead story on page 1 of the newsletter.
-
Click the lead story text frame on the first paragraph. If you have not already added a story in this text frame, then add at least one line of text before continuing.
-
On the Format Menu, click Drop Cap.
-
Click the Drop Cap tab, if necessary, and then click one of the drop-cap options in the Available drop cap box. You can scroll in the Available drop cap box to see additional drop-cap options.
-
Click OK to add the drop cap you selected.
Checking your spelling
Publisher 2000 includes some of the same features found in Microsoft Word, including background spell checking. Publisher 2000 also has a spelling option on the Tools menu.
To check your spelling
- If you misspell a word or Publisher 2000 does not recognize it, a red wavy line appears directly beneath the word on the screen. Right-click the underlined word to see suggested spelling option.
- You can choose a correction, add the word to the dictionary, or tell Publisher 2000 to ignore all instances of the word.
-
On the Tools menu, point to Spelling, and then click Check Spelling. The spell checker checks one story at a time. A dialog box appears at the end of the first story asking if you want to check the rest of the publication.
-
Click OK to continue checking spelling. The Check Spelling dialog box appears when a misspelled word is found. You can change, ignore, or add the word to the dictionary.
After all this the final solution will be exactly the same as below.
IMPLEMENTATION
The features of Microsoft Publisher which I have used are :-
News letter wizard:- This is to select the design of the news letter. This will enable us to save loads of time.
Template:- To make the letter bold.
Drop cap :- To make the first word of a sentence big.
Loading my solution in to different computer is very simple. This solution is user friendly and very easy to load and re-use. Before we load this solution in to the computer, we have to make sure that Microsoft Publisher 2000/xp is already installed in to the computer otherwise the solution is never going to be loaded in there. After making sure that Microsoft Publisher is installed properly in to the computer, we now can copy the solution in to the computer. After that, we then have to open the file. Once we have opened the file we now can edit and change according to our need then save it. It’s that simple.
There wasn’t any problem encountered while we were loading the solution in to the computer. It loaded very easily and from there we started editing.
DATA FLOW DIAGRAM OF HOW THE SOLUTION (USING THE HELP OF INFORMATION TECHNOLOGY) WORKS
DATAS ARE SENT TO
SECRETARY FROM
DIFFERENT CLASS
EDITED AND PRINTED OUT
PUT THE NEWSLETTERS IN TO THE ENVELOP
DESPATCHED
TESTING
For my solution, I will test 5 major things, they are:-
LOADING
SAVING
SAVING IN FLOPPY (A:)
EDITING
PRINTING
LOADING :-
I have created this solution in my laptop and than I copied it in a 3½ inch floppy. I took that floppy in to the school office and inserted in the CPU. Then I copied the file from the floppy and pasted it in the computer (desktop). Below I have given the screenshot, which I took when the file was loading in the computer.
I copied the file successfully in the PC. It took only 25 seconds to copy from the floppy to PC.
SAVING :-
After loading the file from floppy, I then opened the file and saved it in the MY DOCUMENT folder. When I was saving the folder, it asked me for a name and I chose “summer fields tutorial” as the name for that folder.
It took less than 3 seconds to save that.
SAVING IN FLOPPY (A :)
I copied the file from the PC to the floppy again. I just clicked send to - 3½ Floppy (A :)
It took 20 seconds to copy in to the floppy.
EDITING
Editing the news letter was quite simple. I just opened the file and deleted some lines from the newsletter then added new lines and pictures, than saved it. Saving the new version of the letter did not take very long, only1 sec.
PRINTING
Printing out the news letter was vital in order to pass the test, and it did not go any wrong when I clicked in PRINT button. It asked me for the page specifications and after I selected according to our need it started to print out via printer.
It only took 16 seconds to print out.
There was no problem occurred while I was carrying on my test.
Below I have given a comparison between the computer solution and the non-computer solution of this project.
NON-COMPUTER
- It takes long time to create a newsletter.
- It’s not always perfect.
- The final newsletter doesn’t look very nice and tidy.
- The newsletters have to be photocopied for more than 100 times and this consumes loads of time.
- There is no graphics in the newsletter, which makes the newsletter look dull.
- The final newsletter has to be rechecked several times.
COMPUTER
- It takes half the time to create a news letter.
- It’s always perfect.
- The final newsletter looks quite nice.
- If any information has been mistyped than the secretary does not have to create a new newsletter. She just can delete and the word and correct it.
- Lots of graphics are used in the newsletter which will make it look lot better.
- The final newsletter does not need to be checked but going thorough over it for once will be very safe.
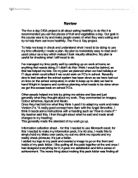
EVALUATION
My final solution almost over satisfies the rough design objectives which I gave in the design section.
By looking at the above result, we can say that the solution has performed pretty well. It not just cut the time of creating the newsletter in to half it also create a touch of elegance in to that newsletter. Before the newsletter did not used to contain any type of graphics at all, but in my solution it is full of graphics. I have created columns in to the newsletter which will look like a newspaper and top of it; it will look like a professional made newsletter.
I gave this solution to the secretary and after one week I went to ask her how she felt about my solution. Below I have given her comment about my solution:-
I have never thought that my job will become so easy and less time consuming ever in my life. I don’t have any word to describe about this solution. I can only say that this solution is amazing. It reduced my working time in half. It is very easy to use so I did not have to face much problem while I was using it for the first time. Before I used to worry about how to type up the newsletter correctly, but after I get this solution I don’t have to worry about spelling mistakes any more. I can correct it and I don’t have to write the entire newsletter again. I don’t know much about computer but still I can create the newsletter which will look like as if it is done by any professional people. I can also change the design easily. Before I couldn’t include any picture in too our newsletter but now I can. This helps a lot to connote our message.
There is lots of rum to improve the solution. One way we can improve it by adding borders and shading in to the newsletter. That will enhance the beauty of the look of the newsletter a lot.
That was just an example. That was just an example. This solution can be improved lot more; it all depends on the user and how they like to use it.