Pen
Paper
Variable Resistor (Rheostat)
Prelim Work
Before doing this experiment I did some preliminary work. I found a computer program called ‘Focus On Science’. In this program it is possible to do a simulation of the test, to see what the results might be. In this test I used copper wire instead of nichrome wire. Although it was not entirely accurate, it helped show how I would set up the equipment and gave me some experience.
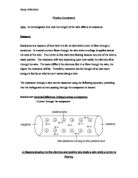
According to ‘Keith Johnson’s Physics For You’, as the length of wire increases, the resistance increases. This is fairly straight forward, as obviously if the wire is longer, the electrons will have to travel further, therefore being more exposed to ions and electrons in the wire, slowing it down. This gives me the impression that our results may have some sort of correlation. As long as all the variables are kept constant where necessary, I believe that there will be a pattern between the results from the different lengths of wire. I am using a variable resistor in the circuit to make a safe and reliable test. This way the current cannot be altered (as long as the variable resistor is left alone).
Prediction
After researching this experiment on various websites and books I have come up with a reasonable idea of what I think will happen. I believe that as the wire gets longer, the resistance will increase at a directly proportional rate. Also, I would not be at all surprised if the correlation between the results slightly changes for the last few results. By this I mean that there will be more resistance in the wire later on. I think this will occur because I have learnt that if the temperature of the wire increases, so should the resistance.
Variables
Obviously we have decided that our only variable will be the length of the wire so we do not have to worry about other possible variables such as the type of wire, diameter of wire, the voltage of the circuit, the temperature of the wire and the current being used in the circuit. However I must make each variable a controlled amount that will stay the same for each experiment. We have already decided that we are to use nichrome wire, so that variable is pre-determined. We also decided that the current would not be altered by anything but the nichrome wire, so I do not have to worry about that. I have therefore decided that I will use these control amounts for the other two variables:
- Diameter of wire – 0.5mm. I chose this frankly because 0.5mm wire is very easy to find.
- Voltage of Circuit – (?)
Also stated in Keith Johnson’s book is the fact that as temperature increases, resistance increases. Consequently I decided that each test must be completed at room temperature.
Decisions
For this experiment the length of wire will have to be altered for each individual test. I determined that I would make the length of the wire increase by 10cm each time. I chose this figure because it is a rounded number and should be small enough to record the difference in resistance, and large enough for there to be a considerable change in resistance. I am using a variable resistor to control the current in the circuit.
I also decided that I would record 10 results ranging from 10cm to 100cm. I hoped that this would result in a wide range of resistances. I chose the rounded figures so that it would be easy to work with.
Method
The first thing I will do is link up the ammeter, the battery pack and the variable resistor in a series circuit using connecting wires. I will then connect the voltammeter up to the circuit in parallel using connecting wires. I will leave a gap at one side of the circuit, and put crocodile clips on the end of the unattached wires. This is where the nichrome wire will be fitted.
I will then start the tests by connecting a 100cm piece of nichrome wire between the crocodile clips. I decided to start with the wire at the longest length, because then I could shorten the wire down once I had done each test instead of lengthening it. This way I could use the same bit of wire each time. This will also guarantee that the wire is the same thickness for each test. Because of this it does not matter that much if the wire is not exactly 0.50mm in diameter because it will be the same each time. Once each length of wire has been fitted I will write down the reading from the voltmeter and the reading from the ammeter. I will then repeat each test twice to rule out any anomalies. Finally I will work out the resistance by using the formula stated on a previous page. Once I have recorded the results I will then be able to make a graph which will show how the resistances increased or decreased between lengths, and if there was a correlation between results.
Fair Test
- It is very important to get the wire exactly (or as close enough) the right length for each test to guarantee it is a fair experiment.
- I can also help guarantee a fair test by not changing or altering any of the equipment used.
- The results from the voltmeter and ammeter should be rounded up (or down) to the same number of significant figures.
- Each test should be carried out twice to rule out anomalies, and then the average should be found from these two results.
- It is important to use wire with the same diameter for each test.
Safety
- It is important that water is kept away from the experiments because someone could get electrocuted, or the equipment could become damaged.
- It is also important that no one is silly while doing this experiment because it would be easy for someone to get electrocuted, or fall over and hurt themselves.
- The power should be turned off when it is not being used, to ensure the safety of yourself or others.
- The power should also be turned off when the length of the wire is being altered or the equipment is being rearranged.