Test number 7
The user clicks on the homage button (1) and the homepage worksheet will open (2)
(1)Homepage button
(2) as you can see below the homepage opens once the homage navigation button has been clicked
Test number 8
The user clicks on the worksheet button “invoice “ (1)as shown below and the following will show(2)
(1)user clicks the button
(2) As you can see below the invoice worksheet opens
Test number 9
Stock list worksheet
Customer details(worksheet)
Design your own pc (worksheet)
Invoice(worksheet)
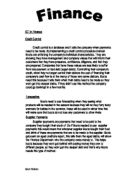
Implementation
User interface
To set up my new computer system I need to use a spreadsheet software package and so I choose to use Microsoft excel. I used this software as it is simple to use for setting up and provides the most commonly used spreadsheet package . This means that the most of the people who are able to use the pc and use Excel , and I know that the employees at PC systems who will be using the system can use the software
. I collected the data for the spreadsheet by contacting Pc Systems contacting office , materials and extra and for the pc parts and other information I used from the PC Systems website.
How to record the macros on the user interface and all pages
Firstly I used clip are as shown below to get the pictures for my user interface:
Below is how I opened the clipart menu
Once the clip are menu is opened I searched for the following items for the pictures to come up that I used for my interface
clip art menu
The following clip art images I used for my interface as shown below
MACROS
Once the pictures are in place I now can record the macros I need to navigate around the spreadsheet as shown below .
Step 1 :
Firstly I needed to click on tools then macro and then record new macro as shown below
Step 2
Then I give a name for my macro .eg macro 1 then press OK
Step 3
Now you will see a little play and pause button icon as shown below
Step 4
Now I have to select the destination of the macro as you can see at the bottom of the worksheets there are named worksheets eg when I made the customer details macro I will do the following as shown below.
Once customer details has been selected I then clicked stop on the macro button as shown below .
Step 5 once I had clicked stop I then clicked on the picture which was relevant to customer details as shown below
then right click on the picture and select assign macro as shown here>>>>>
Step 6
Then once it has opened now I will select the macro I have just made to link it with the button as show below
Once macro 1 is found then click OK and the macro works and it links to the customer worksheet.
I did this to all my macros which are link on the user inter face as shown below I used the same method on all 4 of them.
I also have navigation buttons on the other worksheets to return to the user interface so the user can move around my spreadsheet quick and efficiently.
VBA code :
Vba code is useful for producing message boxes , and are easy to do as shown below and again they are linked to my picture “Help”
I opened vba up as by pressing ALT, F11 together and this screen should appear:
(1)
(2) entering the code as shown below into vba . I have included the following message for the user so if they have problems with the software or with any formulas or buttons they can contact the helpline so I can help them and guide them in the write direction .
Now right click on the picture as I said before and assign macro and then choose “helpline” and once it is done the outcome is
Now I am going to make an exit button using vba so the user can exit excel immediately and saving there work at the same time .using this button below .this method is used again by right clicking on the picture and assigning the macro as shown below :
Then open up VBA as shown above.
Now enter the code as shown below
Once this coded is entered I linked it with my button as shown in the other example and the out come should be as shown below ..first click on the exit icon then this message box will appear
If no then >>>>>
If yes then application quits successfully.
Named ranges
Once I have entered the stock information into my spreadsheet I need to name the ranges to use them in a v look up .to make it easier for the use to make calculations and search for the criteria needed to run the system correctly
Step 1 I highlighted customer details as shown below
Then I named the highlighted items “customerddd” as shown below using the toolbar as shown below :then I pressed enter so that it confirms that the name has been changed and is saved .
I used this method to name all of my ranges and named them appropriately.
To show all of the named ranges I did the following
Inser>Name >define
Then this toolbox opens showing all the named ranges and the formulas in the specific range as shown below . here you can add names and delete them .
V-look ups
Combo boxes
A combo box sometimes called a drop down box is a list of items from which you can choose one item of data.To open the combo box menu I needed to right click on the mouse and select forms as shown below :
Once I have clicked on the forms the menu below opened :
As shown above I then selected the combo box item, then I drew the combo box in the correct column to make it look professional as shown below .
Once I drew the combo boxes they need to be linked to a Vlookup and I need to format the control to link with the specific sell eg, product number as shown below(2)
(1)
(2)
First I had to right click on the combo box and select the format control as shown below
`
Spinners
A spinner button enables you to increase or decrease the value of a number in a cell by clicking the control.
firstly I right clicked on the excel tool bar and selected forms as shown below .
Then I selected the spinner from this menu choice as shown below .
Then I drew the spinner on my spreadsheet as shown below :
Then I needed to format the spinner to a specific cell to make calculations as shown below .i firstly right clicked on the spinner and the menu below appeared
I then selected format control as shown below and the following message box appeared .
Evaluation
In my evaluation I will first of all consider each of the end user requirements stated in the specification in turn and my objectives , and evaluate the success of below are my general objectives
Start up screen and Homepage buttons and links to all the pages back and forth .
I have met this objective as My spreadsheet has a start up screen and various buttons which were requested by the user so the user can move around the spreadsheet efficiently and are able to open and close worksheets also there are 2 other buttons which I used vb code so if the user gets stuck or damages the spreadsheet they contact the help line also there is a save and exit button which will make a back up of the work for future reference and a print button eg. For the output of the invoice as needed which will save a lot of time compared to the old system where everything is done by paper and when a record needs to be found it took a long time and even got lost on the other hand the spreadsheet saves records and time and is much more reliable and efficient compared to the old system
Various work sheets such as , hardware sheet ,invoice sheet etc
I have met this objective as there are 4 separate work sheets to separate the collection of data (stock) and the output(invoice) 4 separate sheets helps the user move around the interface smoothly as he can open and close the preferred work sheet as needed
Automatically store customer details and what they have bought.
Once item is bought it is taken away from the stock.
Protect the work sheet so no formulas can be altered by the user .
Use formulas to calculate total cost and vat etc
Labels to help the customer when moving on to a button
option boxes to let the user choose the best product eg memory for them
Limitations
In the system there are various limitations I have recognised.
In one of my validations it wasn’t accurate as when I typed in incorrect data the error message wasn’t displayed . this would then create inaccurate data as the user wouldn’t be aware of there mistakes
Improvements
In the system there are various improvements that can be made to improve the overall system
Also to improve my system I would create a separate spreadsheet that contains each customers details of the products they have previously bought and what they have ordered so the end user knows what the existing customers have bought so the user can deciide to give discount for spending so much money etc valuable customer.
End user comments
I arranged a meeting with mr Anderson who will be using the system to see how he feels about It and helps reduce work load that he originally had to do . I first of all gave the end user a couple of days to familiarise to the new system .
Here are the end user comments :
- The deign is practical and doesn’t irate the eyes – the colour is restful and doesn’t distract the users attention .
- Navigation is easy , as is adding and deleting information
- Alternating through the worksheets are very easy
- The out out of the system (the invoice) are very organise and very consistant
- The macros , formulas and v look ups help reduce lots of manual imput which saves time .
- There are few errors made as validation used on different data helps keep data accurate and up to date
My overall comments
I think my design is reliable and easy to use , there are only a few things that I can change and they are mentioned in my improvements , I think I have reduced massed amounts of user input compared to the paper work what they had to do before which took allot of time and effort , also the system looks professional and is very efficient and is very user friendly.
User guide
Contents page
Introduction
Welcome to the Invoicing System. This system has been created so that you can create an invoice in a seconds compared to the paper work that you used to do.
Installation
The system works directly off the USB memory stick, or alternatively you can copy it to the computer and run it from your computer. Simply press ctrl c on the Invoicing System file, and then press ctrl v in on the hardrive or in my documents on your computer
Opening the spreadsheet system
- Insert the USB stick .
- Next, click on My Computer
- Next, open the memory stick (a). If the logo is not there then wait for a couple of minutes as computer may be trying to detect the key or press F5 to refresh the page to help the computer detect the inputted device . then click on the invoice system (b) and open the file
(A)
(b)
Once the system has been opened the following pop up will appear about the security of the spreadsheet on the screen as shown below If this is presented then simply click on Enable Macros. This will activate the buttons in your spreadsheet . but if you click disable the spreadsheet will open but the macro buttons will not work which will effect the spreadsheets efficiency
(C)The screen below will be presented once the spreadsheet has opened below :
User interface
The user interface is the heart of the system which allows you to access the invoice system, and to access the stock list and access the customers list and allow users to choose what they would like to buy. To do this, simply click on the buttons at the top of the screen. These buttons are on all sheets, in the same place and with the same names, they will all open their appropriate areas when you click on them and do the tasks the same .
Customers
To enter the customer’s details into the system, you will first need to select the button from any area. This will open up the customers sheet which should look something like the one below.