I also prepared a water bath which contained 50 ml of water from a boiled kettle and 100 ml of tap water. The boiling tube containing the yeast was placed in this water bath which had a temperature of 30°C.
As soon as I placed the tube containing yeast into the water bath I started the timer. I used my standard to decide when the experiment was finished. With my finishing time, I took off 10 minutes as that was the time I allowed for the yeast to begin respiring (equilibration time).
Outline Plan:
Accuracy
I did the experiment for each temperature three times in order to have a more accurate result. To avoid fluke results as well. I also used different measuring cylinders for Glucose and Yeast in order to keep each pure. I used the same amounts of each substance as well to make it accurate and fair.
Safety
I made sure that the kettle was used with caution avoiding any spillages which would result in scolding. I also used the boiling tubes and test tubes carefully not breaking them or using them dangerously.
List of Apparatus
Boiling tube with delivery tube coming through a rubber bung
Test tube
Test tube with medium inside
Thermometer
Yeast
10% Glucose solution
2 measuring cylinders
Beaker
Kettle
Hydrogen carbonate indicator solution
Test tube rack
Fair Testing
In order to make the experiment fair, I kept certain things the same. The amount of glucose and the concentration of it were kept the same along with the amount of yeast. I made sure that the two were not mixed together by measuring them in different measuring cylinders. I also kept the length that the delivery tube, was dipped in the indicator solution the same. I always gave 10 minutes for each experiment for the yeast and glucose to equilibrate. I made sure that I used the same amount of hydrogen carbonate indicator solution as a greater amount would result in a greater time.
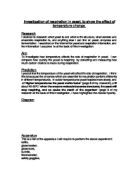
Range of Measurements
In order for this experiment to be successful and fair there needs to be exact measurements for each substance when it is used. I have chosen to use 20cm³ of yeast and 10cm³ of glucose. The temperatures which I will be using as my variables will be 22ºC, 30ºC, 37ºC, 45ºC and 50ºC.
Detailed method
First of all I took a measuring cylinder and measured out 20 cm of yeast. I then used another measuring cylinder (not the first one as there is still residual yeast left) and measured out 10 cm of 10% Glucose solution. The contents of these two measuring cylinders were poured into a boiling tube and then a rubber bung was placed on top of the Tube. This bung had a delivery tube running through to another test tube. This test tube contained a certain amount of Hydrogen carbonate indicator solution. The delivery tube was 1 cm into the indicator solution. Before the delivery tube was placed into this test tube, the whole boiling tube containing the mixture of yeast and glucose solution was placed into a water bath prepared earlier at a temperature of 37 degrees centigrade. The boiling tube was left in this water bath for ten minutes, to equilibrate. A thermometer was placed in the water bath to make sure the temperature never dropped. When it did, I added some water from the kettle. After the ten minutes was up, which I timed with a stop clock, I placed the delivery tube leading out from the boiling tube containing yeast and glucose, into the indicator solution. I began the timer as soon as the delivery tube was placed into the indicator solution. I placed my medium into the rack (also holding the indicator but not the boiling tube as that is still in the water bath) I prepared my medium earlier by using a straw and blowing into a tube containing a little bit of hydrogen carbonate solution. When the solution turned yellow, I placed it in the rack, to compare with the other tube, where the exhaled air from the yeast was being deposited via the delivery tube. When this tube’s contents turned the same colour as my medium, I stopped the clock and recorded the time in my results table. I carried out this EXACT experiment three times in order to get an average for accuracy purposes.
I also carried the experiment out another 12 times after these three. I used another four temperatures and did each temperature 3 times. In all I carried out the experiment 15 times at 5 different temperatures.
Results
Conclusion
I conclude from my results, that the enzymes which control respiration in yeast have an optimum temperature at which they respire best at. The temperature I found was in the region of 40°C. During my experiment, temperature was my variable. When the variable got closer to 40°C, it respired quicker leaving me with a quicker time. When my variable was at 22°C, it took 960 seconds on average to turn the hydrogen carbonate indicator solution to the same colour as my standard. When I did this experiment again with my variable at 37°C (my variable closest to 40°C) the time taken to change the hydrogen carbonate indicator solution to the same colour as my standard was just 345 seconds on average.
Enzymes are catalysts that make chemical reactions happen at quicker rates. They do this better at high temperatures as there is more energy and they move faster causing more reactions, hence my quicker times at higher temperatures. My results also show that after 45°C the time begins to get longer, this is because enzymes have optimum temperatures which they work best at, and in my experiment this optimum temperature is around 40°C. It is true that the greater the temperature the quicker the yeast respires, but at high temperatures (over 40 °C) the enzymes begin to denature (gets damaged) and this slows down the reaction rate.
At lower temperatures, the time taken for the hydrogen carbonate indicator solution to change into the same colour as my standard was significantly longer than that of my result when my variable was around 40°C. This is because at lower temperatures, there is less energy and the yeast moves around lower which slow down the rate of reaction.
The most noticeable trend in my times was that, the closer my variable was to 40°C the quicker the rate of reaction, resulting in the time taken was to change the hydrogen indicator solution into the same colour as my standard to be shorter.
Evaluation
The results I collected seem to be accurate and no anomalies appeared when I plotted my graph. All my results fitted the trend. This trend being that the closer the variable got to 40°C the quicker that time taken was to change the hydrogen carbonate indicator solution into the same colour as my standard. This is shown on my graph by an upward hyperbola. My graph proves my accuracy which was achieved by applying the same conditions to each experiment.
I felt that the only improvement that I could make was WHEN we did the experiment. When we carried the experiment out in the morning, the temperature of the room was much cooler than that of when we did it later in the day. We could possibly control the temperature of the room in which we conducted the experiment in by using radiators and pre-heating the room before we came into the laboratory. When we carried our experiment out we used the same delivery tube each time which made the test fair and it helps to provide us accurate results.
This experiment tells us that enzymes have an optimum temperature. An optimum temperature is a temperature which is most favourable for the enzymes task. This experiment shows us that the enzymes in yeast have an optimum temperature around 40°C.