A Pasteur pipette is small enough to allow us to add very small quantities of solvent. We use it to add the last centimetre before reaching the graduation mark of the volumetric flask. Also, they are very light and it is possible to be watching the meniscus whilst adding solvent.
Quantities of materials needed:
-
2.65g of Na2CO3
-
Approximately 250cm3 of distilled water
Procedure:
Using an electronic balance, which is quite accurate because it can measure to 2 decimal places, we will weigh 2.65 g of Na2CO3 by difference. To do that, we will weigh a weighting boat (which is approximately 0.90g). Then we add the solid up to exactly 3.55, so our final mass of Na2CO3 will be exactly 2.65g of Na2CO3. This way of weighting will give us the exact amount of Na2CO3 needed.
Then, we rinse the beaker, the funnel, the Pasteur pipette and the volumetric flask three times with distilled water. This will ensure us that the equipment is not contaminated because sometimes particles can be left from other experiments. Rinsing all the equipment at the beginning will allow us to be more focused on the procedure of making the solution. Otherwise, we could forget to rinse it later and we would have less reliable result.
After rinsing all the equipment properly, we transfer the Na2CO3 to a 250 cm3 beaker and rinse the weighting boat using distilled water to ensure that all the particles have been added into the beaker. Then we add distilled water into the beaker and mix it using a mixing rod until all the sodium carbonate is dissolved. The amount of water used will be less than 150 cm3. We need to be aware that the whole solution is going to be 250 cm3, so we need to be careful and do not add excess water.
Then we rinse the mixing rod with the same distilled water, in order to be more accurate and avoid losing any solution.
Using a funnel and ensuring that is not resting upon the edge in order to be more accurate and have a clear view of the amount of solution that is being added, we add the solution of Na2CO3 into a 250 cm3 volumetric flask. We use a volumetric flask because it is very accurate as it measures up to exactly 250 cm3.
Then, we rinse the beaker used and consequently, the funnel, both three times, to ensure that any useful particles are remaining. Again, this will ensure us more reliable results.
Then we add distilled water from its bottle up to 1cm below the graduation mark of the volumetric flask.
Then we invert the solution once to ensure it is well mixed. We need to invert it rather than shake it because shaking it could lead to air inside the flask being mixed. This would cause inaccuracies when trying to get to the graduation mark.
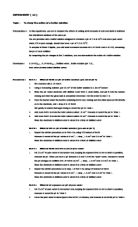
Using a Pasteur pipette, because can let us be very accurate and add very little amounts of liquid; we add the last centimetre of distilled water. In order to get exactly to the graduation mark, we need to ensure that the bottom of the meniscus is level with the graduation mark:
Then we label the flask with the name of the solution and concentration.
Making the titration: The equipment to make a titration will all together look like this:
Equipment needed
A bottle like this is needed to add distilled water and to rinse the equipment properly.
Burettes are vertical cylindrical pieces with a on the bottom. The stopcock is the part of the burette that allows the solution inside the burette to pass or not. It is the “open and close”. This instrument will allow us to dispense very accurate the H2SO4 solution into the flask with the reagent, in this case, Na2CO3 with the indicator methyl orange. Burettes are extremely precise and are accurate to ±0.05 ml.
This type of pipette (in this case, we are going to use a 25cm3) is very accurate and precise. It is safe with corrosive and toxic liquids and it is easy to use and clean. It also has a rapid emptying by depressing the plunger.
A funnel is needed to add the acid sulphuric into the burette. Using a funnel is a careful way of adding a solution into a burette given that it is very thin and long.
We are using a 250 cm3 conical flask. This flask has a narrow neck and a conical shape. The conical shape allows us to swirl or stir the content during titration; the narrow neck keeps the solution inside from spilling. The small neck also slows evaporative loss and the flat bottom of the conical flask makes it unlikely to tip over.
Procedure
First of all, we rinse out the burette and the funnel with H2SO4 and the pipette filler and the conical flask with Na2CO3. This ensures us that the equipment is less contaminated and therefore, it is going to be more precise when reaching the endpoint. If the equipment is not well rinsed, the colour of the solution may change earlier or to a different colour, so it would be very inaccurate. Therefore, we rinse everything properly, three times each apparatus with their respective solutions. This will make the titration and therefore, the results, more reliable and accurate.
Before filling the burette, we need to ensure that the stopcock is closed, so no acid is spilt. Then, using a funnel, we fill the burette with H2SO4 up to 0cm3 (which will make us easier to collect the results afterwards). This is done by ensuring the funnel is not resting upon the edge. In order to do this safely, we need to low down the burette and be sure that it is somewhere comfortable to us to fill it in properly and have a clear view of the graduation mark. Then we read the bottom of the meniscus, ensuring that our eyes are at the level of the meniscus, not above of below (instructions of how to read the meniscus are on page 7).
Using a filler pipette, we pipette 25cm3 of Na2CO3 into a conical flask. 25cm3 of sodium carbonate is enough to find an accurate concentration. We place the conical flask under the burette’s tip, leaving enough room to swirl the flask.
Then we add 3 or 4 drops of methyl orange indicator. This indicator is the commonly used for titration between a strong acid (sulphuric acid) and a weak alkali (sodium carbonate). It changes from red (at pH 3.1) to orange-yellow (at pH 4.4):
The number of drops is relative. This means that what is important is to ensure that the colour of the Na2CO3 has changed considerably.
The indicator is used so we are able to see a difference of colour when the endpoint is reached and therefore the reaction has occurred. The endpoint must look like a change in colour from yellow to red.
Swirling the flask all the time, we deliver 1cm3 of H2SO4 at a time onto the conical flask with Na2CO3 by turning the stopcock. We deliver 1 cm3 at a time because we still do not know when the endpoint is. By doing this, we will reach a more approximate endpoint than by adding bigger amounts at a time.
Sometimes the indicator changes colour when the H2SO4 hits the solution in the flask, but then the colour change disappears upon when swirling, so swirling the flask constantly will ensure us that the reaction has occurred. That is why swirling the flask all the time is a very important step. This will ensure us that the endpoint is reached, so the results will be more reliable if the flask is well swirled.
As approaching the endpoint, the colour of the solution in the flask will be definitely changing, so we open the stopcock partially and deliver H2SO4 dropwise until the endpoint is finally approached.
We read the final volume in the burette and record it. A way of having a better reading of the final volume, we place a white sheet behind the burette, so we can read better the graduation mark.
The first titration is a rough one, what means that is not a valid result as we are not sure when the endpoint is exactly and the exact colour that will look like, so that is why we have done a first, less accurate titration, just to see when the endpoint is approximately. This will allow us to get better and more reliable results, because more titrations will be done after this rough one and we now have an idea of the approximate endpoint.
After recording the final mark, we fill the burette again up to 0cm3, following all the steps in order to reach the exact graduation mark. Filling the burette before each titration up to 0cm3 will avoid any mistake in calculating the difference between the two graduation marks after each titration, so the results will be all from 0, so will be more reliable because fewer calculations have been done. However, it is important to be sure that the meniscus is well read.
For the second titration, we use a new, clean conical flask that has been rinsed with Na2CO3 and add again 25cm3 of Na2CO3. Using a clean and rinsed conical flask for the next titration will ensure us that it is not contaminated at all, so it is going to be more precise. Then we add the same number of drops of indicator, and repeat the procedure again.
Now we have an idea of when the endpoint is, so now we deliver solution (very important: always swirling the flask) up to 5cm3 above the last final volume recorded. Then we add H2SO4 from the burette dropwise, always with a hand on the stopcock to have a quick reaction when the exact endpoint is reached.
Again, we record the final reading using white paper behind the burette.
To ensure we reach the endpoint again, we keep the second flask with the coloured solution in it and repeat the titration until we have three concordant titres. This means that we need to have three final volumes recorded that are to within 0.1cm3 from each other.
Finally, we have all the results in a table.
Surely, if the indications have been followed properly, very little inaccuracies can have been done.
Regarding the procedure and the equipment used, valid and reliable results should be obtained.
References
“Aim” in Revised 2005 help sheet
“Solution” in http://en.wikipedia.org/wiki/Solution
“Titration” in http://members.aol.com/profchm/titrate.html
“Sulphuric (VI) acid in Hazcard 98A
“Methyl orange” in http://www.proscitech.com.au/catalogue/msds/c118.pdf and Hazcard 32
“Sodium carbonate” in: http://www.jtbaker.com/msds/englishhtml/s3242.htm and Hazcard 95A
“Concentrations of solutions” in Daniels A., Johnston L. and Otter C. 2004. Revise As Chemistry. Oxford: Heinemann, page 40.
“Using concentrations in calculation” in Chemical Ideas .Heinemann, page 13
“Weighing boat” in: http://www.chem.ubc.ca/courseware/154/tutorials/exp1A/weigh/
Definition of “Teflon” in http://www.wordreference.com/definition/teflon
“Beaker” in http://en.wikipedia.org/wiki/Beaker_(glassware)
“Burette” in http://en.wikipedia.org/wiki/Burette
“Filler pipette” in http://www.dynamicaqua.com/pipettes.html
“Conical flask” in http://en.wikipedia.org/wiki/Erlenmeyer_flask
“Indicator methyl orange” in http://209.85.165.104/search?q=cache:SKkYbrlmWCsJ:antoine.frostburg.edu/chem/senese/101/acidbase/faq/methylorange.shtml+methyl+orange+indicator&hl=en&ct=clnk&cd=4&gl=uk
Results and calculations to obtain the concentration of the solution
To calculate the final concentration of the acid solution, we first need to know the concentration and mass of Na2CO3.
To know the actual concentration of Na2CO3 used in the titration we need to know the actual mass of Na2CO3 added.
When weighing the solid, we first weighed the weighing boat, which was 0.90g. Then we added the solid until 3.55g. This means that we weighed exactly 2.65g of Na2CO3 as 3.55 – 0.90 = 2.65g.
Knowing that, we can now calculate the actual final concentration of the solution
Step 1: Having the right units.
First of all we need to change from cm³ to dm³, in order to have the wanted units related to the volume of Na2CO3.
So, 250 cm3 = 0.25 dm3
Step 2: Calculate the number of moles of the sodium carbonate solution. Knowing that m (mass) = n (number of moles) x Mr, we can then work out the number of moles of sodium carbonate
So, we first need to calculate the Mr of sodium carbonate:
Mr of Na2CO3 = 23x2 + 12 + 16x3
Mr of Na2CO3 = 106
Therefore,
n = m/Mr
n = 2.65g/106
n = 0.025 moles of Na2CO3
Step 3: Calculate the concentration of sodium carbonate needed. To do that, we need to use the equation n (number of moles) = C (concentration) x V (volume). Knowing that the number of moles is 0.025 and that the volume used was 0.25dm3, we can then calculate the actual concentration of Na2CO3.
Therefore,
c = n/V
c = 0.025 moles/0.25dm3
Concentration of sodium carbonate = 0.1 mol/dm3
Now we can calculate the final concentration of the solution
Step 4: Equation of reaction. From the reaction we can see that if we know the number of moles of Na2CO3, we can work out the number of moles of acid in the solution and therefore use it to calculate the final concentration.
Na2CO3 (aq) + H2SO4 (l) → Na2SO4 (aq) + H2O (l) + CO2 (g)
Step 5: Calculate the number of moles of Na2CO3. If we know the number of moles of Na2CO3, we will then know the number of moles of acid, because they will be the same, which is important to calculate the concentration.
n (number of moles) = C (concentration) x V (volume)
Volume of the flask: 25cm3 = 25 x 10-03 dm3
n = 25 x 10-03 x 0.1 M
n = 2.5 x 10-03 moles of Na2CO3
Step 6: Ratio of the reactants. As we saw in the reaction, the ratio of reactant is 1:1. This means that for each mole of Na2CO3, there is one mole of H2SO4.
1 Na2CO3 to 1 H2SO4
Step 7: Number of moles of H2SO4. As we know that the ratio of the reactants is 1:1, and we know the number of moles of Na2CO3, then we know that the number of moles of acid is going to be the same.
Therefore,
As 1 mol of Na2CO3 = 1 mol of H2SO4, then
2.5 x 10-03 moles of Na2CO3 = 2.5 x 10-03 moles of H2SO4
Step 8: Calculating average titre (using the three concordant ones). Using the three concordant titres and calculating their average, we will then find the volume of the final solution, what will help us to calculate the final concentration.
(20.15 + 20.25 + 20.20)/ 3 = 20.20 cm3 of H2SO4
20.20 cm3 = 0.0202 dm3
Step 9: Calculate concentration of the solution using n = C x V ➔ n/V = C. By using the volume calculated previously and the moles of the acid, we can calculate the final concentration using the formula n/V = C.
2.5 x 10-03 moles of H2SO4/0.0202 dm3 = 0.124 mol/dm3 (3 s.f.)
Therefore, this means that we have calculated that the concentration of acid we were given was exactly 0.124mol/dm3
Evaluation
The expected final concentration was 0.12 mol/dm3. As the results show a final concentration of 0.124 mol/dm3, we see that despite the result is not far away from the aimed one, it is still a bit higher than it. Therefore, we can conclude that there could have been both precision and procedure errors that caused the final result to be different from the expected one.
When making a solution and doing a titration, the accuracy is the main objective. Accuracy means the quality of nearness to the truth or the true value. That is why being accurate is the most important aim in this experiment.
There could have been both precision and procedure errors that could have affected this aim.
First of all, looking back to the procedure, we are going to find any possible errors that could have affected our numerical answers.
These errors could have relation to:
-
Weighing and transferring the solid (Na2CO3)
- Having the material not contaminated
- Having the right amount of everything
- Reading the meniscus of:
- Volumetric flask
- Burette
- Pipette
- Judging the endpoint
- Adding the acid and swirling the flask
It is possible that some Na2CO3 was lost during the transfer of it. This could be caused by either particles being blown by a draught of wind or particles left in the weighing boat or beaker. All this can affect the results because we may do all the calculations using a value, when we were actually working with a completely different one. One way this was prevented was ensuring that there were no windows open and also that all the equipment that had contact with the solid was rinsed properly with distilled water. So then we could ensure that the maximum amount possible was transferred.
Also, particles of the solid could have fallen on the top of the balance whilst transferring it to the weighting boat. If these particles are weighed, then the mass of sodium carbonate used would be different. This can also affect all the numerical answers. However, as we weighed by difference, these weighing errors were reduced as much as possible.
Although the equipment had been cleaned before we used it, it hadn’t been sterilised before we did the practical, so the material could have been easily contaminated.
Having the equipment contaminated can cause inaccuracies in both making the solution and titration because:
- Could react with the compounds and ruin the experiment
- Could alter the colour of the solution and therefore, alter the endpoint
- Could more importantly reduce the concentration
All this could affect our results, both numerically and experimentally.
In order to reduce this inaccuracy, we rinsed all the equipment off with the liquid that was going to be inside each apparatus (e.g. the burette with H2SO4), so we could remove any particles left from any previous use of the equipment.
For this experiment, the results are basically based on reading the graduation marks of the burette, the pipette and the conical flask. In all these apparatus the angle at which the meniscus was read may have caused inaccuracies.
If the graduation marks are not read well, the results would all be completely different. For example, when making the solution and using a conical flask, we were looking for a solution of exactly 250 cm3. If the meniscus is not read from the bottom and with parallel eyes to the graduation mark, the solution would not be exactly 250 cm3. Therefore, the reaction of the solution with the acid could be affected, and then our results and calculations would be affected by this different reading.
Then, when doing the titrations, we filled the burette all the time to 0. This means that we need to ensure that every time we fill it in, it is actually and exactly at 0 and also that as the titre had ended, we read the exact final mark.
When filling the burette, as it is a long tube and normally difficult to be reached when filled, the graduation mark hardly ever will be easily read. Therefore, it is very important to ensure that we are comfortably reading it or otherwise, the results would be affected. So, to read the graduation mark of the burette, we put the equipment at a comfortable position to be read, so we could have a clear reading of the bottom of the meniscus. This reading needs to be more accurate than the reading of the conical flask. That’s because the burette is the apparatus that we read to take into account the endpoint.
As we need at least 3 concordant titres that are to within 0.1cm3, we need to be sure that we are reading the exact graduation mark, or otherwise, our titres won’t be concordant. So, we could be either doing concordant titres thinking that they are not or doing non concordant ones reading a concordant one. This would affect the results when calculating the average titre to get the final concentration. That is why reading the meniscus properly is very important in order to find the right answer. So, what we did to have a better reading of these answers was placing a white paper sheet behind the burette, so both the final and the initial mark weren’t affected by any shape within the lab.
Also, every titre was done using a 25cm3 of the solution previously made. Imagine if the graduation mark of the pipette is not read well and in stead of adding 25cm3 of Na2CO3 we add 26cm3 or 24cm3. How could this affect our results? Firstly, when adding the methyl orange, as we have to add the same number of drops each titre, the colour of the solution would become lighter or darker if the solution has a different volume than the other ones. Then, when doing the titre, the endpoint would look different because the colour of the solution was firstly different and also because the two compound would react at a different point.
What does this mean? This means that at the time that we reach the endpoint and read the graduation mark in the burette, the mark read and, therefore, the results would have been affected by the mistake in reading the pipette.
Another procedure error that might have affected our results was the fact that the judge of the endpoint is very ambiguous and relative. How do we know that this colour is effectively the colour that indicates the endpoint? Judging the endpoint is a difficult task given that no rule or norm is written saying which colour is right or wrong.
As the perception of a change in the colour of the solution is different by everyone, also the results will be all different. So then, what can we do to judge it properly or at least to try to find the closest endpoint to the actual one?
Apart from reading the mark using with paper, we also kept a sample of the second titre after the rough one and then compared the colours when doing the following ones. However, it is not possible to be sure that the sample we kept had reached the endpoint. That sample could probably provide us concordant titres if we looked for the same colour.
To ensure we had the same colour as the second titre, we used white paper to judge it. However, we can’t say that the colour we defined as endpoint was the actual endpoint.
How could this have affected our results?
As our results are a bit higher that the aimed ones, it means that too much acid was acid. This procedural error could have affected the results as we probably thought that we reached the endpoint before reaching the actual one. This procedural error is definitely one of the most important ones as indicates us when the reaction has occurred.
Also, after the rough titre, when we already had an idea of the endpoint, we added the final centimetres dropwise to ensure we did not add too much. This could sound easy, but there are many ways of turning the stopcock, what means that there are different ways of adding these final drops. It is essential that the final centimetres before the thought endpoint are falling very slowly, so it’s important to be patient and wait even if the endpoint seems to be far from there. So, we need to ensure that the final drops are added at a slow enough rate to be aware of the colour change. This is an error that we possibly have made given that we usually try to finish as soon as possible.
Those errors are the most important ones that we have probably made. Those are the procedure errors that may have affected our results, making them higher.
Although the possible procedure errors, we tried to work as accurate as possible in order to have the most precise, valid and reliable results we could.
To get this, we tried to follow important and essential steps in the procedure that could help us to obtain those results.
First of all, we used the most accurate equipment available that had the less percentage error possible. This surely had to do with the accuracy of the experiment and the validity of the results.
Apart from weighing by difference, what gave us the exact amount of Na2CO3 needed, we rinsed all the equipment at the beginning of the experiment to avoid forgetting it afterwards. We also rinsed the equipment three times both at the beginning and during the experiment in order to avoid any contamination and any particles left that could have caused inaccuracies. This should have caused our results more valid given that fewer particles should have been left when transferring them into the beaker and conical flask.
When using a funnel, we tried to put it properly (without resting upon the edge), so we could have a clear view and also be aware of the amount being added.
Then we inverted the solution of Na2CO3 1cm below the graduation mark in order to ensure that the solution was mixed properly. Also, doing that, we ensured there were no bubbles inside, what could cause inaccuracies when reading the meniscus.
We also inverted the flask before using it each time in order to be sure that the solution is still well mixed and particles have not precipitated and remain in the bottom of the flask.
When reading the meniscus of volumetric flask, burette and pipette we tried to have it at eye level and ensure the bottom of meniscus reached the graduation mark.
Also, when doing the titration, we rinsed all the equipment three times after using it with the proper solution. This should give us more precise results when reaching the endpoint.
We also tried to fill the burette in a comfortable position with a clear view of the graduation mark to read properly the meniscus. This was a way of ensuring our results were actually concordant.
Whilst doing the titration, we ensured the flask was being swirled all the time, so we could be sure whether the endpoint was reached or not. Also, to ensure the endpoint was reached properly, we delivered 1 cm3 at a time because we still didn’t know when the endpoint was. Then, when we had an idea of the endpoint, we added the last centimetres dropwise always swirling the flask and having a hand on the stopcock to have a more reliable endpoint.
Then, when we had to record the results, we used a white paper behind the burette to read it properly. This made a clearer view of the meniscus and the graduation mark, what tell us that the results were well recorded and therefore, reliable.
Before all the titres, we filled the burette again up to 0cm3 to avoid any later mistake in calculating the difference between the two graduation marks and therefore, have to do fewer calculations that could cause more mistakes and unreliable results.
Also, we kept doing titres until we had 3 concordant ones. In my case, I had to do 4 titres to get the concordant ones to 0.1cm3. Having 3 concordant titres would give us very reliable results.
Then, to have concordant titres we kept the second flask with the endpoint reached and compared the colour with the third one. That gave us an idea of how close we thought we were from the endpoint, so we could have those concordant results.
Also, we added the same number of drops of indicator on each titre, so the results were more valid.
Obviously, we could have done more titres to have even more concordant answers. However, we thought that we did the titration as accurate as possible, so 3 concordant ones were enough to calculate the concentration of the final solution.
Looking at the precision errors (the errors inherent in the equipment) that could have
affected our results, we are going to calculate the percentage error of each instrument used, so we can have quantitative data to demonstrate how those errors could have affected our results.
Total percentage error: ±0.6762%
How can these errors have affected our results?
The actual concentration is 0.12 mol/dm3, and my result was 0.124 mol/dm3. Knowing the total % error we can calculate how that affected my result numerically:
0.124 x ±0.6762/100 = ±0.000838 mol/dm3
This shows that the precision errors could have affected my results by ±0.000838 mol/dm3.
As this value is very small, we can conclude that these precision errors are not very significant on the final concentration, and therefore may not have affected it in the way it was actually affected (by + 0.004). This means that the procedural errors are more important than the precision ones in terms of affecting our final concentration.
Although both procedural and precision errors cannot be completely avoided, their consequences could be minimised, specially the procedural ones.
So, we need to be aware of them in order to not make them and therefore reduce their significance on our final numerical answers. The most relevant and important procedural errors are both transferring the solid and judging the endpoint, what especially means turning the stopcock on time (taking into account the time of reaction from the moment we see the change until the moment we actually turn it) and interpreting the colour. These are the general errors that may have affected the most.
It seems more difficult to avoid and/or reduce the consequences of the precision errors taking into account that they do not depend on ourselves but the equipment.
However, these errors could be reduced by using other apparatus that have less percentage error.
This table compares the consequences of the significance between the procedure and the precision error:
Cf. Aim in Revised 2005 help sheet
Cf. “Solution” in http://en.wikipedia.org/wiki/Solution
Cf. “Titration” in http://members.aol.com/profchm/titrate.html
Cf. “Sulphuric (VI) acid in Hazcard 98A
Cf. “Methyl orange” in http://www.proscitech.com.au/catalogue/msds/c118.pdf and Hazcard 32
Cf. “Sodium carbonate” in : and Hazcard 95A
Cf. “Concentrations of solutions” in Daniels A., Johnston L. and Otter C. 2004. Revise As Chemistry. Oxford: Heinemann, page 40
Cf. “Using concentrations in calculation” in Chemical Ideas .Heinemann, page 13
Cf. “Weighing boat” in: http://www.chem.ubc.ca/courseware/154/tutorials/exp1A/weigh/
Cf. “Teflon” in http://www.wordreference.com/definition/teflon
Cf. “Beaker” in http://en.wikipedia.org/wiki/Beaker_(glassware)
Cf. “Burette” in http://en.wikipedia.org/wiki/Burette
Cf. “Filler pipette” in http://www.dynamicaqua.com/pipettes.html
Cf. “Conical flask” in http://en.wikipedia.org/wiki/Erlenmeyer_flask
Cf. “Indicador methyl orange” in http://209.85.165.104/search?q=cache:SKkYbrlmWCsJ:antoine.frostburg.edu/chem/senese/101/acidbase/faq/methyl-orange.shtml+methyl+orange+indicator&hl=en&ct=clnk&cd=4&gl=uk